
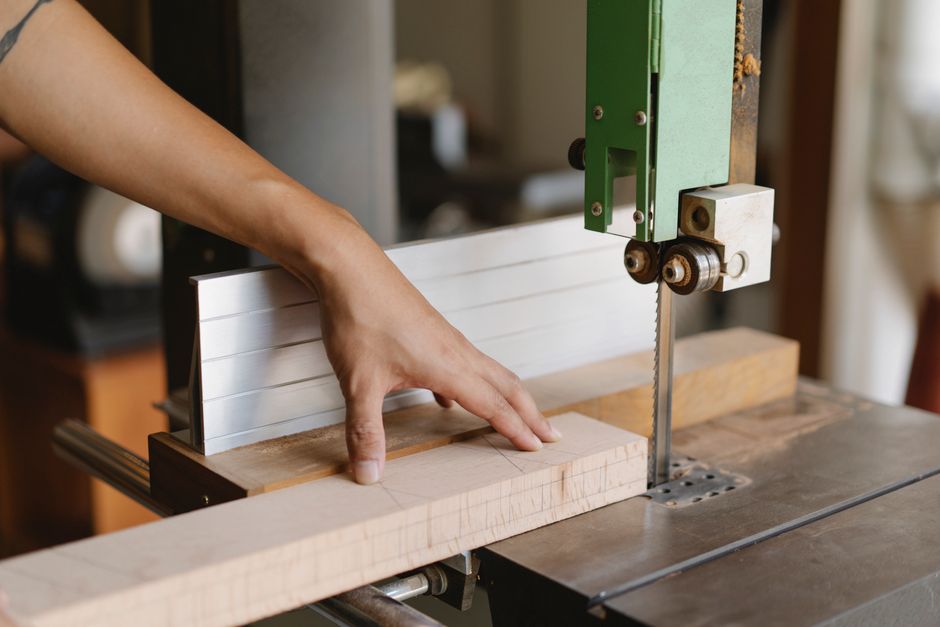
Using a bandsaw correctly comes down to three core skills: choosing the right blade for the cut, setting the correct tension and speed, and maintaining the blade so it stays sharp and true. A properly used bandsaw makes straight cuts, smooth curves, and clean resawing passes. A poorly maintained one produces burned edges, wandering cuts, and premature blade failure. This guide covers the essential facts about blade selection, cutting technique, and maintenance so you get consistent, safe results from your saw.
How Do You Choose the Right Bandsaw Blade for Your Cut?
Blade selection is the single most important factor in cut quality. The three main specifications are tooth per inch (TPI), blade width, and tooth style. Each one changes how the blade behaves in the cut.
TPI determines the finish and feed rate. Blades with fewer teeth per inch (2 to 4 TPI) cut fast and clear sawdust aggressively. They are best for resawing thick stock and cutting softwoods. Blades with more teeth per inch (10 to 14 TPI) produce a smoother finish but cut slower. They are better for thin materials, sheet goods, and metals. A general rule: you want at least three teeth in the material at all times. If the teeth are too coarse, they will grab and tear the workpiece.
Blade width controls your radius of cut. The width is measured from the back edge of the blade to the tip of the teeth. Wider blades (3/4 inch) are stable and track straight, making them ideal for resawing and straight cuts. Narrower blades (1/8 inch to 1/4 inch) flex easily and can turn tight radii. A 1/8-inch blade can cut a radius of about 3/16 inch, while a 3/4-inch blade needs a much larger radius of roughly 5 to 6 inches. Never force a wide blade through a tight curve.
Tooth style matters for specific jobs. Standard hook teeth have a deep gullet and a steep face, which clears material fast. Skip-tooth blades have widely spaced teeth that reduce clogging in softwoods and plastics. Variable-tooth blades break up vibration and reduce noise, making them a good general-purpose choice. For cutting metal, you need a blade with a finer TPI and often a different tooth geometry designed for that material.
How To Use A Bandsaw Blades Cuts Maintenance: Setting Up the Saw
Once the blade is installed, proper setup determines whether it cuts straight or wanders. The setup process takes a few minutes but saves you from ruined workpieces.
Set the correct tension. Too little tension causes the blade to drift and follow the path of least resistance. Too much tension strains the bearings and can break the blade. Most modern bandsaws have a tension indicator that guides you based on blade width. Some experienced users use a flutter test: with the saw off, pluck the blade sideways like a guitar string. A properly tensioned blade produces a clear musical note, not a dull thud. If your saw lacks a gauge, start with the manufacturer’s recommendation for your blade width and adjust from there.
Track the blade on the wheels. The blade should ride in the center of the upper and lower wheel tires. With the saw unplugged, rotate the upper wheel by hand and watch the blade position. Adjust the tracking knob until the blade sits centered on the crown of the tire. A blade that rides too far forward or backward can slip off the wheels entirely.
Set the blade guides. The guides support the blade near the cut and prevent it from twisting. The side bearings should sit just behind the tooth gullet and just off the blade body — about the thickness of a piece of paper. The rear bearing should barely touch the back edge of the blade only when the blade is under cutting pressure. Set the upper guide assembly so it sits about 1/4 inch above the workpiece. This minimizes blade deflection while keeping the guide clear of the material.
What Is the Correct Cutting Technique?
Good technique starts before you turn on the saw. Mark your cut line clearly. Check that the blade is sharp. Make sure the workpiece is flat against the table.
Feed rate matters more than speed. Push the material steadily but not forcefully. The blade should do the cutting, not the operator. If you have to push hard, something is wrong — the blade is dull, the tension is low, or the TPI is wrong for the material. A good feed rate produces continuous, even sawdust. If you see fine dust, you are feeding too slowly and the blade is rubbing rather than cutting. If you see large chunks or the saw bogs down, you are feeding too fast.
Let the saw reach full speed before cutting. A bandsaw blade that starts cutting before reaching full RPM will stall or deflect. Wait a few seconds after switching on.
For straight cuts, use a fence. A fence keeps the cut parallel to the blade and prevents drift. For freehand cuts, keep your hands on either side of the blade, never directly in line with it. Use push sticks for narrow pieces and keep your fingers at least a few inches from the blade at all times.
Cutting curves requires relief cuts. When turning a tight radius, the back edge of the blade can bind in the kerf. Make several straight relief cuts from the edge of the waste area up to the cut line before following the curve. This removes material and gives the blade room to turn.
Resawing demands patience. Resawing means cutting a thick board into thinner pieces along its length. Use the widest blade your saw accepts, typically 1/2 inch to 3/4 inch. Set the fence to the desired thickness and feed the board slowly and steadily. If the cut wanders, check the blade tension and guide settings. A dull blade will follow the grain and produce a wavy cut.





How Do You Prevent Bandsaw Blade Drift?
Drift is the tendency of a blade to cut at an angle rather than parallel to the fence. It is one of the most common frustrations for bandsaw users. Drift happens because the blade is not perfectly uniform, the teeth are not all set identically, or the tension is uneven.
The most reliable fix is to adjust your technique rather than fight the blade. Some woodworkers mark a line on the table parallel to the blade’s natural cutting path and use that as their reference. Others adjust the fence to match the drift angle. Before making critical cuts, always test on scrap wood. Make a straight cut and measure how much the blade wanders over the length of the cut. This tells you the drift angle and lets you compensate.
If drift is severe, check the basics first. Confirm the blade is tracking correctly. Verify the tension is adequate. Inspect the blade for a dull side or damaged teeth. A blade that has been used heavily on one side can develop uneven wear that causes consistent drift. Replacing the blade is sometimes the only reliable solution.
Routine Bandsaw Blade Maintenance
Regular maintenance extends blade life and keeps cuts clean. Most maintenance takes less than five minutes and should become part of your routine.
Clean the blade after use. Pitch and resin build up on the blade body and in the gullets as you cut wood. This buildup increases friction, generates heat, and dulls the cutting edge faster. Wipe the blade down with a solvent or a commercial blade cleaner after heavy use. Some users keep a stiff brush near the saw to clear sawdust from the blade and wheels during operation.
Check for cracks and damage. Bandsaw blades flex around the wheels thousands of times per minute. This flexing can cause fatigue cracks, especially at the base of the teeth or near the weld. Inspect the blade visually each time you change it. Run your fingers gently along the back edge to feel for cracks — but never do this while the saw is running. A cracked blade can snap suddenly and cause serious injury.
Store blades properly. A coiled blade takes up little space but can be dangerous if it springs open. Secure the coil with tape or a wire tie before storage. Keep blades dry to prevent rust. A light coat of oil on the blade body protects against corrosion, but wipe off any excess before use so it does not contaminate your workpiece.
Replace blades when they dull. A dull blade is not just inefficient — it is dangerous. It requires more feed pressure, which increases the risk of the workpiece slipping or the blade breaking. Signs of dullness include burning marks on the wood, a rough cut finish, increased noise, and the need for excessive pressure. Sharper blades also produce a better surface finish, so replacing a dull blade often improves cut quality dramatically.
Common Bandsaw Problems and Their Causes
Many bandsaw issues trace back to a small set of root causes. Understanding these helps you diagnose problems quickly.
- Blade keeps breaking: Usually caused by excessive tension, a cracked blade, or a blade that is too small for the wheel diameter. Check the manufacturer’s minimum blade length and width specifications.
- Blade wanders or drifts: Caused by dull teeth, improper tension, incorrect guide settings, or a blade that is too narrow for the cut.
- Burned edges on the workpiece: Caused by a dull blade, feeding too slowly, or too much tension creating friction. The blade rubs instead of cutting.
- Blade slips off the wheels: Caused by improper tracking, incorrect tension, or a damaged tire on the wheel.
- Noisy operation: Often caused by loose guides, worn bearings, or a blade that is too tight. Check all adjustable components.
- Rough cuts: Caused by a dull blade, the wrong TPI for the material, or excessive feed pressure.
When any of these problems appear, stop and diagnose before continuing. Continuing to cut with a misaligned or dull blade only makes the problem worse and increases the risk of injury.
Safety Practices for Bandsaw Operation
Bandsaws are among the safer woodworking tools, but they still demand respect. The blade moves at high speed and can cause severe lacerations or amputations. Following basic safety rules prevents almost all accidents.
Always keep the blade guard in place. The upper guard should be adjusted to sit just above the workpiece. This minimizes exposed blade while still allowing the cut to proceed. Never remove the guard for convenience.
Use push sticks for small pieces. When cutting narrow stock, your hands naturally get close to the blade. A push stick keeps your fingers away from the cutting area. For very small pieces, consider using a different tool altogether — a handsaw or scroll saw may be safer.
Wait for the blade to stop before reaching in. After switching off the saw, the blade continues to spin for several seconds. Do not reach toward the blade or attempt to remove scraps until it has completely stopped. Many injuries happen during cleanup, not during cutting.
Unplug the saw when changing blades. This is non-negotiable. Blade changes require reaching into the blade area, and an accidental start can cause a serious injury. Unplug the saw before any maintenance or adjustment that involves touching the blade.
Wear appropriate safety gear. Safety glasses protect your eyes from sawdust and debris. Hearing protection is advisable for extended use. Avoid loose clothing, gloves, and jewelry that could get caught in the moving blade.
Frequently Asked Questions
How often should I replace my bandsaw blade?
Replace the blade when it shows signs of dullness, such as burning the wood, requiring excessive feed pressure, or producing rough cuts. For frequent use, this may mean every few weeks; for occasional use, blades can last months.
Why does my bandsaw blade keep drifting off the cut line?
Drift is usually caused by incorrect tension, dull teeth, or a blade that is too narrow for the cut. Check your tension and guide settings first, and test the blade on scrap wood before making critical cuts.
Can I use the same blade for wood and metal?
No. Wood blades have coarser teeth and higher speeds, while metal-cutting requires finer teeth and slower speeds. Using a wood blade on metal will dull it quickly, and using a metal blade on wood will clog and overheat.
What is the safest way to change a bandsaw blade?
Unplug the saw completely before opening the wheel covers. Release the tension, remove the old blade, and install the new one with the teeth pointing downward toward the table. Re-tension and track the blade before closing the covers and plugging the saw back in.
