
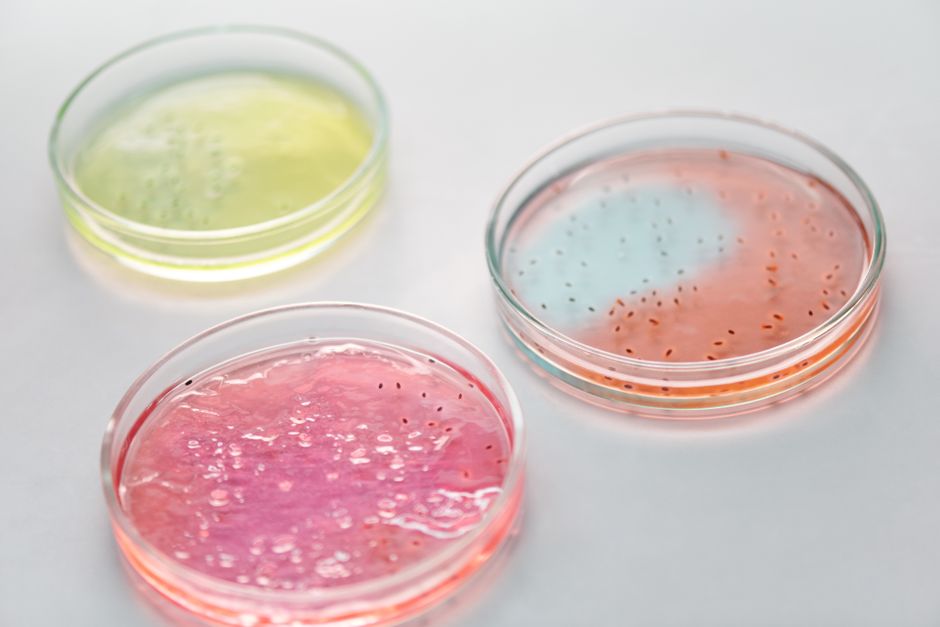
Making an agar plate for bacteria means preparing a nutrient gel in a shallow dish where microbes can grow. You dissolve agar powder and nutrients in water, sterilize the mixture, pour it into sterile petri dishes, and let it set. Once the gel is firm, bacteria can be streaked onto the surface and incubated.
This guide covers the whole process: what agar is, what equipment you need, how to prepare and sterilize it, how to pour plates without contamination, and how to store them. It also explains where home setups and professional labs differ, and what safety limits apply.
What Is Agar and Why Is It Used to Grow Bacteria?
Agar is a gel-like substance extracted from red algae. It is made mostly of a carbohydrate called agarose plus a mix of smaller sugars. When you boil it in water and then cool it, it sets into a firm gel that bacteria cannot digest.
That last point matters. A gelatin-based gel would melt at room temperature and many bacteria would break it down for food. Agar holds its shape and stays solid across the temperature range most labs use. It also stays firm enough for bacteria to grow on the surface rather than sinking in.
Agar on its own has almost no nutritional value for most microbes. That is why you add nutrients. A basic recipe uses a nutrient broth or a mixture of peptones, yeast extract, and salts. The nutrients feed the bacteria. The agar just provides the physical surface.
Different bacteria need different food. That is why labs use many types of media. Nutrient agar grows a broad range of non-fastidious organisms. Blood agar shows whether bacteria can break down red blood cells. MacConkey agar contains bile salts and dyes that inhibit many Gram-positive organisms and reveal whether Gram-negative ones ferment lactose. Selective media include compounds that suppress some microbes so others can grow. Differential media include indicators that make different species look different.
For a general home or classroom plate, nutrient agar is the usual choice. It grows enough to make the process visible without requiring special additives.
What Equipment and Ingredients Do You Need?
You need four groups of things: the agar medium, something to dissolve and heat it in, something to sterilize it, and sterile dishes to pour it into.
- Agar powder
- A nutrient source, such as nutrient broth powder, or a simple mix of peptone and yeast extract
- Distilled or deionized water
- A heatproof container, ideally a borosilicate flask or a heat-safe glass bottle
- A heat source, such as a hot plate or microwave
- A pressure cooker or autoclave for sterilization
- Sterile petri dishes, either pre-sterilized disposable plastic or glass dishes you sterilize yourself
- A thermometer that reads up to 121°C if you are monitoring sterilization
- Optional: a laminar flow hood or a still-air box to reduce contamination
Pre-sterilized disposable petri dishes are the easiest option. They come sealed and ready to pour. Glass dishes work too but must be sterilized before use, usually by autoclaving.
If you do not have a pressure cooker or autoclave, you cannot reliably sterilize agar at home. Boiling kills many organisms but not all bacterial spores. This is a real limitation, not a minor detail. Plates made without proper sterilization will often grow contaminants that make results hard to interpret.
How Do You Prepare and Sterilize the Agar Mixture?
Start by mixing your agar and nutrients with water according to the recipe on the product label. Most nutrient agar powders call for a specific weight per liter of water. Follow that ratio rather than guessing.
Stir the powder into cold water first. This prevents clumping. Then heat the mixture while stirring until it boils and the agar fully dissolves. The liquid should look clear, not grainy. If you see undissolved particles, keep heating gently.
Once dissolved, pour the hot mixture into your flask or bottle. Do not fill more than about two-thirds full. The liquid expands during sterilization and can boil over.
Loosen the cap or cover the flask with foil. Then sterilize. The standard method is autoclaving at 121°C for 15 to 20 minutes at 15 psi. That is the established laboratory standard and it kills bacterial spores as well as vegetative cells.
A home pressure cooker can reach similar conditions if it is a true pressure cooker, not a regular pot with a lid. If you are using one, follow its manufacturer instructions for reaching and holding pressure. Do not open it early.
After sterilization, let the agar cool. You want it to reach roughly 45 to 50°C before pouring. At that temperature it is still liquid but not hot enough to damage your hands or melt thin plastic dishes. If you let it cool too far it will start to set in the flask.



How To Make An Agar Plate For Bacteria: Pouring and Setting the Plates
Pouring is where contamination most often happens. Work quickly, keep the dish covered as much as possible, and minimize the time the agar surface is exposed to open air.
Hold the lid slightly open and pour enough agar to cover the bottom of the dish to a depth of about 3 to 4 millimeters. That is roughly 15 to 20 milliliters for a standard 90-millimeter dish. A thin layer dries out too fast. A thick layer wastes medium and can make it harder to see colony details.
As you pour, lift the lid just enough to let the agar in, then close it. Swirl the dish gently in a small circle to spread the agar evenly. Do not lift the lid to swirl. A gentle circular motion with the lid on works fine.
Let the plates sit undisturbed until the agar sets. This usually takes about 10 to 20 minutes at room temperature. You will see the gel turn from glossy liquid to a firm, slightly matte surface.
If condensation forms on the lid, you can leave the plates to sit a bit longer, or place them lid-side up briefly so the water does not drip onto the surface. Some labs pour plates and then let them dry slightly before use, especially if the surface is wet, because excess moisture can make bacterial growth spread into a smear instead of distinct colonies.
Once set, the plates are ready to use or store. If you are not using them right away, keep them covered and cool.
How Do You Avoid Contamination?
Contamination comes from three main places: the air, your hands and tools, and the dishes themselves. Reducing all three is the goal.
Work in the cleanest space you have. A laminar flow hood directs sterile filtered air across the work area and is the standard tool in labs. A still-air box, which is a simple enclosed box with a clear front, is a common lower-cost alternative. It does not filter air, but it reduces drafts and airborne particles settling onto open plates.
Keep the agar covered whenever you are not actively pouring or streaking. Open plates catch dust and airborne microbes fast.
Do not touch the inside of the dish or the agar surface with your fingers. If you use a tool like an inoculation loop, sterilize it first, usually by flaming it until it glows red and then letting it cool before touching the agar.
Work with clean hands and consider gloves. Avoid talking, coughing, or breathing directly over open plates.
Even with good technique, some contamination happens. That is normal. A plate with a few odd colonies in one corner is different from a plate covered in fuzzy growth, which usually means the plate was contaminated before you even added your sample.
How Should You Store Agar Plates?
Store set plates upside down, with the agar on top and the lid on the bottom. This keeps condensation from dripping onto the agar surface and spreading any growth across the plate.
Keep them cold. Most labs store plates at refrigerator temperature, around 2 to 8°C. That slows microbial growth and keeps the agar from drying out. Plates stored this way are typically used within a few weeks, though exact shelf life depends on the medium and how well it is sealed.
Wrap plates in a sealed bag or sleeve if you are storing them for more than a day or two. This limits moisture loss and reduces the chance of airborne contamination.
Let cold plates come to room temperature before streaking. Cold agar can slow the initial growth of your sample and can also hold extra condensation.
Never store plates somewhere warm. Warmth plus nutrients is exactly what bacteria need to grow, and an unused plate left out will not stay unused for long.
Home Setup vs. Professional Lab: What Actually Differs
The basic process is the same. The difference is control. A professional lab has an autoclave that reliably reaches and holds sterilization conditions, a laminar flow hood, calibrated equipment, and quality-controlled media. A home setup usually has none of those.
That gap matters most for sterilization. Boiling agar in a pot kills many organisms but does not reliably kill bacterial spores. A pressure cooker that reaches 121°C at 15 psi can, but only if it is used correctly and actually reaches those conditions. A regular pot with a lid does not.
Another difference is what you grow. Labs work with known organisms under containment. A home or classroom plate grows whatever lands on it, and that can include organisms you did not intend to culture. This is why plates should be kept covered, stored cold, and disposed of properly rather than left open.
For learning the technique, a home setup is fine. For anything where identification or safety matters, it is not a substitute for a proper lab.
Frequently Asked Questions
Can you make agar plates without a pressure cooker?
You can prepare the mixture, but you cannot reliably sterilize it without a pressure cooker or autoclave. Boiling kills many organisms but not bacterial spores, so plates made this way often grow contaminants.
How long do agar plates last in the fridge?
Most plates stored sealed at 2 to 8°C are used within a few weeks. Exact shelf life depends on the medium and how well the plates are wrapped, since agar slowly dries out.
Why do you pour agar plates upside down?
Storing plates upside down keeps condensation on the lid from dripping onto the agar surface. That prevents water from spreading bacterial growth across the plate and making colonies hard to read.
What temperature should agar be when you pour it?
Pour the agar once it has cooled to roughly 45 to 50°C. At that point it is still liquid but cool enough not to damage your hands or melt thin plastic dishes.
