
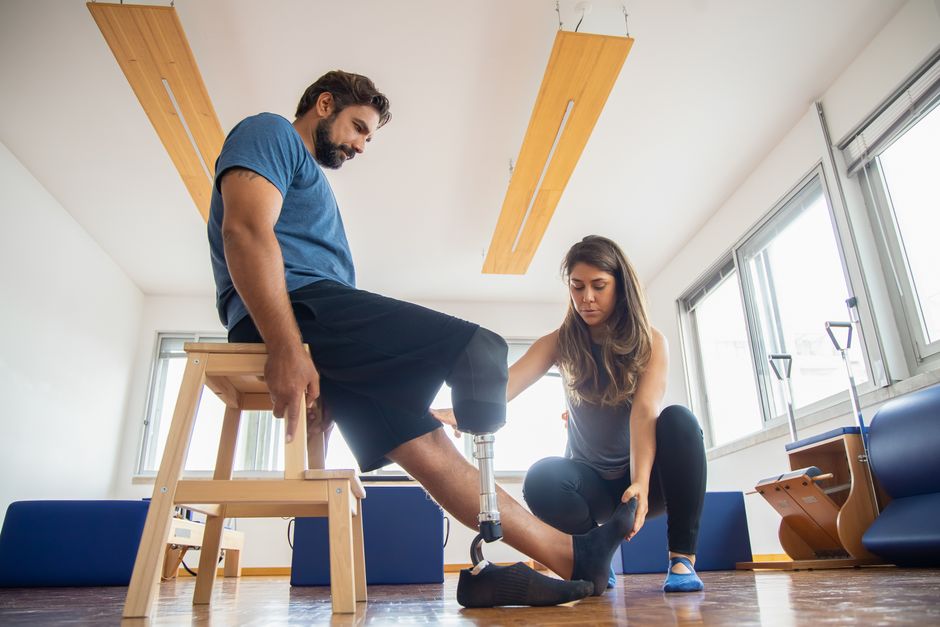
Making a prosthetic leg is a precise process that turns a plaster mold of your residual limb into a functional, comfortable artificial leg. The journey starts with a prosthetist taking a cast and ends with a finished device that is aligned, fitted, and ready for walking. This guide walks through each stage from the initial cast to the final fit, so you know exactly what happens and what to expect.
What Happens During the Initial Casting Appointment?
The process begins with measuring and shaping your residual limb. Your prosthetist wraps the limb in a special sock, then applies wet plaster bandages to create a negative mold. This mold captures the exact shape, including weight-bearing areas and sensitive spots.
Before casting, the prosthetist checks your skin for pressure sores, swelling, or irritation. The limb must be at a stable size. If you still have significant swelling, casting may be delayed until the volume is consistent. This step matters because a cast taken too early can lead to a socket that fits poorly later.
Once the plaster hardens — usually within a few minutes — it is carefully removed. This negative mold becomes the foundation for everything else. The prosthetist also takes measurements of your other leg, your pelvis, and your walking pattern to ensure the new leg matches your natural movement.
How Is the Positive Model Created and Modified?
The negative plaster mold is filled with liquid plaster to create a positive model — an exact replica of your residual limb. This solid model is the working surface for building the socket. The prosthetist then modifies this model by adding or removing plaster in specific areas.
This step requires skill and experience. Plaster is added to relieve pressure on sensitive areas like bony prominences. Plaster is removed in areas that can tolerate more load, such as muscle bellies. This creates a socket that distributes weight evenly and keeps the limb comfortable during standing and walking.
The modified positive model is allowed to dry completely. A poorly dried model can warp, which would ruin the fit of the final socket. Once dry, it is ready for the next stage: creating the test socket.
What Is a Test Socket and Why Is It Necessary?
A test socket is a temporary clear plastic version of the final socket. It is made by vacuum-forming a sheet of clear plastic over the modified positive model. This clear socket lets the prosthetist see your limb inside and check for pressure points while you wear it.
During this fitting, you stand and walk while the prosthetist watches your skin through the plastic. Red areas show where pressure is too high. White areas show where the socket is too loose. These visual cues guide further adjustments to the model.
This step is not optional. Every prosthetic leg goes through a test socket phase. It is far easier and cheaper to adjust a plastic test socket than to remake a final socket. Most patients have two to four test socket fittings before the final version is made.





How Is the Final Socket Fabricated?
Once the test socket fits well, the prosthetist uses the same modified model to create the final socket. The material depends on your activity level, weight, and lifestyle. Common options include laminated acrylic resin, thermoset carbon fiber, and thermoplastic materials.
Carbon fiber is strong and lightweight but more expensive. Thermoplastic sockets are easier to adjust later. Laminated sockets offer a good balance of durability and weight. Your prosthetist will recommend a material based on your needs, not just on cost.
The final socket is fabricated over the positive model using the chosen material. It is then trimmed, smoothed, and finished. The socket must be thin enough to fit inside your clothing but thick enough to handle your body weight during walking, running, or other activities.
How Are the Prosthetic Components Assembled?
The socket alone cannot support walking. It must be attached to a pylon, a knee unit if needed, and a foot. These components are selected based on your activity level and the height of your amputation.
For a below-knee prosthesis, the socket connects directly to a pylon and then to a prosthetic foot. For an above-knee prosthesis, a mechanical or computerized knee joint sits between the socket and the pylon. The knee choice significantly affects your walking pattern and energy use.
Prosthetic feet range from basic solid ankles to advanced energy-storing models that return energy during push-off. More advanced feet cost more but can reduce fatigue during walking. Your prosthetist will help match the foot to your typical daily activity.
The components are connected with alignment adapters. These allow the prosthetist to adjust the position of the foot relative to the socket. This alignment adjustment is a critical step that affects your balance, stride, and comfort.
What Does the Dynamic Alignment Process Involve?
Dynamic alignment is the process of fine-tuning the prosthesis while you walk on it. The prosthetist watches your gait from the front, side, and back. Small adjustments to the foot angle, pylon height, and socket position can change how the leg feels and how you walk.
You will walk in parallel bars first, then on flat ground. The prosthetist may ask you to walk faster or slower, turn, and climb stairs. Each activity reveals different alignment issues. Common adjustments include shifting the foot forward or backward, tilting the socket, or changing the height of the pylon.
This phase can take several sessions. It is normal to feel some discomfort during alignment as your body adapts to the new leg. Report any pain, pressure, or instability to your prosthetist immediately. Small tweaks during this phase prevent bigger problems later.
How Is the Final Fit Confirmed?
The final fit is confirmed when you can walk comfortably without pain, skin damage, or excessive energy use. The socket should feel snug but not tight. You should be able to stand for several minutes without discomfort and walk at a normal pace without swaying.
Your prosthetist will check your skin after removing the prosthesis. Redness that fades within a few minutes is normal. Redness that stays or turns into a blister means the socket needs adjustment. Never ignore persistent redness — it is the first sign of a pressure sore.
You will also receive instructions on how to put on and remove your prosthesis, how to care for your skin, and how to clean the socket. These daily habits are as important as the fit itself. A well-fitted prosthesis fails if the user does not maintain proper hygiene.
How Long Does the Whole Process Take?
The timeline varies by person and clinic. From the initial cast to the final fit, most patients wait three to six weeks. This includes time for the plaster to dry, the test socket fitting, and the final fabrication. Complex cases with multiple adjustments can take longer.
After you receive the finished leg, you will have follow-up appointments. Your limb volume changes over time, especially in the first year after amputation. The socket may need adjustments or a complete replacement as your limb shrinks or changes shape.
Most new prosthetic users need several weeks of physical therapy to learn how to walk with their new leg. The prosthesis is a tool — the skill comes from practice and training. Do not expect a perfect walk on day one.
What Can Go Wrong During the Fitting Process?
Several issues can arise during the fitting process. The most common is poor socket fit due to limb volume changes. Swelling can make the socket too tight, while weight loss can make it too loose. Both require adjustment.
Skin irritation is another common issue. Friction, pressure, or moisture inside the socket can cause blisters, rashes, or sores. These are serious because they can lead to infection and prevent you from wearing your prosthesis. Report any skin problem to your prosthetist right away.
Alignment problems can cause back pain, hip pain, or an uneven gait. These issues are correctable but require honest feedback from you during the alignment sessions. Do not tolerate pain to avoid inconveniencing your prosthetist.
Some patients experience phantom limb pain — pain felt in the missing limb. This is a real neurological condition, not a psychological one. It can interfere with prosthetic use. Discuss any phantom pain with your prosthetist and your doctor.
Frequently Asked Questions
Frequently Asked Questions
Can you walk immediately after getting a prosthetic leg?
No, walking takes time and practice. Most people need several weeks of physical therapy to walk safely with a new prosthetic leg.
How long does a prosthetic leg last?
A prosthetic leg typically lasts three to five years, but the socket may need replacement sooner if your limb shape changes. The foot and knee components wear out at different rates based on your activity level.
Is getting a prosthetic leg painful?
Some discomfort is normal during the fitting process, but sharp or persistent pain is not. The socket should feel snug, not painful, and any pressure points should be adjusted.
How much does a prosthetic leg cost?
Costs vary widely, from a few thousand dollars for a basic below-knee leg to tens of thousands for advanced computerized knees. Most private insurance and Medicare cover a portion of prosthetic costs.
