

Boiling a pot of water and dropping in shucked corn is the classic method, but it is not the only way to get a great ear. The best method depends on your time, your equipment, and whether you want a soft kernel or a charred, smoky bite. You can cook raw corn on the cob by boiling, grilling, roasting, microwaving, or even air-frying it, with each method taking between 4 and 20 minutes.
How To Cook Raw Corn On Cob: The Quickest Methods
If you want dinner on the table fast, the microwave is the speed champion. Do not shuck the corn. Place the whole ear, husk and silk intact, directly on the microwave turntable. Cook on high for 3 to 4 minutes per ear. A single ear usually takes about 3 minutes, and two ears take about 5 to 6 minutes.
Let the corn rest for 2 minutes after cooking. The steam inside the husk continues cooking the kernels and makes the silk easy to remove. Cut off the stem end, squeeze the ear from the top, and the husk slides right off with the silk attached. This is the cleanest method for removing silk you will ever use.
Boiling is only slightly slower and gives you the classic soft, tender kernel. Bring a large pot of salted water to a rolling boil. Add the shucked corn and cook for 4 to 5 minutes. Do not boil longer. Overcooked corn turns mushy and loses its natural sugar and crunch.
How To Grill Corn On The Cob
Grilling adds a smoky flavor that boiling cannot match. You have two choices: grill in the husk or grill shucked.
For husk-on grilling, pull the husks back without removing them. Remove the silk, then pull the husks back up over the ear. Soak the corn in cold water for 15 minutes to prevent the husks from burning. Place it on a medium-hot grill and turn it every 3 to 4 minutes. Total time is 15 to 20 minutes. The husk steams the kernels while the outer leaves char slightly.
For shucked grilling, brush the corn lightly with oil or melted butter. Place it directly over medium-high heat. Turn every 2 to 3 minutes until the kernels are tender and charred in spots. This takes 8 to 12 minutes. The high heat caramelizes the natural sugars in the corn, creating a sweeter, more complex flavor.
Grilled corn develops a firmer texture than boiled corn. The kernels stay slightly crunchy with a smoky exterior. If you want grill flavor but softer kernels, grill in the husk instead.
How To Roast Corn In The Oven
Oven roasting is the best hands-off method when you are cooking for a crowd. Preheat the oven to 400°F. You can roast corn with the husk on or off.
With the husk on, place the ears directly on the oven rack. Roast for 30 minutes, turning once halfway through. The corn steams inside the husk and comes out tender and moist. Let it rest for 5 minutes before shucking.
With the husk off, place the shucked ears on a baking sheet. Brush with oil or butter and season with salt and pepper. Roast for 20 to 25 minutes, turning once. The exterior kernels will brown slightly and develop a nutty flavor. The texture is firmer than boiled corn but softer than grilled.
Oven roasting works well for meal prep. You can roast several ears at once and keep them warm in a covered dish for up to 30 minutes before serving.


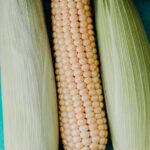


How To Cook Corn In An Air Fryer
The air fryer has become a popular option for corn on the cob because it combines speed with browning. Preheat the air fryer to 380°F. Place shucked corn in the basket in a single layer. Do not overlap the ears. Cook for 10 to 12 minutes, turning halfway through.
Brush the corn with butter or oil before cooking for better browning and flavor. The air fryer produces a texture similar to grilled corn — slightly charred on the outside, tender on the inside — but without firing up the grill. This method works best for one or two ears at a time because the basket has limited space.
How To Pick The Best Corn At The Store
No cooking method can fix an old, starchy ear of corn. Freshness matters more than technique. The sugars in corn begin converting to starch the moment the ear is picked. That is why corn from a local farm tastes sweeter than corn that traveled across the country.
Look for husks that are bright green and tightly wrapped. The silk at the top should be golden brown and slightly sticky, not dry and brittle. Gently squeeze the ear through the husk. It should feel plump and firm from top to bottom. Avoid ears with soft spots or gaps where kernels are missing.
Peel back a small section of the husk to check the kernels. They should be plump, tightly packed, and milky when you press a kernel with your fingernail. If the kernels look shriveled or the juice is watery, the corn is past its prime.
Buy corn the same day you plan to cook it. If you must store it, keep it in the refrigerator with the husk on. Do not shuck it ahead of time. The husk helps retain moisture.
Should You Add Salt To The Water?
Salt in the boiling water adds flavor to the outer layers of the kernels. Use about 1 tablespoon of salt per quart of water. Do not worry about the salt toughening the corn. That concern comes from old cooking lore and is not supported by how the cooking process actually works.
Sugar in the water is a different story. Adding sugar to the cooking water can make corn taste sweeter, but it is a sign the corn is not fresh. Fresh corn does not need added sugar. If you have older corn, a teaspoon of sugar in the water can help mask some of the starchiness. Skip this step with fresh corn.
How To Season And Serve Cooked Corn
Butter and salt are the classic toppings for a reason. The fat carries the flavor and the salt enhances the corn’s natural sweetness. Melted butter brushed over hot corn coats the kernels better than a cold pat that slides off.
Beyond the basics, try one of these combinations:
- Lime juice, chili powder, and crumbled cotija cheese for a Mexican-style elote
- Garlic powder and fresh chopped parsley
- Smoked paprika and a squeeze of lemon
- Parmesan cheese and cracked black pepper
- Fresh herbs like thyme or chives mixed into softened butter
Season corn while it is still hot. Warm kernels absorb flavors better than cold ones. If you seasoned the corn before cooking, go light on the additional salt at the table.
How To Store And Reheat Leftover Corn
Cooked corn on the cob keeps in the refrigerator for 3 to 5 days. Store it in an airtight container or wrap it tightly in foil. Do not leave cooked corn at room temperature for more than 2 hours. Bacteria grow quickly in that danger zone.
To reheat, wrap each ear in a damp paper towel and microwave for 1 to 2 minutes. This adds moisture back into the kernels. You can also reheat corn in a covered skillet with a splash of water over medium heat for 3 to 4 minutes.
Leftover kernels can be cut off the cob and used in salads, soups, salsas, or grain bowls. Cut the kernels off by standing the ear upright on a cutting board and slicing downward with a sharp knife.
Frequently Asked Questions
How long should I boil corn on the cob?
Boil shucked corn for 4 to 5 minutes in salted water. Longer cooking makes the kernels mushy and reduces their natural sweetness.
Do I need to soak corn before grilling?
Only soak corn that will be grilled in the husk. Soaking for 15 minutes prevents the husks from burning and adds moisture for steaming. Shucked corn does not need soaking.
Can I cook corn on the cob in the microwave without shucking it?
Yes, microwave the corn with the husk on for 3 to 4 minutes per ear. The trapped steam cooks the kernels and makes the silk easy to remove.
How can I tell if corn on the cob is fresh?
Look for bright green, tight husks and golden, slightly sticky silk. The kernels should be plump and release milky juice when pressed with a fingernail.
