
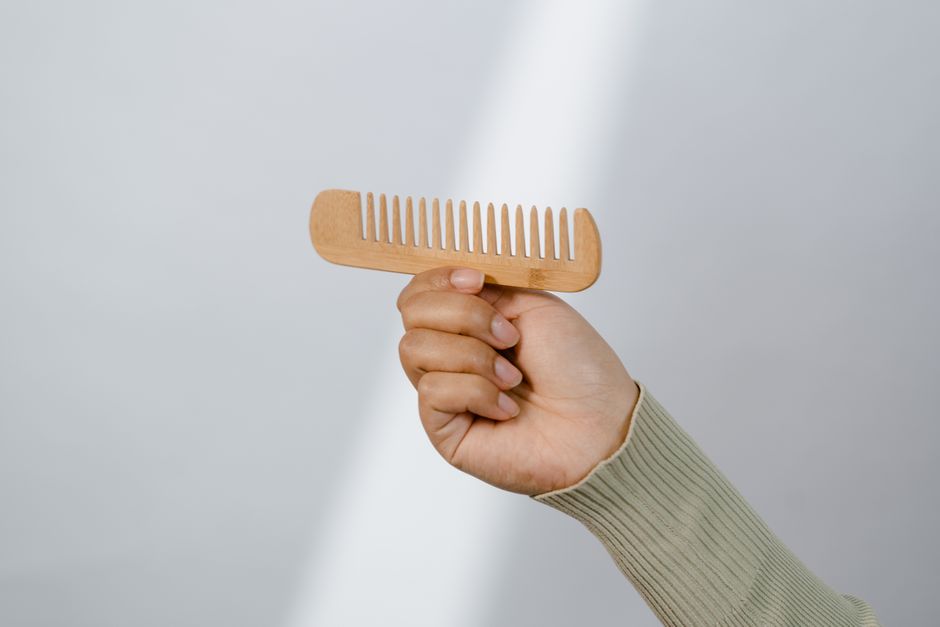
Cleaning a comb is simple but most people do it wrong. You need to remove hair, soak the comb in warm water with a few drops of shampoo or dish soap, scrub it with an old toothbrush, rinse thoroughly, and let it dry completely before using it again. That is the basic process. The details matter more than you think because a dirty comb puts old oil, dead skin cells, and bacteria back into your hair every time you use it.
How Often Should You Clean Your Comb?
The American Academy of Dermatology recommends cleaning your hairbrush and comb every one to two weeks. That might sound like a lot, but think about what your comb touches. It picks up natural oils from your scalp, leftover hair products, dust from the air, and dead skin cells. All of that builds up fast.
If you use heavy products like gels, pomades, or dry shampoo, you should clean your comb once a week. The same goes if you have a flaky scalp or dandruff. A dirty comb can spread those flakes to clean hair. If you have short hair and use minimal products, every two weeks is probably fine.
One easy way to know it is time: run your comb under warm water. If you see a cloudy film or bits of debris floating off, it needs cleaning. Do not wait until you can see visible gunk with your eyes. That means it has been too long.
What You Need to Clean a Comb Properly
You do not need special products. Most homes already have everything. Gather these items before you start:
- A small bowl or cup big enough to submerge the comb
- Warm water, not hot — hot water can warp plastic combs
- A few drops of gentle shampoo or dish soap
- An old toothbrush or a small scrub brush
- A clean towel or paper towels for drying
- A wide-tooth comb or your fingers for removing hair first
Avoid using harsh chemicals like bleach or rubbing alcohol on plastic combs. They can damage the surface or make it brittle over time. For wooden combs, you will need a different approach, which is covered in a later section.
Step by Step: How To Clean A Comb the Right Way
Start by removing all the hair wrapped around the teeth. Use a wide-tooth comb or your fingers to pull it out. For stubborn hair wrapped tightly near the base, use the tip of a toothpick or a bobby pin to gently lift it free. Do not yank — you can bend or break the teeth.
Fill your bowl with warm water and add a few drops of shampoo or dish soap. Swish it around to create suds. Place the comb in the water and let it soak for five to ten minutes. This loosens the oils, product residue, and dirt stuck between the teeth.
After soaking, scrub the comb with your old toothbrush. Focus on the area between each tooth and the base where the teeth meet the spine of the comb. That base area collects the most buildup. Scrub both sides. Pay extra attention if you use hairspray or gel — those products harden and stick more stubbornly.
Rinse the comb under running warm water. Make sure no soap remains. Leftover soap will transfer to your hair and can cause buildup or irritation. Shake off excess water and pat the comb dry with a clean towel. Let it air dry completely on the towel before using it again. Putting a wet comb into a drawer or case can lead to mold growth.
| Step | Action | Time Needed |
|---|---|---|
| 1 | Remove all hair from teeth | 1-2 minutes |
| 2 | Soak in warm soapy water | 5-10 minutes |
| 3 | Scrub with old toothbrush | 2-3 minutes |
| 4 | Rinse thoroughly | 30 seconds |
| 5 | Dry with towel and air dry | Several hours |


How To Clean Wooden Combs Without Damaging Them
Wooden combs need a different method. Soaking them in water causes the wood to swell and crack. The finish can peel off. The grain can split. You will ruin a good comb fast if you treat it like plastic.
For wooden combs, start by removing all hair the same way. Then dip a toothbrush into a mixture of warm water and a tiny drop of soap. Do not submerge the comb. Scrub the teeth and base with the damp brush, working quickly. Wipe the comb dry immediately with a cloth. Do not let water sit on the surface.
Some people report good results using a few drops of tea tree oil on the toothbrush for its antibacterial properties. That is a personal choice. Strong evidence that it makes a meaningful difference is limited, but it will not hurt the wood if you dry it properly afterward. What matters most is keeping the wood dry after cleaning.
For deeply set buildup on a wooden comb, use a toothpick to scrape between the teeth gently. Then follow with the damp brush method. Never use oil-based conditioners or wood polishes on a comb — those will transfer to your hair and make it look greasy.
Common Mistakes People Make When Cleaning Combs
The biggest mistake is not cleaning often enough. Many people wait months or even years. A study published in the Journal of Clinical and Aesthetic Dermatology noted that hair tools can harbor bacteria and fungi. While the study focused on brushes used in salons, the same principle applies to personal combs. You are rubbing a dirty object through clean hair.
Another common mistake is using hot water on plastic combs. Hot water can warp the teeth, making the comb uneven. That can cause snagging and hair breakage. Always use warm or cool water for plastic.
Some people skip the scrubbing step entirely. Soaking alone does not remove all the buildup. You need physical scrubbing to dislodge oil and product residue. A toothbrush is cheap and effective. Do not skip it.
Drying is another area where people rush. Putting a damp comb back into a bathroom drawer or a travel case creates a humid environment where mold can grow. Let it air dry fully. If you need it quickly, dry it with a towel and then use a hair dryer on a cool setting for a minute or two.
One more mistake: using vinegar or baking soda as a cleaning hack. While these are popular online, there is no clinical evidence that they clean combs better than simple soap and water. Vinegar has acetic acid which can damage certain plastics and wooden finishes over time. Baking soda is an abrasive that can scratch the surface. Stick to gentle soap.
Does Cleaning Your Comb Actually Make a Difference for Hair Health?
Research shows that clean hair tools reduce the transfer of oil, bacteria, and product buildup back onto your hair. The American Academy of Dermatology states that dirty brushes and combs can make hair look greasy and limp. They also note that sharing unclean hair tools can spread scalp infections.
Some people report that cleaning their comb regularly reduces scalp itching and flaking. That makes sense logically. If you have dandruff, a dirty comb can redistribute the flakes and the yeast that causes them. Cleaning your comb breaks that cycle.
There is no large clinical trial specifically on comb cleaning and hair growth. That kind of study has not been done. But the indirect evidence is clear: a clean comb puts only clean things into your hair. A dirty comb puts old oil, dead skin, and bacteria into your hair. Which one sounds better for your scalp?
For people with acne along the hairline, a dirty comb can be a contributing factor. Oils and bacteria from the comb transfer to the skin every time you brush your hair back. Cleaning your comb weekly can help reduce that transfer. Some dermatologists recommend this as part of a routine for acne mechanica, which is acne caused by friction and pressure.
Frequently Asked Questions
Can I clean a comb with just water?
Water alone will not remove oils and product buildup effectively. You need soap to break down the oils and a brush to scrub the residue off.
How do I clean a comb with a lot of hair stuck in it?
Remove as much hair as possible with your fingers or a wide-tooth comb first. For hair wrapped tightly at the base, use a toothpick or bobby pin to lift it out before soaking.
Is it safe to boil a comb to clean it?
Boiling can warp or melt most plastic combs and damage wooden ones. Stick to warm water and soap. Boiling is not necessary and can ruin your comb.
Can I use hydrogen peroxide to disinfect my comb?
Hydrogen peroxide can be used on metal or hard plastic combs, but it may bleach or damage colored plastic and wooden finishes. Soap and water is sufficient for regular cleaning.
