
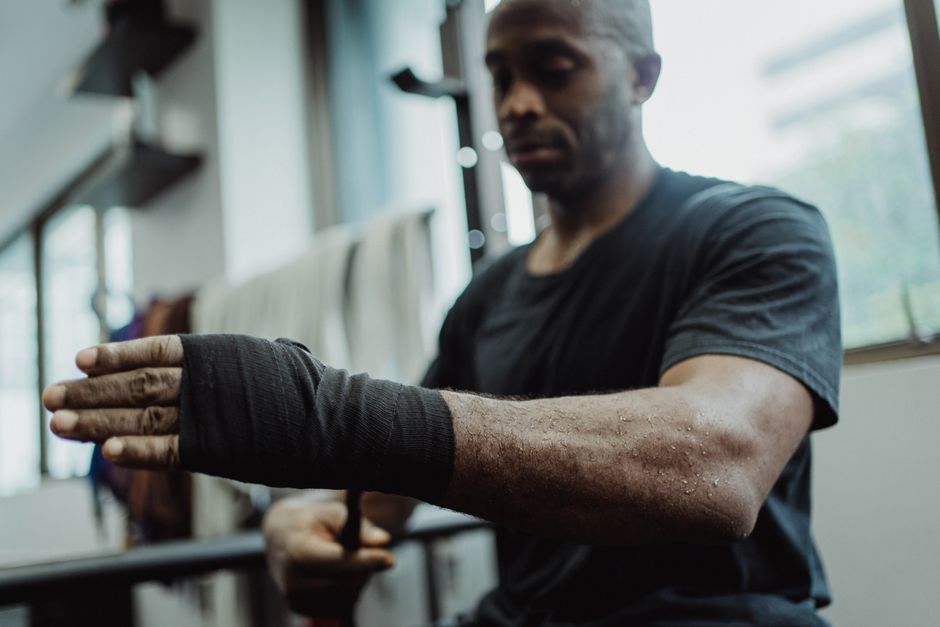
Boxing puts your hands through a lot of force. Without proper protection, a single punch can sprain your wrist or break a small bone in your hand. Wrapping your hands correctly secures your wrist and cushions your knuckles so you can punch safely. The basic process involves placing a loop over your thumb, wrapping your wrist several times, covering your knuckles, weaving between your fingers, and securing the wrist again with the Velcro closure.
How To Wrap Your Hands For Boxing?
Start with your hand open and your fingers spread slightly. Place the thumb loop over your thumb. Pull the wrap across the back of your hand and wrap your wrist three times. Keep the wrap flat against your skin, not twisted. Make each wrap snug but not tight enough to cut off circulation.
After the wrist wraps, bring the wrap across the top of your hand and wrap your knuckles three times. Keep your fingers slightly spread so the wrap covers the full width of your knuckles. Do not wrap too tightly over the knuckles themselves. Your hand should still be able to form a fist comfortably.
From the knuckles, bring the wrap down between your pinky and ring finger. Go around the back of your hand and then down between your ring and middle finger. Continue this pattern for each finger space. This webbing stabilizes your hand and prevents the wrap from slipping during a workout.
After the final finger weave, bring the wrap across your palm and wrap your wrist again two or three times. Secure the Velcro closure firmly. Your wrap should feel snug all over. There should be no loose flaps and no painful pressure points.
Why Do Boxers Wrap Their Hands?
Your hand contains 27 small bones. The bones in your palm, called metacarpals, take the direct force of each punch. Without support, those bones can shift and collide. A wrap holds them in place so they stay aligned on impact.
Your wrist is also at risk. The wrist joint has many small bones held together by ligaments. A punch that lands slightly off angle can hyperextend or sprain your wrist. A wrap limits how far your wrist can bend backward, which is the most common injury direction.
Boxing gloves provide padding but not structural support. The glove cushions the impact. The wrap controls the skeleton underneath. You need both for full protection.
What Type Of Hand Wraps Should You Use?
Two main types exist: cotton wraps and elastic wraps. Cotton wraps are traditional. They do not stretch much, so they provide consistent support through a full workout. They also breathe better and dry faster between sessions.
Elastic wraps have some stretch. This allows you to adjust the tension more precisely. However, elastic wraps can loosen during a workout as the material fatigues. You may need to rewrap between rounds.
Most wraps are 180 inches long. This length gives enough material to wrap both wrists and knuckles thoroughly. Shorter wraps around 120 inches work for smaller hands but may not provide enough coverage for the finger weaves. Longer wraps around 200 inches are available for people with larger hands or anyone who prefers extra wrist support.
Velcro closures matter more than most beginners realize. Cheap Velcro wears out within weeks. The closure must hold under sweat and repeated movement. If your wrap comes undone during a session, you are not protected.





How To Wrap Your Hands For Boxing – Step By Step
These instructions assume you are using standard 180-inch wraps. Adjust the number of wraps around each area if your wraps are shorter or longer.
Step 1: Place the thumb loop.
Put your thumb through the loop at the end of the wrap. The wrap should sit across the back of your hand, not on your palm. The loop holds the entire wrap in place as you work down its length.
Step 2: Wrap your wrist three times.
Pull the wrap across the back of your hand and start circling your wrist. Keep the wrap flat. Overlap each layer by about half the width of the wrap. Finish with the wrap coming across the top of your hand toward your knuckles.
Step 3: Wrap your knuckles three times.
Bring the wrap over your knuckles with your hand open and fingers spread slightly. Each pass should cover the full width of your knuckles. Do not wrap your thumb. Do not pull tight enough that you cannot comfortably close your fist.
Step 4: Weave between your fingers.
From your knuckles, bring the wrap down between your pinky and ring finger. Pull it across the back of your hand. Then bring it down between your ring and middle finger. Continue across the back and down between your middle and index finger. Finish by pulling the wrap across the back of your hand toward your thumb.
Step 5: Wrap your thumb once (optional).
Some wrapping styles include a single pass around the thumb. Bring the wrap across the base of your thumb, around it, and back across the top of your hand toward your wrist. Do not wrap the thumb more than once. Too much wrap restricts movement.
Step 6: Wrap the wrist again two to three times.
Bring the wrap across your palm toward your wrist. Circle your wrist two or three times. Keep the wrap snug. This final wrist wrap locks everything in place and provides the wrist support you need during punching.
Step 7: Secure with Velcro.
Press the Velcro closure firmly against the wrap. It should hold without slipping. If it does not hold, you may need a tighter wrap or the Velcro may be worn out.
Step 8: Test your wrap.
Make a fist. Open your hand fully. The wrap should feel tight enough to support your wrist but not so tight that your hand cramps. You should be able to wiggle your fingers. If your fingertips turn white or tingle, the wrap is too tight.
If you are left-handed or right-handed does not matter for this technique. The steps are identical for both hands. Simply mirror the instructions for your non-dominant hand.
Common Hand Wrapping Mistakes To Avoid
Wrapping too tightly over the knuckles.
This is the most common mistake. A tight knuckle wrap can bruise the bone or cut blood flow. Your knuckles need cushioning, not compression. Leave enough room that you can comfortably form a fist.
Wrapping too loosely.
A loose wrap shifts during punching. It bunches up inside your glove and creates pressure points. It also fails to support your wrist. If you can slide a finger under the wrap easily, it is too loose.
Skipping the finger weaves.
The weaves between your fingers separate and stabilize your metacarpal bones. Without them, the wrap slips and your knuckle padding moves out of position. Every finger space should have a weave pass.
Leaving the thumb loop loose.
The thumb loop anchors the entire wrap. If it is not snug against your thumb, the wrap will loosen as you punch. Make sure the loop sits firmly at the base of your thumb.
Not wrapping the wrist enough.
Your wrist needs multiple layers of wrap to limit backward bending. Three wrist wraps before the knuckle section plus two or three after the finger weaves is a good minimum. Fewer layers increase injury risk.
Wrapping over the same spot repeatedly.
Too many layers in one spot creates a lump inside your glove. That lump can cause bruising or discomfort. Spread your wraps evenly across the wrist, knuckles, and hand.
Frequently Asked Questions
How tight should boxing hand wraps be?
Snug enough that your wrist cannot bend sideways or backward easily, but loose enough that your fingers can wiggle and you can form a fist without discomfort.
Can you wrap your hands without a thumb loop?
Yes, but it is harder to keep the wrap secure. Starting with the wrap across your knuckles and working toward your wrist is the alternative method, though most people find the loop easier.
Should you wrap your hands before putting on gloves?
Yes. Hand wraps go directly against your skin. Gloves go over the wraps. Wearing wraps under gloves provides the support and moisture management you need, while the glove adds padding on top.
How long do hand wraps last?
Cotton wraps last about six months with regular use if washed after each session. Elastic wraps may need replacement sooner as the stretch fibers break down. Replace any wrap once the Velcro stops holding or the fabric develops tears.
