
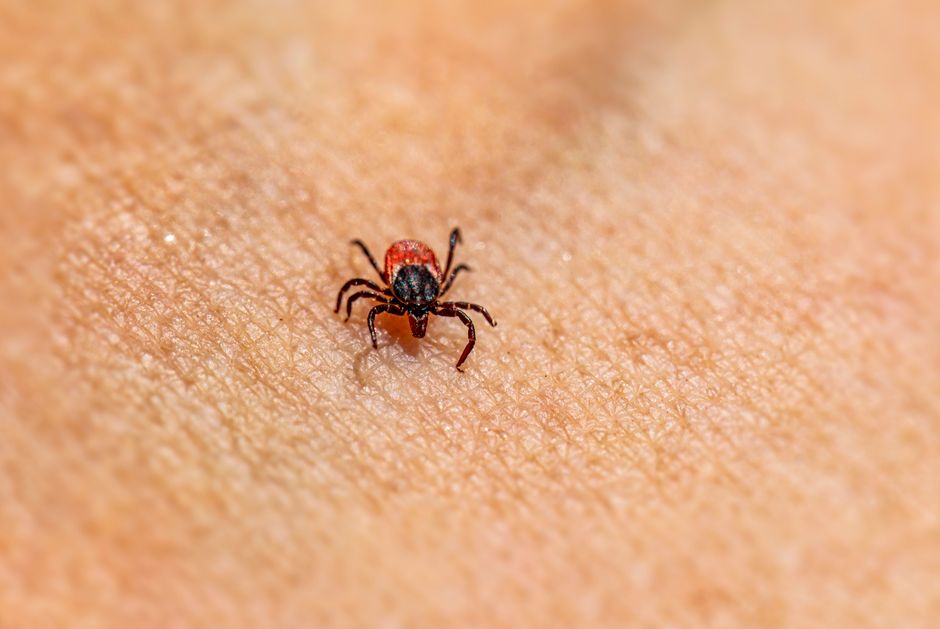
Ticks are small, but the diseases they carry can change your life. Removing one quickly and correctly matters more than most people realize. A tick remover tool is effective, but only when you use it the right way. The correct method is simple: grasp the tick as close to your skin as possible, pull straight upward with steady pressure, and never twist or jerk the tool. Do not squeeze the tick’s body, do not use heat or petroleum jelly, and do not wait to remove it. Clean the bite area and your hands with rubbing alcohol or soap and water afterward, then watch the bite site for a rash or other symptoms for several weeks.
Why Proper Tick Removal Matters
The way you remove a tick affects your risk of infection. When a tick bites, it anchors its mouthparts into your skin. Some ticks also secrete a cement-like substance that helps them stay attached. If you pull incorrectly, the mouthparts can break off and remain in your skin, which can lead to a local infection.
More importantly, improper removal can cause the tick to regurgitate its stomach contents into your bite wound. That fluid can contain pathogens, including the bacteria that cause Lyme disease. Squeezing the body or applying heat can trigger this regurgitation. The goal is to remove the entire tick without stressing it.
What Is a Tick Remover Tool?
A tick remover is a small tool designed to grasp and extract ticks. There are two main types. The first is a hooked tool, often shaped like a small crowbar with a V-shaped notch. The second is a pair of fine-tipped tweezers, sometimes called tick tweezers, with long, narrow points that meet precisely.
Both types work well when used correctly. The hooked tool slides under the tick’s body and lifts it out with a twisting motion. Fine-tipped tweezers grasp the tick directly at the skin line. Standard household tweezers are too blunt and can crush the tick, so they are not recommended.
How To Use A Tick Remover Dos And Donts
Follow these steps for safe and effective tick removal with a hooked tool or fine-tipped tweezers.
Using fine-tipped tweezers: Grasp the tick as close to the surface of your skin as possible. Pull upward with steady, even pressure. Do not twist or jerk the tick, as this can cause the mouthparts to break off. Continue pulling until the tick releases.
Using a hooked tick remover: Slide the notch of the tool under the tick, positioning the tick in the V-shaped slot. Lift the tool upward until the tick releases. Some hooked tools work best with a gentle twisting motion, but a straight lift is always safe. Check the instructions that came with your specific tool.
The dos: Use fine-tipped tweezers or a dedicated tick remover. Grasp the tick at the skin surface, not the body. Pull straight upward with steady pressure. Clean the bite area and your hands with rubbing alcohol or soap and water after removal. Save the tick in a sealed bag or container in case you need to identify it later.
The donts: Do not squeeze the tick’s body with your fingers. Do not use petroleum jelly, nail polish, gasoline, or heat to try to make the tick detach on its own. Do not twist or jerk the tick when using tweezers. Do not crush the tick after removal. Do not flush a live tick down the toilet, as it can survive.




What Not To Do: Myths That Increase Risk
Several folk remedies for tick removal are dangerous and ineffective. Petroleum jelly and nail polish are meant to suffocate the tick, but ticks can survive for long periods without breathing much. Meanwhile, the tick remains attached and continues feeding.
Heat from a match or lighter is even worse. The heat can cause the tick to regurgitate infected fluid into your bloodstream. It can also burn your skin. These methods do not work and they increase your risk of disease transmission.
Twisting the tick with tweezers is another common mistake. Some tick removal tools are designed for a twisting motion, but fine-tipped tweezers are not. Twisting with tweezers can detach the body from the mouthparts, leaving the head embedded in your skin.
What To Do If the Mouthparts Break Off
Sometimes the tick’s mouthparts remain in the skin even with proper technique. This is not an emergency, but it needs attention. If you can see the mouthparts and they are close to the surface, you can try to remove them with sterilized tweezers.
If you cannot remove them easily, leave them alone. Your body will eventually push them out like a splinter. Do not dig into your skin to remove them, as this increases the risk of infection. Clean the area with rubbing alcohol and monitor it for signs of infection, such as redness, swelling, or warmth.
After the Tick Is Removed: Next Steps
Once the tick is out, clean the bite area with rubbing alcohol or soap and water. Wash your hands thoroughly as well. You do not need to apply an antibiotic ointment unless a healthcare provider recommends it, but keeping the area clean is important.
Save the tick if you can. Place it in a sealed plastic bag or a small container with a moist cotton ball. Some health departments offer tick testing for disease-causing pathogens, but the results are not always actionable. Knowing what type of tick bit you can still be useful, so take a photo or keep the tick for identification.
Watch the bite site for 30 days. A red rash that expands outward, sometimes shaped like a bullseye, can be a sign of Lyme disease. Fever, headache, fatigue, and muscle aches can also occur. If you develop any of these symptoms, see a healthcare provider and tell them you were bitten by a tick.
When To See a Doctor After a Tick Bite
Most tick bites do not lead to disease. But some do, and early treatment matters. See a healthcare provider if you develop a rash, fever, headache, or joint pain within several weeks of a tick bite.
In some cases, a doctor may prescribe a preventive dose of antibiotics after a tick bite. This is not routine for every bite. It is typically considered only when the tick was attached for a long period, the tick is known to carry Lyme disease, and the bite occurred in an area where Lyme disease is common. Your healthcare provider will make this decision based on your specific situation.
How To Prevent Tick Bites in the First Place
Prevention is always better than removal. When spending time in grassy, wooded, or brushy areas, treat your clothing and gear with permethrin, an insecticide that kills ticks on contact. Apply an EPA-registered insect repellent containing DEET or picaridin to exposed skin.
After being outdoors, check your entire body for ticks. Pay special attention to areas where ticks hide: under the arms, in and around the ears, inside the belly button, behind the knees, between the legs, and around the waist. Ticks can be very small, so look carefully. Showering within two hours of coming indoors has been shown to reduce the risk of Lyme disease.
Dry your clothes in a dryer on high heat for 10 minutes to kill any ticks that may have hitched a ride. If your clothes are damp, dry them longer first, then add 10 more minutes on high heat.
Frequently Asked Questions
Can I use my fingers to remove a tick?
No. Using your fingers can squeeze the tick’s body and push infected fluids into your skin. Always use fine-tipped tweezers or a dedicated tick remover tool.
Should I twist the tick when removing it?
Only if your tool is specifically designed for a twisting motion. With fine-tipped tweezers, pull straight upward with steady pressure. Twisting with tweezers can break off the mouthparts.
What happens if the tick’s head stays in my skin?
If the mouthparts break off, try to remove them with sterilized tweezers if you can see them. If not, leave them alone and let your body push them out naturally. Clean the area and watch for signs of infection.
How long should I watch the bite site after removal?
Watch the bite site for 30 days. A rash, fever, headache, or joint pain within that period means you should see a healthcare provider.
