
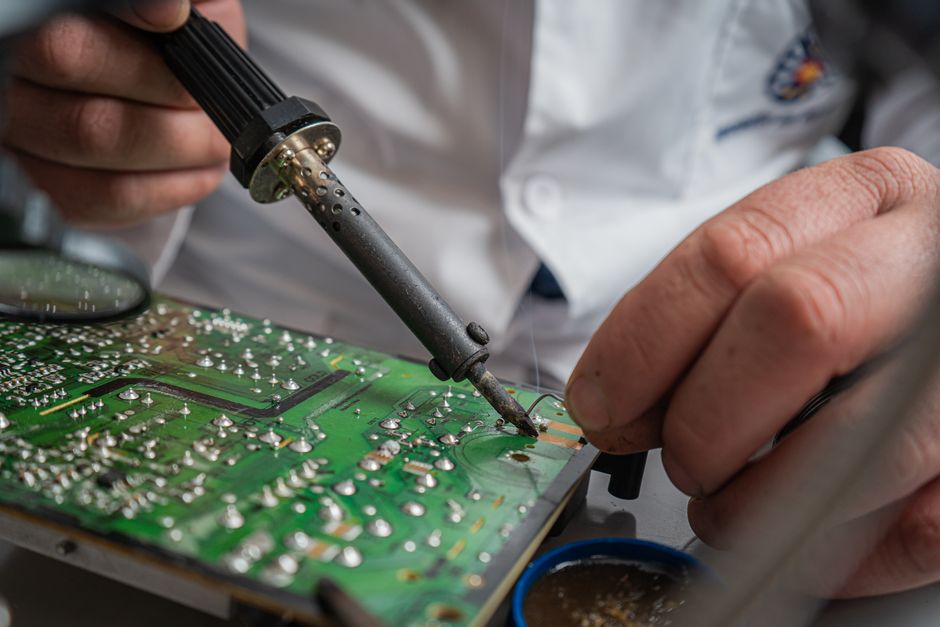
Soldering looks simple, but clean joints come from preparation, not luck. A good solder joint is shiny, smooth, and holds the wire or component firmly. A bad joint is dull, rough, or blobby, and it can fail weeks later. The process is straightforward: clean the tip, heat the joint, not the solder, and let the solder flow naturally. Master that sequence, and you will produce reliable connections every time.
What Does a Clean Solder Joint Actually Look Like?
A clean joint has a smooth, concave fillet of solder that climbs up the wire or component lead. It looks like a small shiny volcano, not a ball. The solder should fully wet both surfaces, meaning it bonds with the metal rather than sitting on top of it.
Color matters. Bright and shiny means the solder cooled correctly. A dull, grainy, or frosty appearance suggests the joint moved while cooling, or the heat was wrong. Cracks, pits, or black spots mean contamination or overheating.
You should be able to see the outline of the wire or lead through the solder. If the solder forms a blob that hides everything underneath, the joint is cold and unreliable. Electrical continuity might exist, but mechanical strength will be weak.
What Temperature Should You Set on the Soldering Iron?
Temperature depends on the solder you use. Most lead-free solder melts around 217°C (423°F). Traditional lead-based solder, like 60/40 tin-lead, melts around 183°C (361°F).
For most electronics work, set the iron between 315°C and 370°C (600°F to 700°F). This range heats the joint quickly without burning the board or component. If you are soldering very small surface-mount parts, use the lower end. For thick wires or ground planes that absorb heat, use the higher end.
A hotter iron is often better than a colder one because it transfers heat fast. A cold iron sits on the joint for too long, and that prolonged contact damages components. The goal is to heat the joint in one to three seconds, apply solder, and remove the iron.
How Do You Prepare the Soldering Iron Tip?
The tip must be clean and tinned before every joint. Tinning means coating the tip with a thin layer of fresh solder. This layer transfers heat efficiently and prevents oxidation.
Wipe the hot tip on a damp sponge or brass wool to remove old solder and debris. Then apply a small amount of fresh solder to the tip. It should look silver and shiny. If the tip looks black or blue, it is oxidized, and solder will not stick to it.
Never file or sand an iron tip. The coating on the tip is a protective layer, and removing it destroys the tip. If the tip is badly oxidized, replace it.
Keep the tip tinned even when the iron sits idle. Turn it off when not in use for long periods. Leaving a hot, untinned tip in the air causes rapid oxidation.





What Is the Correct Technique for Making a Solder Joint?
Position the components first. For through-hole components, bend the leads slightly to hold them in place. For wires, twist them together or use a helping hand tool to hold them steady.
Touch the clean, tinned iron tip to both the pad and the component lead at the same time. The iron should contact both surfaces simultaneously. Hold it there for about one second.
Now touch the solder to the joint, not to the iron tip. If the joint is hot enough, the solder will melt and flow into the connection. It should wick into the joint smoothly. If the solder melts on the iron but does not flow to the joint, the joint is not hot enough yet.
Feed just enough solder to form a concave fillet. This is usually about the diameter of the wire or lead. Remove the solder first, then remove the iron. Hold everything completely still for two to three seconds while the solder solidifies.
Moving the joint during cooling creates a cold joint. This is the most common cause of cracked and failed solder connections.
What Are the Most Common Soldering Mistakes?
The biggest mistake is applying solder directly to the iron tip and then carrying it over to the joint. This creates a joint where the solder never properly bonded with the metal surfaces. The solder may look fine on the outside but fail internally.
Another common error is using too much solder. Excess solder can bridge adjacent pads and create short circuits. If you see solder spilling beyond the pad, you used too much.
Using too little solder is also a problem. A joint with insufficient solder has poor mechanical strength and may crack under vibration.
Heating the joint for too long damages the component and lifts the copper pad off the circuit board. If the pad lifts, the board is often ruined. This usually happens when using a cold iron or an iron with a dirty tip.
Using the wrong type of solder is another frequent issue. Acid-core solder is for plumbing and destroys electronics. Always use rosin-core solder for electrical work.
How Do You Fix a Bad Solder Joint?
If a joint looks dull, cracked, or blobby, you need to redo it. Apply fresh flux to the joint, then reheat it with the iron. The old solder will melt and reflow with the new solder.
For removing solder entirely, use solder wick or a desoldering pump. Solder wick is a braided copper wire that draws molten solder away from the joint. Place the wick over the joint, press the hot iron on top, and the solder will soak into the wick.
A desoldering pump is a vacuum tool that sucks up molten solder. It works well for through-hole components. Heat the joint, trigger the pump, and the solder is removed in one motion.
After removing the old solder, clean the area with isopropyl alcohol to remove flux residue. Then re-solder the joint using the proper technique.
What Safety Precautions Matter When Soldering?
Soldering produces fumes from the flux. These fumes are irritating and potentially harmful with prolonged exposure. Work in a well-ventilated area or use a fume extractor. Position the fan so it pulls fumes away from your face, not toward it.
The iron tip reaches temperatures above 300°C. It will burn skin instantly and can start fires. Always rest the iron in its stand when not in use. Never set a hot iron directly on a workbench.
Wash your hands after soldering. Lead-based solder contains lead, and residue can remain on your hands. Even lead-free solder contains other metals that should not be ingested.
Wear safety glasses. Solder can splatter, and clipped component leads can fly across the room. A lead in the eye is a serious injury.
What Supplies Do You Need for Clean Soldering?
- Soldering iron with a fine tip (conical or chisel shape)
- Rosin-core solder, 0.5mm to 0.8mm diameter for electronics
- Damp sponge or brass wool for tip cleaning
- Helping hands or a third-hand tool to hold work
- Isopropyl alcohol for cleaning flux residue
- Desoldering wick or pump for corrections
Quality matters. A cheap iron with poor temperature control makes soldering much harder. A basic adjustable-temperature iron is a worthwhile investment. The tip must be replaceable, and replacement tips should be readily available.
Solder diameter matters too. Thick solder is hard to control on small joints. Thin solder feeds precisely and is easier to dose. For general electronics, 0.6mm solder is a good middle ground.
How Do You Solder Different Types of Connections?
Through-hole components are the easiest. The lead passes through the board, and you solder on the opposite side. The joint needs enough solder to fill the hole and form a small cone around the lead.
Surface-mount components are smaller and require a finer touch. Use a smaller tip and less solder. A magnifying lamp helps enormously. Apply flux to the pad first, then place the component, then heat and solder.
Wire-to-wire connections need a mechanical joint before soldering. Twist the wires together first. The solder should flow into the twisted strands, not just coat the outside. A good splice is mechanically strong before solder is applied.
Wire-to-terminal connections, like those on switches or speakers, require wrapping the wire around the terminal post before soldering. The solder should flow into the wrap and form a smooth fillet.
Frequently Asked Questions
Why does my solder form balls instead of flowing?
The surface is not hot enough or not clean enough for the solder to wet. Clean the tip, apply fresh flux, and make sure the iron contacts both the pad and the lead simultaneously.
How long should I hold the iron on the joint?
Typically one to three seconds is enough for most electronics. If the solder does not flow within three seconds, the iron is too cold or the tip is dirty.
Can I use plumbing solder for electronics?
No. Plumbing solder uses acid flux that corrodes electronic components and circuit boards. Always use rosin-core solder rated for electrical work.
What causes a cold solder joint?
A cold joint happens when the joint moves while the solder is cooling, or when the joint did not reach full melting temperature. It looks dull and grainy and has poor electrical and mechanical properties.
