
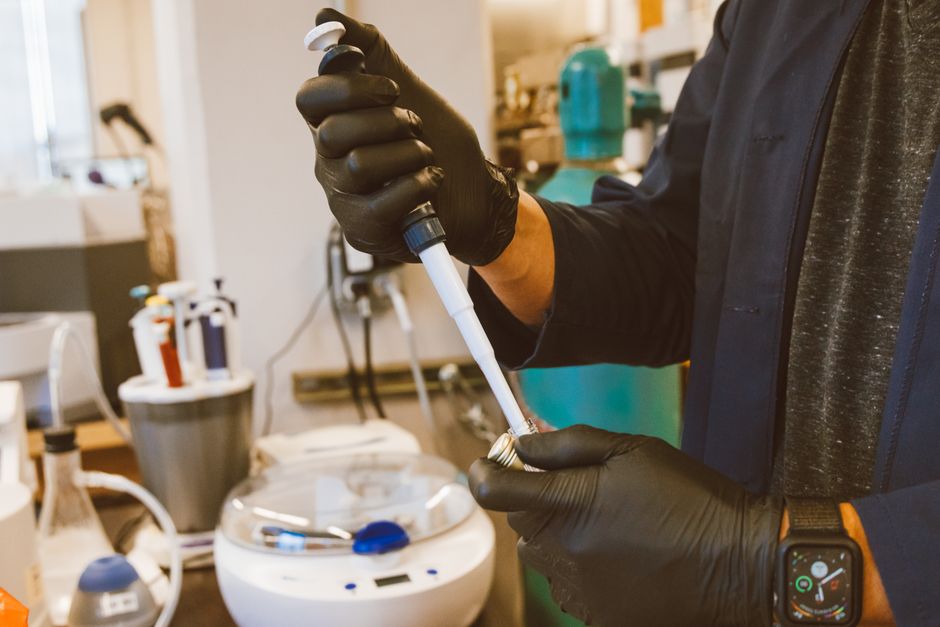
Using a micropipette correctly is essential for accurate results in any lab. You set the volume, attach a tip, press the plunger to the first stop, immerse the tip in the liquid, slowly release the plunger to draw the sample, then transfer it by pressing to the first stop, pause, then press to the second stop to expel any remaining liquid, and discard the tip.
What Is a Micropipette and How Does It Work?
A micropipette is a precision instrument used to measure and transfer very small volumes of liquid, typically from 0.5 microliters to 1000 microliters. It works by creating an air cushion inside the tip. When you press the plunger, you displace that air. Releasing it draws liquid into the tip. The volume is set by turning a dial or a digital display. Most micropipettes have a two‑stop plunger mechanism. The first stop dispenses most of the liquid. The second stop blows out any liquid that clings to the tip.
These tools are common in research labs, clinical diagnostics, and even some home health tests. Accuracy depends on proper technique. Even small errors in angle, speed, or tip handling can change the volume by several percent.
How To Use A Micropipette Step By Step Technique
Follow these steps exactly for accurate and repeatable results.
- Set the volume. Turn the volume adjustment knob to your desired value. Do not turn it below the minimum or above the maximum range of the pipette. This can damage the internal mechanism.
- Attach a pipette tip. Press the pipette shaft firmly into the tip. Use a tip that matches the volume range. Do not touch the tip with your fingers.
- Press the plunger to the first stop. Push the plunger down until you feel a clear resistance. Do not push further yet.
- Immerse the tip vertically. Hold the pipette straight up and down. Immerse the tip 2–4 millimeters into the liquid. Do not touch the bottom of the container.
- Slowly release the plunger. Let the plunger rise at a steady, smooth speed. If you release too fast, liquid may splash into the pipette body or air bubbles may form.
- Pause for one second. Wait a moment to allow the full volume to enter the tip.
- Remove the tip from the liquid. Withdraw the tip slowly and wipe any drops from the outside against the container wall. Do not touch the tip opening.
- Move to the destination container. Hold the pipette at a slight angle (10–45 degrees) or vertically, depending on the liquid type. For water‑based liquids, a slight angle works fine. For viscous liquids, keep the tip against the container wall.
- Press to the first stop, then the second stop. First depress the plunger to the first stop to dispense the liquid. Then press firmly to the second stop to blow out any remaining liquid. Hold the plunger down.
- Remove the tip. Lift the pipette straight out while keeping the plunger depressed. Press the tip ejector button to discard the tip into a waste container.
Practice each step until the motion feels fluid. Many labs recommend training with water and a balance to confirm accuracy before using the pipette for actual samples.
What Are the Two Stops on a Micropipette Plunger?
The two stops are the most important design feature of a micropipette. The first stop is where you feel initial resistance. Pushing to this point displaces air equal to the set volume. When you release the plunger, that exact volume of liquid is drawn in. The second stop requires extra force. It pushes the plunger past the first stop and expels any liquid that remains clinging to the inside of the tip. Using only one stop will leave a small amount of liquid behind, which adds up over repeated steps.
Always press to the first stop before drawing liquid. Always press to the second stop after dispensing into the final container. If you are mixing liquids or adding a reagent to a tube, the second stop ensures complete transfer.





Common Mistakes When Using a Micropipette
Even experienced users make small errors that affect accuracy. Here are the most frequent problems.
- Releasing the plunger too fast. This can cause liquid to enter the pipette body, leading to contamination and damaged parts. It can also introduce air bubbles that reduce the measured volume.
- Immersing the tip too deep. More than a few millimeters increases the chance of liquid clinging to the outside of the tip, which adds volume. It can also cause drops to fall off during transfer.
- Using the wrong tip. Tips are designed for specific volume ranges. A tip meant for 100–1000 µL will not seal properly on a pipette set to 10 µL. This causes leakage and inaccurate volumes.
- Not pre‑wetting the tip. For volatile liquids or very small volumes, drawing and expelling the liquid once before the final transfer helps saturate the air inside the tip. This reduces evaporation loss. Some protocols require pre‑wetting; others do not. Check your procedure.
- Holding the pipette at an angle when drawing. The tip should be vertical while aspirating. An angle changes the hydrostatic pressure and alters the volume.
- Dragging the tip across the container rim. This can dislodge liquid or contaminate the tip.
Avoiding these mistakes is straightforward once you know them. Many labs perform periodic accuracy checks using a balance and water to catch errors.
How to Maintain and Calibrate a Micropipette
Micropipettes need regular care to stay accurate. After each use, wipe the outside with a mild detergent solution or 70% ethanol. Do not submerge the pipette. For deep cleaning, follow the manufacturer’s instructions. Most pipettes can be disassembled for cleaning of the piston and shaft. Use only distilled water and lint‑free wipes.
Calibration should be done at least every 6 to 12 months. Some labs calibrate more often if the pipette is used heavily or with corrosive liquids. Calibration involves comparing the dispensed volume to a reference weight on an analytical balance. The acceptable error varies by pipette class. For example, a P10 pipette set to 10 µL should dispense within about 0.1 µL of the target. If it falls outside the tolerance, adjust the volume setting according to the calibration manual or send it to a service center.
If you notice inconsistent performance—such as drops sticking to the tip, difficulty turning the dial, or visible liquid inside the shaft—stop using the pipette and service it. Using a damaged pipette can ruin experiments and waste samples.
Choosing the Right Micropipette Tip
Tips are not all the same. They come in different sizes, materials, and sterility levels. The size must match your pipette’s volume range. A standard tip box will list which pipette models it fits. For example, a 10 µL tip fits pipettes with a range of 0.5–10 µL. Using the wrong size causes poor sealing and inaccurate volumes.
Material matters for certain applications. Polypropylene tips are common and work for most liquids. Low‑retention tips have a hydrophobic coating that reduces liquid sticking inside the tip. These are useful for viscous samples or very small volumes. Filter tips contain a barrier that prevents aerosols from reaching the pipette shaft. They are recommended when working with DNA, RNA, or infectious materials. Sterile tips are gamma‑irradiated and are required for cell culture or clinical samples. Non‑sterile tips are fine for general lab work.
Always check the tip before use. A deformed or dusty tip can introduce contamination. Never reuse a tip. The residual liquid can cross‑contaminate the next sample, and the tip can become damaged during ejection.
Frequently Asked Questions
How do you set the volume on a micropipette?
Turn the volume adjustment knob until the display shows your desired volume. Never force the knob past the minimum or maximum limit.
What does the second stop on a micropipette do?
The second stop expels any remaining liquid that sticks to the inside of the tip after the first stop dispenses the main volume. Using it ensures complete transfer.
Can you reuse pipette tips?
No. Reusing tips can contaminate your samples and damage the pipette. Always use a fresh tip for each liquid transfer.
What is the best angle to hold a micropipette when drawing liquid?
Hold the pipette vertically (straight up and down) while immersing the tip and releasing the plunger. Any angle can change the accuracy of the volume drawn.
