
Cordyline plants are a striking addition to any garden or indoor space, known for their spiky, colorful foliage. If you want more of these plants without buying new ones, propagation is straightforward. You can successfully grow new cordylines from stem cuttings or by dividing an established plant. Both methods are reliable when done at the right time of year and with proper aftercare.
When Is The Best Time To Propagate Cordyline?
Timing matters more than most people think. The best window for propagating cordyline is during the active growing season, which runs from late spring through early summer. During this period, the plant’s metabolism is highest, and cuttings or divisions will root faster and more reliably.
Propagating in late summer or autumn is riskier. The plant begins slowing down for winter, and cuttings may rot before they have a chance to root. If you live in a climate with mild winters, you can extend the window slightly, but spring remains the safest choice.
Indoor propagation can happen year-round if you have a warm, bright spot. However, even indoors, cuttings taken in spring outperform those taken in winter because the plant’s natural growth hormones are at their peak.
How To Propagate Cordyline With Stem Cuttings
Stem cuttings are the most common method for cordyline. The technique works for both outdoor garden plants and indoor potted specimens. You can take cuttings from the top of the plant or from the middle of an older stem.
Here is the step-by-step process:
- Select a healthy stem. Look for a firm, green stem with no signs of disease or pest damage. The stem should be at least the thickness of a pencil.
- Cut a section 4 to 6 inches long. Use clean, sharp pruning shears. Make a straight cut just below a leaf node, which is the point where leaves attach to the stem.
- Remove the lower leaves. Strip off the bottom half of the leaves so the lower portion of the stem is bare. This prevents leaves from rotting when placed in soil or water.
- Optional: apply rooting hormone. Some gardeners use a rooting powder or gel to speed up root development. This is not required, but it can improve success rates, especially for woody stems.
- Plant the cutting. Insert the bare stem into a pot filled with moist, well-draining potting mix. Bury the stem about 1 to 2 inches deep.
- Cover with a plastic bag. Creating a mini greenhouse around the cutting helps retain humidity. Use a clear plastic bag supported by sticks so it does not touch the leaves.
- Place in bright, indirect light. Direct sunlight is too intense for a cutting without roots. A bright windowsill or shaded spot outdoors works well.
- Keep the soil consistently moist. Check every few days. The soil should feel damp but not waterlogged.
Roots typically develop within 4 to 8 weeks. You will know the cutting has rooted when you see new leaf growth at the top. Gently tug on the stem after a few weeks — if there is resistance, roots have formed.
Can You Root Cordyline Cuttings In Water?
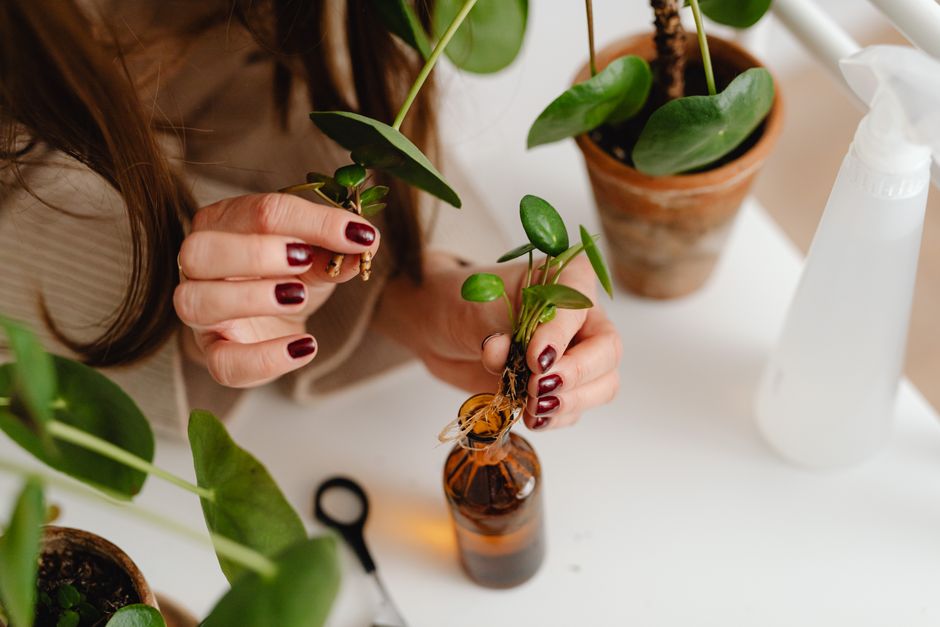
Yes, water rooting works for cordyline. Many gardeners prefer this method because it lets you watch root development without disturbing the cutting. Place the prepared cutting in a glass jar filled with room-temperature water. Only the bare stem should sit in water — keep all leaves above the waterline.
Change the water every 3 to 4 days. Stagnant water promotes bacterial growth, which can cause the cutting to rot. Place the jar in bright, indirect light. Roots should appear within 3 to 6 weeks.
Once roots reach about 1 inch long, transfer the cutting to potting soil. Be gentle during this transition. Water-rooted cuttings sometimes struggle when moved to soil because the roots are delicate and adapted to a water environment. Keep the soil extra moist for the first two weeks to ease the transition.




How To Propagate Cordyline By Division
Division is the better method for established plants that have developed multiple stems or offsets. A mature cordyline often produces small shoots at its base. These offshoots are essentially baby plants connected to the parent root system. Separating them is a reliable way to get new plants.
Here is how to divide a cordyline:
- Water the plant thoroughly. Do this one day before dividing. Moist soil makes it easier to remove the plant from its pot or the ground without damaging roots.
- Remove the plant from its container. For garden plants, dig a wide circle around the base to avoid cutting through major roots.
- Shake off excess soil. This exposes the root system so you can see where the offsets connect to the parent.
- Identify natural separation points. Look for where each stem has its own root cluster. You want each division to have a good amount of roots attached.
- Cut the connecting roots. Use a clean, sharp knife or garden spade. Make a clean cut rather than tearing, which damages tissue.
- Replant immediately. Each division goes into its own pot or planting hole. Plant at the same depth it was growing before.
- Water well. Give each new plant a thorough watering to settle the soil around the roots.
Division is less risky than cuttings because each new plant already has a root system. The main risk is transplant shock, which shows up as wilting or drooping leaves. This usually resolves within a week or two if the plant is kept out of direct sun and watered consistently.
What Soil And Potting Mix Works Best?
Cordylines need well-draining soil. They do not tolerate waterlogged roots, which quickly leads to rot. A standard commercial potting mix works if you add perlite or coarse sand to improve drainage. A mix of about two parts potting soil to one part perlite is a good ratio.
For cuttings, the same mix works but should be kept more consistently moist. Cuttings have no roots to absorb water, so the soil around the stem must stay damp to encourage root formation. Once roots establish, let the top inch of soil dry out between waterings.
Outdoor cordylines prefer slightly acidic to neutral soil, with a pH range of 6.0 to 7.0. Most garden soils fall within this range. If your soil is heavy clay, amend it with compost and sand before planting to improve drainage.
How To Care For Newly Propagated Cordylines
Newly propagated cordylines are vulnerable. They have limited root systems and cannot handle stress the way established plants can. The first few weeks are critical.
Keep new plants in bright, indirect light. Direct sun can scorch leaves and stress the young plant. After about a month, you can gradually introduce them to more sun if you plan to grow them outdoors.
Water consistently but do not overwater. The goal is evenly moist soil, not soggy soil. Stick your finger about an inch into the soil — if it feels dry, water. If it feels damp, wait another day or two.
Do not fertilize for the first 6 to 8 weeks. New roots are sensitive to fertilizer salts, which can burn them. Once the plant shows active new growth, you can begin a regular feeding schedule with a balanced liquid fertilizer diluted to half strength.
Watch for signs of stress. Yellowing leaves usually mean overwatering. Brown, crispy leaf tips often mean too much sun or low humidity. Wilting despite moist soil can indicate root rot, which is usually fatal. If you catch problems early, you can often correct them.
Common Mistakes And How To Avoid Them
Most cordyline propagation failures come down to a few repeated mistakes. Understanding these beforehand greatly improves your success rate.
Overwatering is the number one killer. Cuttings and new divisions have small root systems that cannot absorb much water. Soggy soil leads to rot. When in doubt, let the soil dry slightly before watering again.
Taking cuttings from unhealthy plants. A stressed or diseased parent plant produces weak cuttings. Only propagate from vigorous, pest-free plants.
Using dull or dirty tools. A dull blade crushes stem tissue instead of cutting cleanly. Dirty tools can introduce disease. Sterilize your shears or knife with rubbing alcohol before cutting.
Placing cuttings in direct sun. Cuttings have no way to replace water lost through leaves. Direct sun causes rapid water loss, and the cutting dries out before it can root.
Removing the plastic cover too early. The humidity dome keeps moisture around the leaves. Removing it before roots form causes the cutting to dehydrate. Wait until you see new growth before gradually removing the cover over several days.
How Long Does It Take For Cordyline Cuttings To Root?
Under good conditions, cordyline cuttings root in 4 to 8 weeks. Several factors influence this timeline: temperature, humidity, and the age of the stem. Younger, greener stems root faster than older, woodier ones.
Temperature plays a major role. Cuttings root fastest when the soil temperature is between 70°F and 75°F. If your home is cooler than this, rooting takes longer. A heat mat designed for seed starting can speed things up considerably.
Patience is essential. It is normal for a cutting to look unchanged for weeks before any visible progress. As long as the stem stays firm and green, it is still alive and working on root development. Soft, brown, or mushy stems indicate rot, and those cuttings should be discarded.
Frequently Asked Questions
Can you propagate cordyline from a leaf cutting?
No. Cordyline cannot be propagated from a leaf alone. You need a section of stem with a node, because that is where new roots and shoots develop.
How long do cordyline cuttings take to root?
Most cordyline cuttings root within 4 to 8 weeks. Warmer temperatures between 70°F and 75°F speed up the process.
Can you divide a cordyline with a single trunk?
No. Division requires multiple stems or offsets, each with its own root system. A single-trunk plant can only be propagated through stem cuttings.
Do cordyline cuttings need rooting hormone?
No, rooting hormone is optional. Cordyline cuttings root successfully without it, though hormone powder can speed up root development on woody stems.
Propagation is one of the most rewarding parts of gardening. With a little patience and attention to the basics, you can turn one cordyline into many. Start with a healthy parent plant, choose the right season, and give your new plants the care they need during those first vulnerable weeks.
