
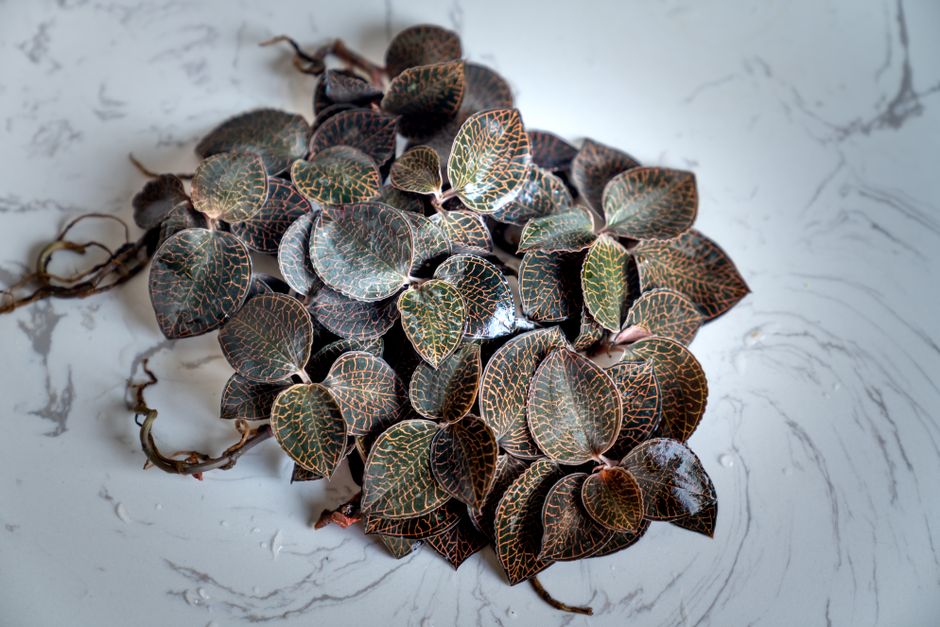
Jewel orchids are unlike most houseplants because you can root a cutting directly in soil, bypassing the water stage that many plant owners default to. Take a stem cutting with at least two nodes, remove the lower leaves, and press the bare stem into moist, well-draining soil. Keep the soil consistently damp and provide bright, indirect light, and roots will typically form within four to eight weeks.
What Makes Jewel Orchids Different From Other Cuttings?
Most houseplant cuttings root in water first. Jewel orchids do not need that step. In fact, water rooting often leads to rot because the stems are fleshy and prone to bacterial decay.
Jewel orchids are terrestrial orchids. In the wild they grow on the forest floor in leaf litter and humus, not attached to trees like many other orchids. Their stems crawl along the ground and root at the nodes naturally. This crawling habit is why soil propagation works so well — the plant is already programmed to root wherever a node touches moist ground.
There are several species sold under the jewel orchid name. Ludisia discolor is the most common. Macodes petola and Anoectochilus species are also popular. All of them propagate the same way from stem cuttings.
How To Propagate A Jewel Orchid From A Cutting: Step By Step
Start with a healthy parent plant. Look for a stem that is firm, not wrinkled, and has at least two or three visible nodes. Nodes are the small bumps where leaves attach to the stem. Roots will emerge from these points.
Use clean, sharp scissors or pruning shears. Sterilize the blade with rubbing alcohol before cutting. Make the cut just below a node, at a slight angle. The cutting should be three to four inches long.
Remove the leaves from the bottom half of the stem. Leave one or two leaves at the top. The cutting needs some leaf surface for photosynthesis, but leaves buried in soil will rot.
Fill a small pot — two to three inches wide — with a well-draining mix. A blend of two parts potting soil, one part perlite, and one part orchid bark works well. The goal is a mix that holds moisture but never stays soggy.
Press the bare stem into the soil so at least one node is buried. Firm the soil gently around the stem. Water thoroughly until water drains from the bottom of the pot.
Place the pot in bright, indirect light. A north or east-facing windowsill works well. Avoid direct sun, which can scorch the leaves.
Keep the soil consistently moist. Check every two to three days. The top inch of soil should feel damp, not dry and not wet. Some growers cover the pot with a clear plastic bag to raise humidity, but this is optional and increases rot risk if air circulation is poor.
Roots typically appear in four to eight weeks. You can check by giving the stem a gentle tug. Resistance means roots have formed. New growth at the top of the cutting is another sign of successful rooting.
What Soil Mix Should You Use?
Soil choice matters more for jewel orchids than for most houseplants. These orchids need moisture, but they also need air around their roots. A dense, water-retaining potting soil will suffocate the roots and invite rot.
A simple mix of two parts standard potting soil, one part perlite, and one part orchid bark gives the right balance. The potting soil holds moisture. The perlite and bark create air pockets. This combination keeps the cutting hydrated without waterlogging it.
Sphagnum moss is another option. It holds moisture well and is commonly used for orchid propagation. If you use moss, soak it in water first, squeeze out the excess, and pack it loosely around the cutting. The downside is that moss dries unevenly, making it harder to judge when to water.
Avoid cactus or succulent mixes. They drain too quickly and do not hold enough moisture for jewel orchids. Avoid pure potting soil as well — it compacts and holds too much water.





Light And Temperature Requirements For Rooting
Jewel orchids come from tropical forest floors. They receive dappled light under a canopy, never full sun. Bright, indirect light is the sweet spot for propagation.
An east-facing window provides gentle morning sun. A north-facing window works too but may be too dim in winter. If you use a west or south window, place the cutting a few feet away from the glass or behind a sheer curtain.
Temperature affects rooting speed. Jewel orchids root fastest between 70 and 80 degrees Fahrenheit. Room temperature in most homes falls in this range. Avoid placing cuttings near heating vents, air conditioners, or drafty windows — sudden temperature swings stress the plant.
Humidity above 50 percent helps, but it is not essential for rooting. If your home is very dry, a humidity tray or a nearby humidifier can help. Misting the leaves once a day is a lighter alternative, though it does little to change overall humidity.
Common Mistakes When Propagating Jewel Orchids
The most common failure is overwatering. Jewel orchids need consistently moist soil, but the line between moist and waterlogged is thin. If the soil feels like a soaked sponge, it is too wet. If it feels like a wrung-out sponge, it is right.
Another common mistake is burying leaves. Leaves in contact with moist soil will rot and can spread decay to the stem. Strip the lower leaves completely before planting.
Taking a cutting that is too short is also a problem. A cutting with only one node has a single chance to root. If that node rots, the cutting is done. Two or three nodes give you backup options.
Some growers move cuttings to a larger pot too soon. A cutting in a large pot sits in a lot of wet soil, which increases rot risk. Start small and pot up only when the roots fill the current container.
When Can You Move The New Plant To A Bigger Pot?
Wait until the root system is established before repotting. This usually takes two to three months from the time you take the cutting.
Signs that the plant is ready include new leaf growth, roots visible at the drainage holes, or the cutting resisting a gentle tug. At this point, move it to a pot one size larger — no more than one to two inches wider. Use the same soil mix you used for rooting.
Handle the roots carefully during repotting. Jewel orchid roots are brittle and break easily. Gently loosen the soil around the root ball and place the plant at the same depth it was growing before.
Can You Propagate Jewel Orchids In Water?
Some growers do root jewel orchid cuttings in water, and it can work. But it is not the recommended method.
Water rooting has a higher failure rate with jewel orchids because the stems are succulent and prone to rot. When roots form in water, they are also water-adapted. These roots often struggle when transferred to soil, and the plant may go through a shock period where growth stalls.
If you do try water propagation, use a small glass jar and change the water every two to three days. Keep only the bare stem submerged — no leaves in the water. Once roots reach about an inch long, transfer the cutting to moist soil. Expect some leaf droop during the transition.
Soil propagation remains the more reliable path. It matches how the plant roots in nature, produces soil-adapted roots from the start, and avoids the transplant shock of water-rooted cuttings.
Frequently Asked Questions
How long does it take for jewel orchid cuttings to root?
Roots typically form in four to eight weeks when the cutting is kept in moist soil with bright, indirect light. New growth at the top of the stem is the clearest sign rooting succeeded.
Can you root a jewel orchid cutting in water?
Yes, but soil rooting is more reliable because jewel orchid stems are prone to rot in water. If you use water, change it every two to three days and transfer the cutting to soil once roots reach about an inch long.
When is the best time of year to take jewel orchid cuttings?
Spring and early summer are ideal because the plant is in active growth. Cuttings taken during this period root faster and have more energy to recover from the cut.
Why is my jewel orchid cutting turning yellow or mushy?
This is almost always a sign of rot from excess moisture. Remove the cutting from the soil, cut away any mushy tissue, and replant in a drier mix with better drainage.
