
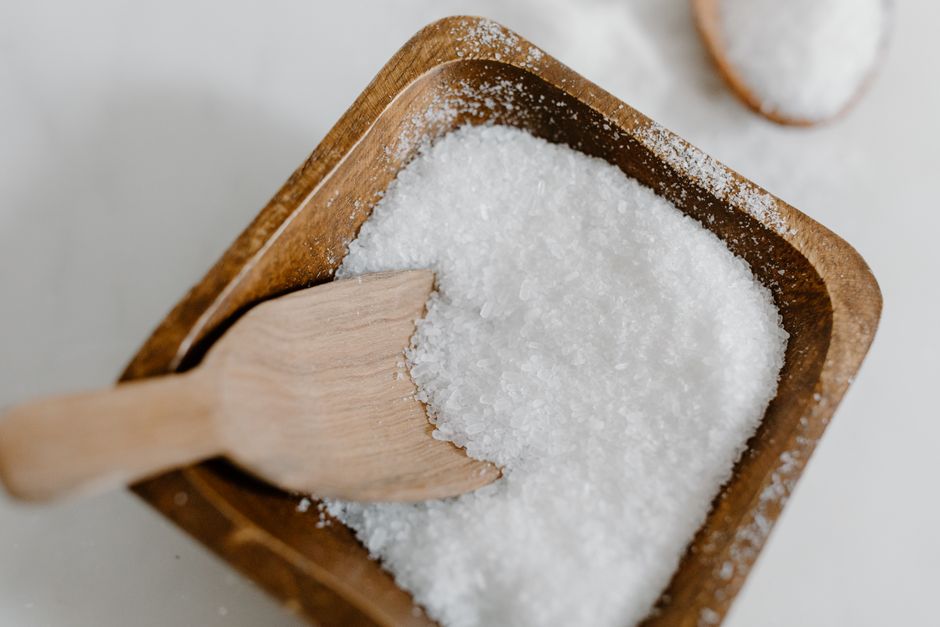
Salt is one of the oldest and most reliable food preservation tools we have. You can preserve food with salt using three main methods: dry salting, brining (wet salting), and fermentation. Dry salting pulls moisture out of food and creates an environment where spoilage bacteria cannot survive. Brining soaks food in a saltwater solution to inhibit microbial growth and season the food deeply. Fermentation uses salt to create conditions where beneficial bacteria thrive, producing lactic acid that preserves the food naturally. Each method works differently, and each has its own best uses, ratios, and safety rules.
How Does Salt Actually Preserve Food?
Salt preserves food through a process called osmosis. When salt concentration outside a cell is higher than inside, water moves out of the cell. Bacteria and fungi need water to survive and multiply. Salt draws that water away, effectively dehydrating the microbes until they cannot function.
Salt also disrupts the internal chemistry of bacteria. High salt concentrations can denature proteins and interfere with enzyme activity, which stops the microorganisms from reproducing. This is why heavily salted foods like salt cod, country ham, and salted lemons can last months without refrigeration.
Not all bacteria are equally salt-sensitive. Most spoilage bacteria stop growing at salt concentrations above 10%. Some dangerous bacteria, like Staphylococcus aureus, can tolerate higher salt levels but still fail to produce toxins below certain temperatures. Clostridium botulinum, the bacteria behind botulism, cannot grow in acidic environments or in the presence of oxygen, which is why fermentation works as a safety method when done correctly.
Salt is not a sterilizer. It slows or stops growth, but it does not kill all microbes. This distinction matters for food safety. Salt preservation changes the environment, but you still need proper technique, clean equipment, and correct ratios to keep food safe.
How To Preserve Food With Salt Dry Brine Ferment: Choosing Your Method
The three salt-based preservation methods share a common ingredient but work in fundamentally different ways. Understanding the difference helps you choose the right one for each food.
Dry salting involves rubbing salt directly onto food surfaces or layering food with salt in a container. The salt pulls moisture out of the food, creating a concentrated brine over time. This method works well for vegetables like cabbage for sauerkraut, cucumbers for pickles, and meats like country ham or salt pork.
Brining uses a pre-mixed saltwater solution. The food is fully submerged in the brine, which ensures even salt distribution. This works well for poultry, pork, fish, and vegetables like olives or green beans. Brines can be short-term for flavor and moisture, like a 12-hour turkey brine, or long-term for preservation, like barrel-cured pickles.
Fermentation is a controlled biological process. You add salt at a concentration that inhibits spoilage bacteria but allows lactic acid bacteria to grow. These beneficial bacteria convert sugars into lactic acid, which lowers the pH and preserves the food. Fermentation produces a tangy flavor and adds beneficial probiotics. Common fermented foods include sauerkraut, kimchi, and traditional dill pickles.
The choice between these methods depends on the food and the result you want. Dry salting and brining preserve through high salt concentration alone. Fermentation preserves through a combination of salt and acid, which means you can use less salt and get a more complex flavor.
What Is the Right Salt-to-Food Ratio for Each Method?
Getting the salt concentration right is not optional. Too little salt means spoilage. Too much salt makes food inedible and can still present safety issues in some cases.
For dry salting vegetables, the standard ratio is 2% salt by weight of the vegetables. For sauerkraut, weigh your shredded cabbage, then add 20 grams of salt per kilogram of cabbage. This equates to about 1 tablespoon of fine salt per 2 pounds of cabbage. This concentration is high enough to prevent harmful bacteria while still allowing fermentation.
For brining, the ratio depends on the purpose. A short-term flavor brine for poultry typically uses 5-8% salt by weight of water. That is about 50-80 grams of salt per liter of water, or roughly 3-5 tablespoons per quart. A long-term preservation brine for vegetables needs 5-10% salt by weight of water. Traditional cucumber pickles use a 5% brine, which is about 50 grams of salt per liter.
For fermentation, the target is 2-5% salt by total weight of food and water. Vegetables with high water content, like cucumbers, need more salt, closer to 5%. Denser vegetables, like carrots or green beans, do well at 2-3%. The sweet spot for most vegetable fermentation is 2-3.5%.
Use non-iodized salt for fermentation and pickling. Iodine can inhibit beneficial bacteria and cause discoloration. Table salt often contains anti-caking agents that can cloud brines. Sea salt, kosher salt, and pickling salt are the best choices. If using kosher salt, be aware that its volume-to-weight ratio differs from table salt, so weigh your salt rather than measuring by volume.



Dry Salting Step by Step
Dry salting is the simplest method to start with. It requires no special equipment beyond a container, salt, and food.
Start with clean, dry vegetables or meat. For vegetables like cabbage, shred or slice them into uniform pieces. For every kilogram of vegetables, add 20-30 grams of salt. Massage the salt into the food with clean hands. The salt will begin drawing water out within minutes.
Pack the salted food tightly into a clean glass jar or ceramic crock. Press down firmly to remove air pockets. The liquid released from the food should eventually cover the vegetables. If it does not, add a small amount of brine made with the same salt concentration to ensure everything is submerged.
Weight the food down so it stays below the liquid surface. Food exposed to air will mold. Use a clean glass disk, a food-grade plastic bag filled with brine, or a dedicated fermentation weight. Cover the container with a cloth or lid that allows gas to escape while keeping out dust and insects.
Leave the container at room temperature, ideally between 65-72°F (18-22°C), for 3-14 days depending on the food and your taste preference. Check daily for mold on the surface. Skim off any mold that forms. The food is ready when it tastes pleasantly sour and has lost its raw flavor.
Brining Step by Step
Brining requires a bit more preparation because you make the saltwater solution first.
To make a basic brine, dissolve the salt in warm water. Use the ratios described earlier based on your goal. For flavor brines, add sugar, herbs, spices, or aromatics. For preservation brines, keep it simple with just salt and water.
Cool the brine completely before adding food. Hot brine will partially cook the food and can change its texture. Once cool, submerge the food fully. Use a plate or weight to keep food below the surface.
Refrigerate short-term brines. A 5-8% brine for poultry or pork should stay refrigerated and can be used within 24-48 hours. Longer brining at these concentrations will make the food too salty.
For long-term preservation, the food must stay submerged and the container must remain cool, ideally below 60°F (15°C). A root cellar or refrigerator works well. Check the brine weekly for cloudiness, off-odors, or mold. A slight film on top is normal, but fuzzy mold or a foul smell means the batch has spoiled.
Fermentation Step by Step
Fermentation is the most rewarding method but requires the most attention to detail.
Prepare your vegetables and weigh them. Add salt at 2-3.5% of total weight. Mix thoroughly and let the vegetables sit for 10-20 minutes so they release liquid. Pack them tightly into a clean jar, pressing down to release more liquid and eliminate air pockets.
Add a brine of the same salt concentration if the vegetables do not produce enough liquid to cover themselves. The vegetables must stay completely submerged. Use a weight and an airlock system if you have one. Airlocks allow carbon dioxide to escape without letting oxygen in, which reduces the risk of mold.
Ferment at room temperature, ideally 65-72°F. Warmer temperatures speed fermentation but increase the risk of spoilage. Cooler temperatures slow it down and produce a crisper texture. Taste the ferment daily after day three. When it reaches the flavor you like, move the jar to the refrigerator. Cold storage slows fermentation dramatically but does not stop it entirely.
Fermented foods will keep for months in the refrigerator. The acidity and salt work together to prevent spoilage. As long as the food stays submerged and the brine smells clean and sour, it is safe to eat.
Safety Rules That Apply to All Three Methods
Salt preservation is safe when done correctly, but mistakes can lead to foodborne illness. Follow these rules every time.
Use clean equipment. Sterilize jars and utensils in boiling water or a dishwasher cycle before use. Wash your hands thoroughly. Contamination is the leading cause of spoiled batches.
Use the correct salt concentration. Do not guess. Weigh your food and salt. A 2% brine for sauerkraut is the minimum safe concentration for fermentation. Going below that risks the growth of harmful bacteria.
Keep food submerged. Any food exposed to air is vulnerable to mold and yeast. If you see mold on the surface, remove it immediately. The food below is usually still safe, but if the mold has penetrated or the food smells bad, discard the entire batch.
Trust your senses. Fermented foods should smell sour, tangy, and clean. They should not smell rotten, putrid, or like ammonia. If something seems off, throw it out. The cost of a lost batch is far less than a hospital visit.
Do not use salt preservation for everything. Low-acid foods like green beans and meats require pressure canning for shelf-stable storage. Salt alone does not reliably inactivate C. botulinum spores in these foods. Fermentation works because the acid produced lowers the pH below 4.6, which inhibits botulism. Dry salting and brining alone do not achieve this reliably.
Common Mistakes and How To Avoid Them
Most failed batches come down to a few repeatable errors.
The most common mistake is using too little salt. Beginners often reduce salt for health reasons, but this creates unsafe conditions. If you want lower sodium, you are better off refrigerating your ferments and eating them quickly rather than reducing the salt below safe levels.
The second most common mistake is using tap water with chlorine. Chlorine can inhibit the beneficial bacteria needed for fermentation. If your tap water is chlorinated, use filtered water or let the water sit out overnight so the chlorine evaporates.
The third mistake is fermenting in a metal container. Salt corrodes metal, and the reaction can ruin the food and leach harmful compounds. Use glass, ceramic, or food-grade plastic only.
Finally, do not rush. Fermentation takes time. A batch that is not sour enough after three days is not spoiled, it just needs more time. Taste daily and be patient.
Frequently Asked Questions
How much salt do I need for fermentation?
Use 2-3.5% salt by weight of the food. For most vegetables, 2-3% is ideal. Weigh your vegetables and add salt as a percentage of that weight.
Can I use table salt for pickling and fermenting?
Plain table salt works but is not ideal. Iodized salt and anti-caking agents can inhibit fermentation and cause cloudy brine. Sea salt or pickling salt gives better results.
How long do fermented foods last in the refrigerator?
Properly fermented vegetables last 4-6 months in the refrigerator. Keep them submerged in brine and use clean utensils each time you take some out.
Is fermented food safer than food preserved with salt alone?
Fermentation produces acid that adds a second preservation barrier. This makes fermented foods safer than salt-only preservation in many cases, provided the fermentation is done correctly.
