
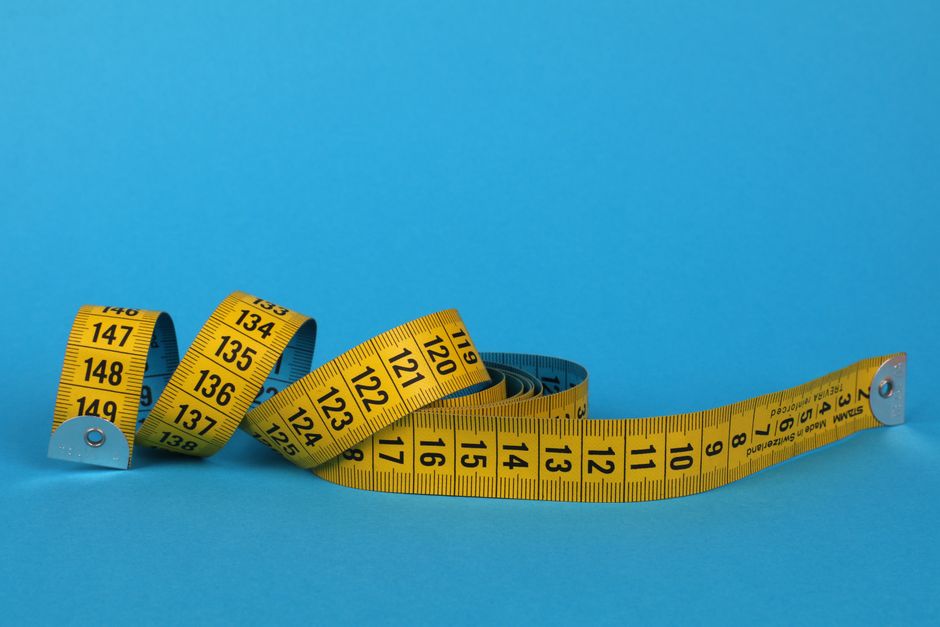
To measure a wound, first clean the area gently and use a disposable ruler or measuring tape to record the longest length (head-to-toe orientation), then the widest width perpendicular to that length. For depth, insert a sterile cotton-tipped applicator into the deepest part, mark the point at skin level, and measure the distance from the tip to that mark. Finally, use a clock-face system to document any tunneling or undermining clearly.
Why Accurate Wound Measurement Matters
Tracking wound size over time tells clinicians and caregivers whether healing is on track. A wound that gets bigger or deeper may signal infection, pressure injury progression, or a need to change treatment. Research shows that consistent measurements are one of the most reliable ways to predict healing — faster closure rates generally point to good tissue repair.
Measurements also help guide decisions about dressings, debridement, and whether to escalate care. For example, a wound that is not reducing in size by 20–40% after two weeks often means the current plan is not working. Documenting exact numbers reduces guesswork and improves communication between different providers.
How To Measure Wounds Length Depth And More
Use a simple, repeatable method every time. Here is the standard clinical approach:
- Length: Position the ruler so it aligns with the patient’s head-to-toe axis. Measure the longest visible opening edge to edge. Do not include intact skin or scabs.
- Width: Keep the ruler perpendicular to the length line. Measure the widest point of the open wound.
- Depth: Gently insert a sterile cotton-tipped applicator into the deepest part of the wound bed. Hold the applicator at the level of the skin edge, withdraw it, and measure from the tip to that mark. Do not force it — stop if you meet resistance.
- Tunneling: This is a channel that extends from the wound edge under intact skin. Use a sterile probe to explore the track, mark the deepest point, and measure the distance. Record the location using a clock face (e.g., “tunnel at 3 o’clock, 2 cm deep”).
- Undermining: This is a shelf of tissue under intact skin at the wound edge. Probe gently around the perimeter and measure the depth of any pockets. Again, use clock coordinates and the depth in centimeters or millimeters.
Write down all measurements and the date, time, and measurement method (ruler brand, probe type) so they are comparable across visits.
Measuring Wound Depth Safely
Depth measurement requires caution. Only probe wounds that you have been trained to assess. Use a sterile technique — wear clean gloves, use a new swab each time, and avoid pressing hard. Very deep wounds or wounds near major blood vessels, organs, or the chest cavity should be measured by a wound care specialist or under medical guidance.
If the wound bed has visible tissue like fat, muscle, tendon, or bone, note that as well. The type of tissue visible at the deepest point gives clues about healing stage and infection risk. For instance, bright red granulation tissue is a good sign; yellow slough or black eschar may need debridement.



Assessing Tunneling and Undermining
Tunneling and undermining can trap bacteria and slow healing. To find them, use a sterile probe (cotton swab or narrow, flexible instrument) and explore the entire edge of the wound. Insert it only at recognizable openings. Do not force it — you should feel no resistance if a channel or pocket exists.
Record the depth and direction using a clock face: 12 o’clock is toward the patient’s head, 6 o’clock toward the feet. For example, “undermining 1 cm deep from 2 o’clock to 4 o’clock.” This allows any clinician to reproduce the assessment. Some advanced wound documentation systems also use triangulation with fixed reference points like bony landmarks.
How to Document Wound Measurements
Consistent documentation includes: date, time, wound location, length, width, depth, tunneling and undermining measurements (with clock positions), wound bed tissue type, drainage amount and color, and periwound skin condition. Use a standard form if available. If not, write clearly in the medical record or wound diary.
Take photographs with a ruler placed next to the wound for visual reference. Use consistent lighting and distance each time. Label photos with the date and patient identifier. Some facilities require a color scale card to ensure true color reproduction.
Wound Measurement Tools and Techniques
Several tools exist beyond the basic ruler and swab:
- Disposable paper rulers — inexpensive and hygienic. Many have a window with grid lines to estimate area.
- Adhesive wound measurement guides — clear, flexible plastic sheets with imprinted scales. They can be placed directly over the wound to trace its outline.
- Kundin wound gauge — a simple three‑layered device that measures length, width, and depth simultaneously.
- 3D wound imaging systems — handheld cameras that create a digital model of the wound. These provide volume, surface area, and color analysis. They are expensive and less common in home care but increasingly used in hospital wound centers.
For most home or clinic settings, a sterile cotton swab and a disposable ruler are sufficient. What matters most is consistency — using the same tool and method each time to make the numbers comparable.
Common Mistakes to Avoid
Measuring over a curved surface without accounting for the contour can underestimate depth or overestimate length. Always try to align the ruler parallel to the body surface without pressing into the wound.
Another frequent error is measuring the same wound in different orientations each time. Always use head-to-toe for length and side-to-side for width. If the wound changes shape, note that on the documentation form rather than switching the measurement method mid‑treatment.
Not documenting the presence or absence of tunneling is a missed opportunity to monitor hidden infection pockets. Also, avoid measuring through drainage or blood — clean the wound gently first so you see the true edges.
Frequently Asked Questions
What is the best way to measure a wound?
Use a disposable ruler to measure the longest length (head-to-toe) and the widest width perpendicular to that line. For depth, gently insert a sterile cotton-tipped applicator into the deepest part and measure from the tip to the skin-level mark.
How do you measure wound tunneling?
Insert a sterile probe gently into the channel until you feel resistance, mark the probe at the wound edge, and measure the distance from tip to mark. Record the depth and direction using a clock face (e.g., 2 cm deep at 9 o’clock).
Do you need to wear gloves when measuring a wound?
Yes. Clean or sterile gloves protect both you and the wound from contamination. Change gloves between patients and after touching dirty surfaces.
How often should wound measurements be taken?
Clinical guidelines typically recommend measuring at least once a week, and more often (every dressing change) for rapidly changing wounds. Always measure at the same time of day and with the same method to track true progress.
