
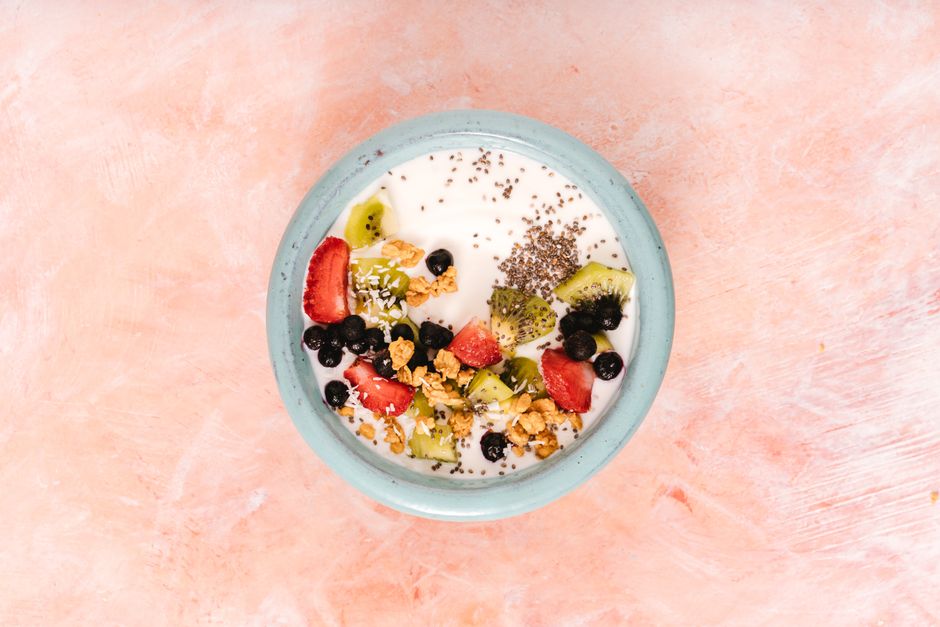
Making soy yogurt with probiotics at home is a simple process: heat soy milk, cool it to the right temperature, add a probiotic source, and keep it warm for several hours to ferment. You need only three core ingredients: plain soy milk, a probiotic starter, and a way to hold a steady temperature around 110°F. The result is a dairy-free yogurt that contains live cultures, provided you use the right type of starter and ferment it long enough.
What Makes Soy Yogurt Different From Dairy Yogurt?
Soy yogurt starts with soy milk instead of cow’s milk. The fermentation process is similar, but the chemistry is different. Soy milk contains less natural sugar than dairy milk. It has complex carbohydrates called oligosaccharides that feed bacteria differently than lactose does.
Most commercial yogurt starters are designed for dairy milk. They rely on lactose, the sugar in cow’s milk, for food. Soy milk has no lactose. This is why many people fail at making soy yogurt on their first try. The bacteria simply starve.
You need a starter that can ferment sugars found in soy. Some probiotic strains handle this well. Others do not. This is the single most important factor in whether your soy yogurt sets properly.
Which Probiotic Strains Work Best For Soy Yogurt?
Not all probiotics can ferment soy milk effectively. Research shows that certain strains of Lactobacillus and Bifidobacterium perform better than others in plant-based milks. Lactobacillus plantarum and Lactobacillus rhamnosus are among the most reliable choices for soy fermentation.
Streptococcus thermophilus and Lactobacillus bulgaricus are the classic yogurt bacteria. They work in dairy because they consume lactose. In soy milk, they often struggle. Some commercial yogurt starters contain these strains only, which explains inconsistent results.
The most dependable approach is to use a probiotic capsule that lists strains known to ferment plant sugars. Look for capsules that contain Lactobacillus plantarum, Lactobacillus rhamnosus, or Bifidobacterium lactis. These strains can digest the sugars found in soy.
You can also use a commercial soy yogurt starter culture. These are specifically formulated for plant-based milks. They cost a few dollars per packet and remove the guesswork. Many people find this the easiest path to consistent results.
What Ingredients Do You Need?
Keep the ingredient list short. More ingredients mean more variables and more chances for something to go wrong.
- Plain unsweetened soy milk — Check the label. It should contain only soybeans and water, possibly with a thickener like guar gum. Avoid soy milk with added sugar, vanilla, or other flavorings.
- Probiotic starter — Either a capsule with the right strains or a commercial soy yogurt starter.
- Thickener (optional) — Agar powder, tapioca starch, or a spoonful of store-bought soy yogurt can improve texture. Soy yogurt tends to be thinner than dairy yogurt.
The protein content of your soy milk matters. Soy milk with at least 7 grams of protein per serving produces a firmer yogurt. Higher protein helps the yogurt set. Some brands add pea protein or other plant proteins to boost the number. These can improve texture.
Avoid soy milk labeled “light” or “low-calorie.” These have less protein and more water. They ferment poorly and often stay runny.



Step-by-Step: How To Make Soy Yogurt With Probiotics At Home
Cleanliness matters more than most people realize. Bacteria that cause spoilage compete with your probiotic cultures. Sterilize your equipment before starting.
Step 1: Heat The Soy Milk
Pour the soy milk into a clean pot. Heat it to 180°F and hold it there for 10 minutes. This step serves two purposes. It kills unwanted bacteria and it denatures the soy proteins, which helps the yogurt set thicker.
Do not skip this step. Raw soy milk straight from the carton contains background bacteria. If you skip the heating step, those bacteria compete with your probiotics and can spoil the batch.
Step 2: Cool The Soy Milk
Cool the soy milk to between 108°F and 112°F. This is the ideal temperature range for most probiotic strains. Above 115°F, you risk killing the bacteria. Below 100°F, fermentation slows dramatically.
An instant-read thermometer is essential here. Guessing the temperature leads to failed batches. Let the milk cool naturally in the pot, stirring occasionally to prevent a skin from forming on top.
Step 3: Add The Probiotic Starter
If using a capsule, open it and empty the powder into a small bowl. Add a few tablespoons of the warm soy milk and stir until dissolved. This prevents clumping. Then pour this mixture back into the pot of soy milk and stir thoroughly.
If using a commercial starter packet, follow the package instructions. Most work the same way. If using store-bought soy yogurt as a starter, whisk in about two tablespoons per quart of soy milk.
Step 4: Ferment
Pour the inoculated soy milk into clean glass jars. Cover them with a lid or cloth. Keep them at a steady temperature between 108°F and 112°F for 8 to 12 hours.
Several tools can maintain this temperature. A yogurt maker is the simplest. An Instant Pot with a yogurt setting works well. A dehydrator, an oven with the light on, or a cooler filled with warm water also works. The key is temperature stability. Fluctuations slow fermentation and produce inconsistent results.
Longer fermentation produces tangier yogurt. At 8 hours, the yogurt is mild. At 12 hours, it is noticeably sour. Some people prefer 14 hours for a pronounced tart flavor. The longer fermentation also produces more lactic acid, which acts as a natural preservative.
Step 5: Chill And Set
After fermentation, move the jars to the refrigerator. Chill for at least 4 hours before eating. Cold temperatures stop fermentation and allow the yogurt to thicken further. Soy yogurt often looks thin when warm but firms up in the fridge.
If the yogurt is still runny after chilling, you can stir in a small amount of agar powder dissolved in hot water. This is a texture fix, not a fermentation fix. Alternatively, strain the yogurt through a cheesecloth to remove excess liquid, similar to making Greek yogurt.
How Do You Keep The Live Cultures Alive?
Live probiotic cultures are sensitive. They die from heat, time, and improper storage. The moment fermentation ends, the cultures begin to decline.
Refrigeration slows this decline but does not stop it. Most homemade yogurt retains meaningful levels of live cultures for about one to two weeks. After that, the count drops significantly. Eat your yogurt within this window to get the probiotic benefit.
Freezing stops the cultures in a dormant state. You can freeze soy yogurt in ice cube trays and thaw individual cubes as needed. This also works as a way to save a portion of your batch as a starter for future batches. However, repeated re-culturing from your own yogurt can lead to strain drift over time. After several generations, the culture balance changes. Many home fermenters start fresh with a new probiotic capsule every few batches.
Do not add hot ingredients to your finished yogurt. Stirring hot fruit compote or granola straight from the oven into yogurt kills the live cultures. Let toppings cool to room temperature before mixing.
Why Does My Soy Yogurt Turn Out Runny Or Grainy?
Runny yogurt is the most common complaint. Several factors cause it. The soy milk may have too little protein. The fermentation temperature may have been too low. Or the fermentation time was too short.
Soy milk naturally produces a thinner gel than dairy milk. This is a structural difference. Dairy casein forms a strong gel. Soy protein forms a weaker one. Even a perfect batch of soy yogurt will be softer than cow’s milk yogurt.
Grainy or separated texture usually means the temperature was too high or the culture was stressed. If the soy milk exceeded 115°F when you added the starter, many bacteria died. The survivors fermented unevenly, producing a curdled appearance.
Another cause of separation is overheating during the heating step. If you boil soy milk aggressively, the proteins can coagulate. Heat it gently and stir frequently.
One non-obvious tip: add a small amount of sugar to the soy milk before fermenting. About one teaspoon of sugar or maple syrup per quart gives the bacteria a quick energy source. This helps fermentation start faster and can improve texture. The bacteria consume the sugar, so the final yogurt is not noticeably sweeter.
Is Homemade Soy Yogurt Actually A Good Probiotic Source?
Homemade soy yogurt contains live cultures if you fermented it correctly. The question is how many. Without laboratory testing, you cannot know the exact count in your batch. Home fermentation is variable.
Commercial yogurts are tested to guarantee a minimum number of live cultures at the time of purchase. Homemade batches have no such guarantee. Your results depend on starter quality, fermentation conditions, and storage time.
That said, a properly fermented batch of soy yogurt almost certainly contains billions of live bacteria per serving. This is comparable to commercial yogurt. The cultures are real, active, and capable of colonizing the gut transiently.
One caveat: the health benefits of probiotics are strain-specific. Different strains have different effects. The Lactobacillus plantarum in your soy yogurt may support digestion, but it is not the same as the Lactobacillus rhamnosus GG studied in clinical trials for specific conditions. Eating homemade soy yogurt supports a diverse diet, but it is not a substitute for a targeted probiotic therapy.
Common Mistakes To Avoid
Most failed batches trace back to a handful of errors. Knowing them in advance saves time and ingredients.
- Using the wrong starter — Dairy-only yogurt cultures often fail in soy milk. Use a starter with plant-sugar-fermenting strains.
- Adding starter to milk that is too hot — Above 115°F, most probiotic bacteria die. Always cool the milk first.
- Skipping the heating step — This allows competing bacteria to spoil the batch.
- Inconsistent fermentation temperature — Temperature swings stress the cultures and produce thin yogurt.
- Judging readiness by thickness — Soy yogurt may never get as thick as dairy yogurt. Judge by time and smell, not texture.
If your first batch fails, adjust one variable at a time. Change the starter first. That is the most common culprit. Then check your temperature control. Then consider switching to a higher-protein soy milk.
Making soy yogurt at home takes practice. The first batch may not be perfect. The second or third usually is. Once you find a routine that works, the process becomes reliable and repeatable.
Frequently Asked Questions
Can I use any probiotic capsule to make soy yogurt?
No. Many probiotic capsules contain strains that cannot ferment soy milk effectively. Look for capsules listing Lactobacillus plantarum, Lactobacillus rhamnosus, or Bifidobacterium lactis.
How long does homemade soy yogurt last in the refrigerator?
Homemade soy yogurt stays fresh for about one to two weeks in the fridge. Live culture counts decline over time, so eat it earlier rather than later for maximum probiotic benefit.
Why is my soy yogurt not thickening?
Low-protein soy milk, short fermentation time, or temperatures below 100°F are the usual causes. Try a soy milk with at least 7 grams of protein per serving and ferment for at least 10 hours.
Can I use store-bought soy yogurt as a starter?
Yes, if it contains live active cultures. Check the label for “live cultures” or “contains active cultures.” Use about two tablespoons per quart of soy milk.
