
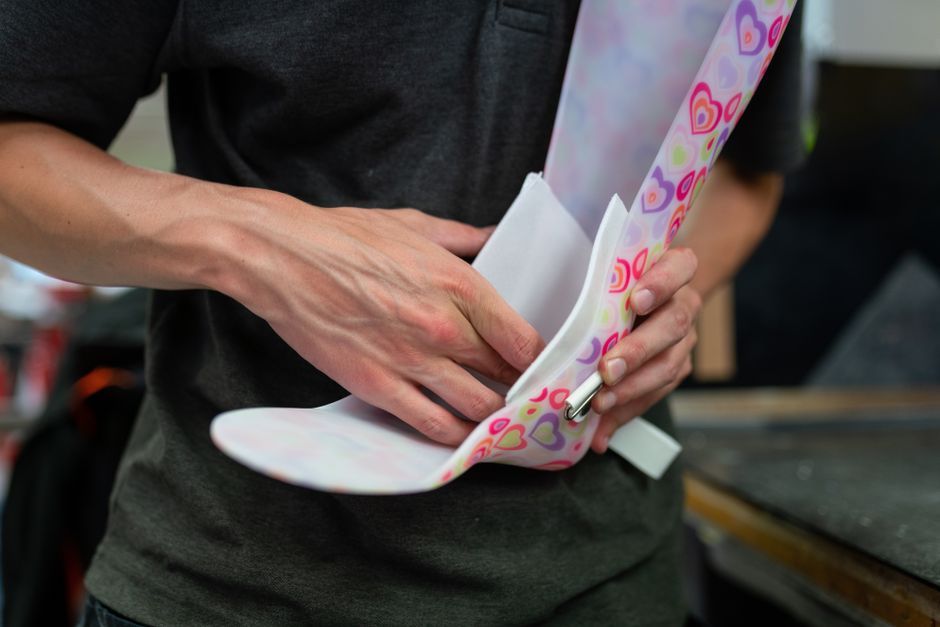
A Sam Splint is a versatile, foam-padded aluminum splint used to stabilize injuries like wrist sprains, forearm fractures, and ankle injuries. To use one, you first mold the splint to the shape of the injured limb, then pad any bony areas, and finally secure it with an elastic bandage or tape while keeping the joint in a neutral, comfortable position. The splint works by keeping the injured area still, which reduces pain and prevents further damage until you can see a medical professional.
What Is a Sam Splint and How Does It Work?
A Sam Splint is a thin sheet of aluminum covered with a closed-cell foam layer. It is bendable and can be shaped by hand to fit almost any part of the body. Once molded, it holds its shape and keeps the injured area from moving.
The splint works through basic physics. It acts as a rigid beam that spans the injured joint or bone. When the splint is secured, it transfers the forces of movement away from the injury. This immobilization is the core of early injury care. It reduces pain, limits soft tissue damage, and helps prevent a simple injury from becoming worse.
Because the splint is lightweight and compact, it is common in first aid kits, emergency rooms, and ambulances. It is also sold for home use. It is not a cast. It does not fully harden like plaster or fiberglass. It is a temporary tool for stabilization, not a long-term treatment.
How To Use a Sam Splint on the Wrist
Wrist injuries are among the most common reasons a Sam Splint is used. The goal is to hold the wrist and forearm still in a neutral position. A neutral position means the hand is in line with the forearm, not bent up, down, or sideways.
Start by placing the splint against the underside of the forearm. The splint should extend from the middle of the forearm, across the wrist, and end at the palm of the hand. The fingers should remain free and able to move unless the injury involves them.
Mold the splint to follow the natural curve of the forearm and wrist. You want a gentle bend at the wrist, not a sharp angle. Before wrapping, check that the splint is smooth and has no sharp edges or creases that could press into the skin.
Pad the area between the thumb and index finger. This web space is a common spot for pressure sores. You can use gauze, a soft cloth, or extra foam if available. Place the padding before you wrap the bandage.
Secure the splint with an elastic bandage or medical tape. Start wrapping at the forearm and work toward the hand. Wrap snugly enough to hold the splint in place, but not so tight that it cuts off circulation. The wrap should feel firm, like a handshake, not like a tourniquet.
Check the fingers after wrapping. They should be pink and warm. If they turn pale, blue, or feel numb, the wrap is too tight. Loosen it and re-wrap.
How To Use a Sam Splint on the Ankle
Ankle injuries, especially sprains, are another common reason for splinting. The splint holds the ankle at a roughly 90-degree angle to the leg. This position keeps the joint stable and prevents the foot from rolling inward or outward.
Place the splint along the back of the calf and under the foot. The splint should extend from the upper calf, down past the heel, and end just past the toes. This creates an L-shape that supports both the lower leg and the bottom of the foot.
Mold the splint carefully around the heel. The heel should sit comfortably in the curve of the splint. Make sure the splint is shaped to the foot, not just laid flat against it. A poorly molded splint can create pressure points at the heel or the Achilles tendon.
Pad the ankle bones on both sides. The medial malleolus (inner ankle bone) and lateral malleolus (outer ankle bone) are prominent and prone to pressure injury. Extra padding here is worth the effort.
Wrap the splint with an elastic bandage. Start at the top of the calf and wrap downward toward the foot. Leave the toes visible so you can check circulation. The wrap should be snug but allow you to slide one finger underneath it.
Check the toes after wrapping. They should be warm and pink. If they feel cold or look pale, loosen the wrap immediately.




How To Use a Sam Splint on Other Body Parts
The same basic principles apply to other injuries. A Sam Splint can be used on the forearm, elbow, finger, or lower leg. The key is to immobilize the joint above and below the injury.
For a forearm injury, splint from the elbow to the hand. For an elbow injury, splint from the upper arm to the wrist. For a finger, a small piece of splint can be cut and molded to hold the finger straight. For a lower leg injury, splint from the knee to the ankle.
In every case, the rule is the same. Immobilize the joint above and below the injury site. This prevents movement at the injury itself. Padding is essential at bony prominences. Circulation checks are mandatory after wrapping.
One common mistake is making the splint too short. A splint that does not span the joint above and below the injury will not provide adequate stability. When in doubt, use a longer splint rather than a shorter one.
Key Mistakes To Avoid When Using a Sam Splint
The most serious mistake is applying the splint too tightly. A tight splint can compress nerves and blood vessels. This can lead to permanent damage in a matter of hours. If the injured person reports increased pain, numbness, or tingling, loosen the splint right away.
Another common error is failing to pad bony areas. The aluminum core of the splint can press into the skin and cause pressure sores, especially at the wrist, ankle, and heel. Extra padding is not optional for longer transport times.
Do not attempt to straighten a deformed limb. If a bone is visibly out of place or the joint looks abnormal, splint it in the position you found it. Trying to align the limb can cause further damage to nerves, blood vessels, and soft tissue.
Do not place the splint directly against bare skin for extended periods. The foam layer is comfortable for a short time, but moisture from sweat can cause skin irritation. A thin cloth layer between the splint and skin is a reasonable precaution.
Finally, do not use a Sam Splint as a substitute for medical care. A splint is a temporary measure. Most wrist and ankle injuries need professional evaluation, including an X-ray to rule out a fracture. If you suspect a fracture, seek medical attention promptly.
When To See a Doctor Instead of Splinting at Home
Some injuries require immediate medical attention. Do not rely on a home splint when any of the following signs are present.
- Visible deformity or bone protruding through the skin
- Numbness or tingling in the fingers or toes
- Inability to bear any weight on the injured limb
- Severe pain that does not improve with rest
- Cold, pale, or blue skin beyond the injury
- A popping or tearing sensation at the time of injury
These signs may indicate a fracture, dislocation, or severe ligament tear. A Sam Splint can provide temporary comfort during transport, but it cannot treat these injuries. Delaying professional care can lead to poor healing or permanent disability.
For minor sprains, the general approach is rest, ice, compression, and elevation. This is commonly known as the RICE method. A Sam Splint can serve as the compression component, but it should not be worn continuously for more than a few hours without a medical evaluation.
How To Remove a Sam Splint Safely
Removing a Sam Splint is straightforward but should be done carefully. Cut or unwrap the elastic bandage slowly. Do not pull the bandage away from the skin forcefully, as this can cause friction burns.
Once the bandage is removed, gently lift the splint away from the limb. Do not bend the splint while it is still against the skin, as this can pinch the skin between folds of aluminum. Lift it straight off.
Inspect the skin after removal. Look for red marks, blisters, or areas of numbness. Some redness is normal from pressure, but it should fade within a few minutes. Persistent redness or blistering indicates the splint was applied too tightly or left on too long.
If you are removing the splint because of increased pain or numbness, seek medical attention before reapplying anything. Do not simply re-wrap the limb and hope the problem resolves.
Frequently Asked Questions
Can you reuse a Sam Splint?
Yes, a Sam Splint can be reused if it is not bent out of shape and the foam padding is intact. Clean it with a mild soap and water solution and allow it to dry completely before storing it.
How tight should a Sam Splint be?
The splint should be snug enough to hold the limb still but loose enough to slide one finger underneath the bandage. If the fingers or toes turn pale, blue, or numb, the splint is too tight and must be loosened immediately.
Can you sleep with a Sam Splint on?
You should not sleep with a Sam Splint on unless a doctor has instructed you to do so. The risk of the bandage tightening or shifting during sleep is too high, and circulation problems can develop without you noticing.
Is a Sam Splint the same as a cast?
No, a Sam Splint is a temporary stabilization device, while a cast is a rigid, long-term immobilization treatment. A Sam Splint holds the injury still for transport or short-term care, but it does not provide the same level of support as a professionally applied cast.
