
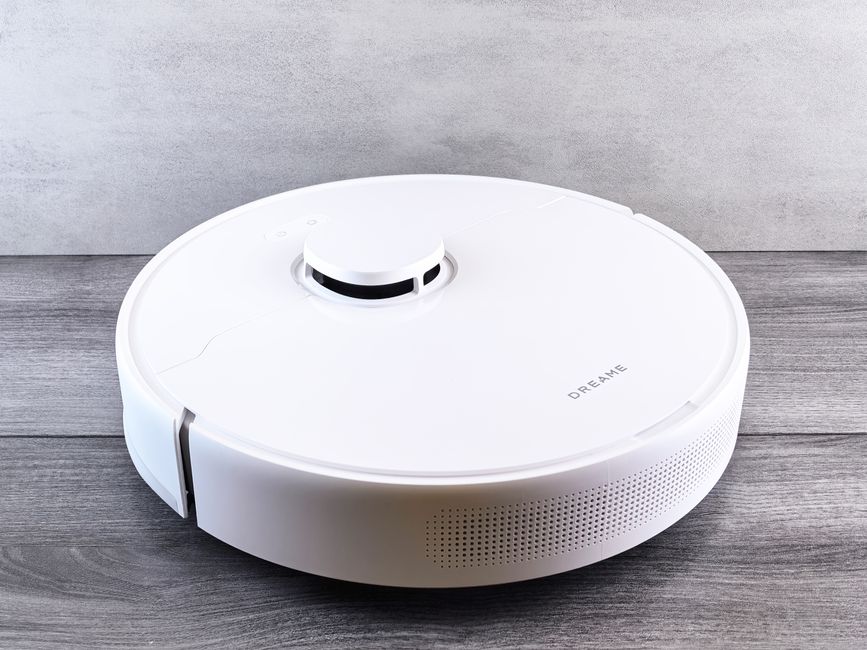
Setting up a robot vacuum is mostly about preparation, not technology. You need to clear the floor, place the charging dock correctly, and let the robot map your home before it cleans. Most modern robot vacuums take about 30 to 60 minutes from unboxing to the first full cleaning cycle, though mapping can take longer on the first run.
What Do You Need Before You Start?
Gather everything before you open the box. This saves time and frustration later.
You will need the robot vacuum itself, the charging dock, the power adapter, and any included accessories like spare filters or side brushes. A clean, dry cloth and a pair of scissors are also useful for removing packaging tape and wiping down the sensors.
Read the quick start guide that came with your specific model. While the general steps are similar across brands, the exact button combinations and app setup can differ. The manual is the most reliable source for your specific device.
Where Should You Place the Charging Dock?
Dock placement is the single most important decision in the setup process. The dock’s position determines how easily the robot can find its way home and how much of your home it can reach.
Place the dock against a wall in an open area. Leave at least 3 feet of clear space in front of the dock and about 1.5 feet on either side. This gives the robot room to approach and dock properly. Do not place it under furniture, in tight corners, or near stairs without a barrier.
Keep the dock away from direct sunlight and heat sources. The infrared sensors on many models can be confused by bright light or heat. A spot under a couch or behind a door will cause problems because the robot cannot navigate to it reliably.
Plug the adapter into the wall and connect it to the dock. The dock should have an indicator light that turns on. Set the robot on the dock to begin charging before you do anything else. A full charge can take 2 to 3 hours depending on the model.
How Do You Prepare Your Home for the First Run?
Robot vacuums are not replacements for a quick tidy-up. They work best when floors are relatively clear. Loose cables, small toys, and clothing on the floor can jam the brushes or cause the robot to stop mid-cycle.
Pick up items smaller than the robot itself. This includes phone chargers, socks, pet toys, and paper clips. Coil any loose wires or tuck them under furniture. Loose cords are a common reason robot vacuums get stuck.
Move lightweight chairs and stools out of the way if possible. The robot can bump into them and push them around, which disrupts the mapping process. If you cannot move furniture, use the included magnetic boundary strips or virtual walls if your model has them.
Close doors to rooms you do not want cleaned during the first run. This keeps the mapping process simple. You can open them later once the robot has a basic map of the main areas.




How Do You Set Up the App and Connect to Wi-Fi?
Most modern robot vacuums require a smartphone app for full functionality. The app allows you to start and stop cleaning, set schedules, and view maps. Without the app, the robot will still clean, but you lose access to features like room selection and no-go zones.
Download the app made by your robot vacuum’s manufacturer. Do not use a third-party app. Each brand has its own app, and they are not interchangeable. The app store listing will show the correct one for your device.
Create an account if you do not already have one. Most apps require an email address and password. Some allow sign-in through Apple or Google accounts.
Put the robot on the dock and make sure it is charging. Open the app and follow the prompts to add a new device. The app will ask you to press and hold a button on the robot to enter pairing mode. This is usually the power button or a dedicated Wi-Fi button, held for 3 to 5 seconds until the indicator light blinks.
Select your home Wi-Fi network and enter the password. The robot only supports 2.4 GHz Wi-Fi networks, not 5 GHz. If your router broadcasts both, make sure your phone is connected to the 2.4 GHz band during setup. Some routers require you to temporarily disable the 5 GHz band to complete the connection.
Wait for the app to confirm the connection. This can take up to a minute. If it fails, restart the robot and try again. Move the dock closer to the router if the signal is weak, or check that you entered the correct Wi-Fi password.
How Do You Run the First Mapping Cycle?
The first cleaning run is not really about cleaning. It is about mapping. The robot uses its sensors to create a layout of your home, identifying walls, furniture, and obstacles. This map is what allows the robot to clean specific rooms on command later.
Before starting the first full cleaning cycle, clear the floor completely. Remove all obstacles you can. The fewer obstacles, the more accurate the map will be. This is especially important in the first run because the map is built from scratch.
Use the app to start a full cleaning cycle. Do not use a spot clean or edge clean for the first run. You want the robot to cover the entire accessible area to build a complete map.
Let the robot run without interruption. Do not pick it up, move it, or open doors while it is working. Interruptions confuse the mapping process and can result in an incomplete or inaccurate map.
Expect the first run to take longer than normal cleaning cycles. The robot moves more slowly as it maps, and it may revisit areas to confirm its readings. A first run of a small apartment can take 45 minutes. A larger home can take over an hour.
When the robot returns to the dock, the app should show a map of your home. This map may look rough or incomplete. That is normal. Many models refine the map over subsequent cleaning runs. Some models allow you to save the map after the first complete run.
How Do You Set Up No-Go Zones and Room Labels?
Once the map is saved, you can customize where the robot cleans. This is where the app becomes genuinely useful.
Most apps allow you to draw boundaries on the map to create no-go zones. These are areas where the robot will not go. Common uses include areas with many cables, pet food bowls, or areas with fragile items on the floor. Place a no-go zone around any area that caused problems during the first run.
Some apps also allow you to set invisible walls. These are similar to no-go zones but function as straight lines that the robot will not cross. This is useful for blocking off an entire room or section of a hallway without closing a door.
If your model supports room labeling, you can name each room on the map. The app will show outline shapes that you can label as “Living Room,” “Kitchen,” or “Bedroom.” This allows you to send the robot to a specific room with a single tap.
Check your specific app’s interface for these features. Not all models have them. Budget models may only offer basic no-go zones or none at all. If your model lacks these features, you can still use physical boundary strips if they were included or purchased separately.
How Do You Set a Cleaning Schedule?
Cleaning schedules are one of the main reasons people buy robot vacuums. The robot cleans while you are at work or asleep, so you come home to clean floors.
Open the app and look for the schedule or timer function. This is usually labeled “Schedule” or “Cleaning Schedule.” You can set specific days of the week and times for the robot to start cleaning.
Choose a time when the floors are clear. For most people, this is during the workday or early morning. Avoid scheduling cleaning when you are likely to be moving around the house, as the robot will constantly avoid you and may take longer to finish.
Set the schedule for the whole house initially. Once you trust the map and the robot’s performance, you can refine the schedule to clean specific rooms on specific days. For example, you might clean the kitchen daily and the bedrooms twice a week.
Make sure the robot is on the dock and charging when the scheduled time arrives. If the battery is too low, the robot will not start. Most models will skip the scheduled clean if the battery is below a certain level and will not catch up later.
How Do You Maintain the Robot After Setup?
Setup is not a one-time event. Robot vacuums require regular maintenance to keep working well. The most common issue is a full dustbin, which reduces suction and can cause the robot to stop mid-cycle.
Empty the dustbin after every cleaning cycle or when the app tells you it is full. Most dustbins are easy to remove and empty over a trash can. Wash the filter regularly according to the manufacturer’s instructions. A clogged filter reduces suction power significantly.
Check the main brush and side brushes weekly. Hair and string wrap around the brushes and can stop them from spinning. Remove any tangled debris. Many models come with a small cleaning tool that includes a blade for cutting hair off the brush.
Wipe the sensors on the front and bottom of the robot every few weeks. Dust on the sensors can cause navigation problems. Use a dry cloth. Do not use water or cleaning solutions on the sensors.
Frequently Asked Questions
How long does it take to set up a robot vacuum?
Physical setup takes about 10 to 15 minutes, including dock placement and clearing the floor. The first full charging cycle takes 2 to 3 hours, and the first mapping run can take 45 minutes to over an hour depending on the size of your home.
Why is my robot vacuum not connecting to Wi-Fi?
The most common cause is using a 5 GHz Wi-Fi network instead of 2.4 GHz. Check that your phone is on the 2.4 GHz band and try again, or temporarily disable the 5 GHz band on your router during setup.
Do I need to run the robot vacuum before setting up the app?
No, set up the app first and charge the robot fully before the first run. The app is required for mapping, scheduling, and creating no-go zones, and the robot needs a full battery to complete the first mapping cycle without stopping.
Can I use a robot vacuum without a smartphone?
Yes, most robot vacuums can be started with a physical button on the device. However, you will lose access to mapping, schedules, no-go zones, and room-specific cleaning, which are the main benefits of a robot vacuum.
