Putting on roof shingles is a job many homeowners think about doing themselves. The basic steps are: remove old shingles, install underlayment, lay drip edge, then nail shingles starting from the bottom edge and working up. Each row overlaps the one below it by about five to six inches. You stagger the seams so no two cut ends line up in the same gap between rows. Nails go in the shingle’s nailing strip, about one inch from each edge and just above the tar strip. It sounds simple, but roofing has many details that matter for keeping water out. This guide walks through each step and explains what the evidence shows about doing it right.
What Tools and Materials Do You Actually Need for Roof Shingles?
Before starting any roofing job, you need the right gear. The list is not long, but each item serves a clear purpose. Standard three-tab asphalt shingles are the most common choice for residential roofs. They are affordable and easy to work with. You also need roofing felt or synthetic underlayment, drip edge metal, roofing nails, and roofing cement for sealing.
For tools, a roofing nailer is the most efficient option. A hammer works but takes much longer and increases the chance of missed strikes. You also need a utility knife with extra blades, a chalk line for marking straight rows, a tape measure, a pry bar for removing old shingles, and a ladder that extends at least three feet above the roof edge. Safety gear includes a harness anchored to the roof ridge or a secure point inside the attic. The CDC reports that falls are the leading cause of death in construction, and roofing accounts for a large share of those falls.
Most people underestimate how much material they need. A square of shingles covers 100 square feet. Measure your roof length and width, multiply for area, then divide by 100. Add ten percent for waste and mistakes. Underlayment should cover the entire roof deck with six-inch overlaps at seams. Drip edge runs along all eaves and rakes. Get enough nails — about four per shingle for standard installation.
How Do You Prepare the Roof Deck Before Shingling?
Preparation is where most mistakes happen. The roof deck must be clean, dry, and smooth. If you are re-roofing over existing shingles, check local building codes first. Some areas allow one layer over another, but two layers is the maximum. The International Residential Code states that removing old shingles is required when the deck is damaged or when the existing layer is more than one thick. Leaving multiple layers traps heat and moisture, which rots the deck faster.
Inspect the deck for soft spots, rot, or loose boards. Replace any damaged plywood or OSB. Nail down any loose sections with ring-shank nails. The deck must be flat — bumps or dips cause shingles to buckle and leak. Sweep off all debris, dust, and nails. Then install drip edge along the eaves first. The drip edge should sit under the underlayment on the eaves but over it on the rakes. This detail matters because water running down the roof needs a clear path off the edge, not behind the fascia.
Roll out the underlayment next. Start at the bottom edge and work upward. Overlap each row by at least six inches. Use cap nails or staples spaced six inches apart along the edges and twelve inches in the field. Synthetic underlayment is stronger than felt and less likely to tear. It also does not absorb water like felt does. Some studies suggest synthetic underlayment lasts longer and provides better protection during delays between installation steps. But felt still works fine if installed correctly.
How To Put On Roof Shingles Step By Step — The Actual Installation
This section covers the core process. Start at the bottom edge of the roof. Install a starter strip course first. This is a row of shingles with the tabs cut off. Place it along the eaves so the sealed edge faces upward. Nail it down. The starter strip prevents wind from lifting the first row of full shingles. Many people skip this step, but research from the Asphalt Roofing Manufacturers Association shows that starter strips reduce blow-off failures significantly.
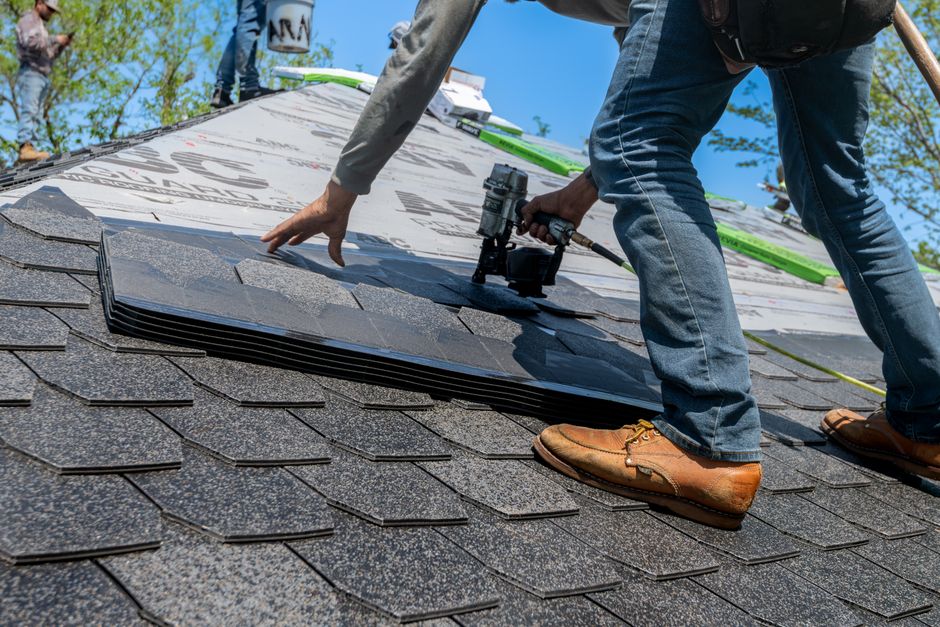
Now lay the first full row of shingles on top of the starter strip. Align them so the bottom edge hangs over the drip edge by about a quarter inch. Nail each shingle with four nails placed one inch from each side and just above the tar strip. The nails must penetrate at least three-quarters of an inch into the deck or sheathing. Too shallow and they pull out. Too high and they miss the nailing zone entirely.
Each subsequent row goes above the previous one, overlapping by five to six inches. Use a chalk line to mark straight rows every six inches up the roof. Stagger the seams so no two cut ends line up in the same gap between shingles. A common pattern is to cut the first shingle of each row by half a tab. This offsets the joints and prevents water from finding a straight path through the gaps. Nail each shingle the same way — four nails per shingle, positioned correctly.
Work your way up the roof row by row. At valleys, install metal flashing before shingling. The shingles should extend at least six inches past the valley center on each side. Cut them at a slight angle so water flows cleanly into the valley. At hips and ridges, use specially designed ridge shingles or cut standard shingles into thirds. Nail them on each side, overlapping by five inches. Ridge vents require cutting a slot in the deck first, then covering with vent material and shingles.
| Step | Key Detail | Common Mistake |
|---|---|---|
| Starter strip | Cut tabs off, seal edge up | Skipping it entirely |
| First row | Overhang drip edge 1/4 inch | Too much or too little overhang |
| Nail placement | 1 inch from edges, above tar strip | Nailing too high or too low |
| Row overlap | 5-6 inches per row | Uneven overlap causing leaks |
| Seam stagger | Half-tab offset each row | Aligned seams |
| Valley flashing | Metal under shingles, 6-inch extension | No flashing or too short |


What Are the Most Common Mistakes People Make When Shingling a Roof?
Even experienced DIYers make errors that cause leaks or shorten roof life. The most common mistake is incorrect nail placement. Nails driven too high miss the nailing strip and leave the shingle loose. Nails driven too low sit below the tar strip and let water seep in. The correct zone is between the tar strip and the top edge of the shingle, about five-eighths to three-quarters of an inch above the cutouts. Research published in the Journal of Building Physics found that improperly nailed shingles are the leading cause of wind damage in residential roofs.
Another frequent error is not staggering seams properly. When two rows have aligned cut ends, water has a direct path to the deck. This creates a leak that may not show up inside for months. Staggering by half a tab prevents this. Some people also forget to install drip edge on rakes, only putting it on eaves. Water running off the rake edge then soaks into the fascia board and rots it.
Overdriving nails is another problem. Nails should be driven flush with the shingle surface, not sunk into it. An overdriven nail compresses the shingle and creates a depression where water pools. Over time, this wears the shingle faster. Underdriven nails leave the head exposed, which can scrape the shingle above it and cause premature wear. A roofing nailer with depth adjustment helps avoid both issues.
Finally, many people do not seal around penetrations correctly. Pipes, vents, and chimneys need flashing and boot seals. A common shortcut is to just caulk around the base. Caulk dries out and cracks within a few years. Proper flashing involves step flashing installed between shingle courses, with counterflashing over the top. This is not a place to cut corners.
When Should You Hire a Professional Instead of Doing It Yourself?
Roofing is physically demanding and dangerous. The National Institute for Occupational Safety and Health reports that roof falls cause hundreds of deaths each year in the United States. Even experienced roofers fall. If you are uncomfortable on a ladder or have a steep roof pitch, hiring a pro is the safer choice. Roofs with a pitch over 7:12 are difficult to walk on without specialized equipment.
Complex roof designs also argue for professional help. Multiple valleys, dormers, skylights, and chimneys all require careful flashing and cutting. Mistakes in these areas are hard to fix later. A professional roofer has the experience to handle these details efficiently. They also carry insurance, which protects you if something goes wrong.
Warranty is another factor. Many shingle manufacturers require installation by a certified contractor to honor the warranty. DIY installations often void the warranty. If you plan to sell your home within a few years, a transferable warranty from a licensed roofer can be a selling point. Some people report saving money by doing it themselves, but the cost of fixing a leak from a bad installation often exceeds the savings.
That said, a simple gable roof with a low pitch and no penetrations is within reach of a careful DIYer. If you have experience with tools, good balance, and a helper, you can do it. Just be honest with yourself about your skill level and comfort with heights.
Frequently Asked Questions
Can you install new shingles over old ones?
Yes, but only if the existing layer is one layer thick and the deck is in good condition. Most codes allow only two layers total.
How long does it take to shingle a roof by yourself?
A single person can shingle about 10 to 15 squares per day with a nailer. Hand nailing is much slower, about 5 squares per day.
What happens if you nail shingles too high?
Nailing too high misses the nailing strip and leaves the shingle loose. Wind can lift it and cause leaks.
Do you need underlayment under shingles?
Yes. Underlayment provides a secondary water barrier if shingles fail. Building codes require it in most areas.