
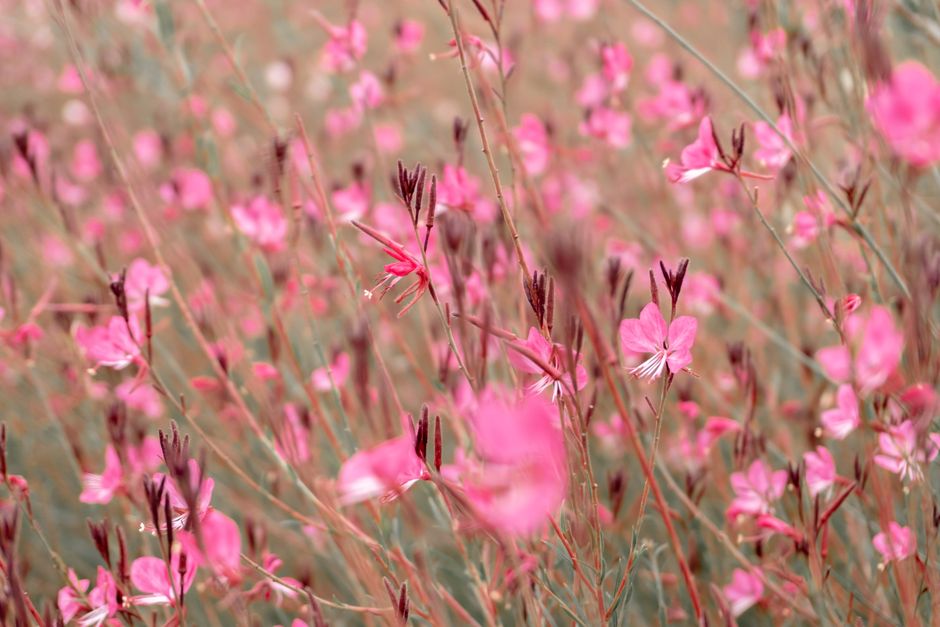
Gaura, also known as whirling butterflies or bee blossom, is a hardy perennial that produces delicate, wand-like flowers that dance in the breeze. If you want more of these airy plants, you have three reliable options: starting seeds, taking softwood cuttings, or dividing established clumps. Seeds are the most economical method and work well for the straight species, while cuttings and division produce exact copies of the parent plant. The best time to propagate depends on your method: sow seeds indoors 8–10 weeks before the last frost, take cuttings in late spring, and divide plants in early spring or fall.
Which Gaura Propagation Method Should You Choose?
Your choice depends on what you want to achieve. Seed propagation gives you many plants at low cost, but the offspring may not look exactly like the parent. This is especially true if you grow a named cultivar like Gaura lindheimeri ‘Siskiyou Pink’ — seeds from cultivars often revert to the plain white or pale pink of the species.
Cuttings and division are vegetative methods. They produce genetic clones. If you love the specific flower color, height, or growth habit of a particular plant, use cuttings or division to preserve those traits exactly.
Division is the fastest method for a gardener who already has a mature plant. Cuttings take more time and care but allow you to produce many new plants from a single mother plant without disturbing its roots.
How To Propagate Gaura From Seeds
Gaura seeds need light to germinate. Do not bury them. Press them gently onto the surface of moist seed-starting mix and leave them uncovered.
Start seeds indoors 8 to 10 weeks before your last expected spring frost. Use a seed tray or small pots with drainage holes. Keep the soil consistently moist but not waterlogged. A heat mat set to about 70°F improves germination consistency, though it is not strictly required.
Germination typically takes 2 to 4 weeks. Once seedlings develop their second set of true leaves, transplant them into individual pots. Harden them off gradually over 7 to 10 days before moving them outdoors. Space young plants 12 to 18 inches apart in full sun.
You can also sow seeds directly outdoors in early spring after the soil warms. Direct sowing works best in mild climates with long growing seasons. In cooler regions, indoor starts give the plant enough time to establish before winter.
One note about seed viability: gaura seeds remain viable for several years if stored in a cool, dry place. Fresh seeds germinate more reliably than old ones, so label your seed packets with the year you collected or purchased them.
How To Propagate Gaura From Cuttings
Softwood cuttings taken in late spring or early summer root most successfully. At this stage, the stems are still flexible and green but firm enough to handle without wilting instantly.
Choose a healthy, non-flowering stem. Cut a 4 to 6 inch section just below a leaf node using clean, sharp pruners. Remove the lower leaves, leaving only two or three pairs at the top. Dip the cut end in rooting hormone powder — this is not strictly required, but it speeds up rooting and improves success rates for many gardeners.
Insert the cutting into a pot filled with a well-draining mix, such as equal parts perlite and peat moss or a commercial propagation mix. Water thoroughly and cover the pot with a clear plastic bag or a propagation dome to maintain high humidity. Place it in bright, indirect light — not direct sun, which can cook the cutting.
Roots typically form within 3 to 4 weeks. You can check by giving the stem a gentle tug; resistance means roots have developed. Once rooted, gradually expose the new plant to normal humidity over several days, then pot it up individually.
Keep young cuttings indoors or in a sheltered spot through their first season. Plant them out in the garden the following spring after all frost danger has passed.





How To Propagate Gaura By Division
Division works best on plants that are at least 2 to 3 years old. Mature gaura develops a woody crown and a deep taproot, which makes division slightly trickier than with fibrous-rooted perennials. The plant responds well if you divide it carefully at the right time.
Early spring is the ideal moment, just as new growth begins to emerge. Fall division is also acceptable in mild climates, but spring gives the divided sections a full season to re-establish before winter stress.
To divide, dig up the entire plant. Use a sharp spade or knife to cut the root ball into sections. Each section must have both roots and several shoots. Discard any woody, dead center growth if present.
Replant each division immediately at the same soil depth it grew before. Water deeply. Keep the soil evenly moist for the first few weeks until new growth is clearly underway.
One caution: gaura’s deep taproot does not like disturbance. Some plants may sulk or take a full season to recover after division. If your plant is young and vigorous, division is low risk. If it is old with a massive woody crown, expect slower recovery.
What Conditions Help New Gaura Plants Thrive?
Gaura is native to North American prairies and performs best when you replicate those conditions. Full sun — at least 6 hours of direct light daily — produces the most flowers and the strongest stems. In partial shade, plants grow leggy and flop over.
Well-draining soil is non-negotiable. Gaura tolerates poor, sandy soil and even rocky ground, but it rots in heavy clay that stays wet. If your garden soil is dense, amend it with compost or coarse sand before planting, or grow gaura in raised beds.
Once established, gaura is drought-tolerant. Water deeply but infrequently. Overwatering is a more common cause of death than underwatering. Newly propagated plants need consistent moisture for their first season, but after that, they prefer to dry out between waterings.
Do not fertilize heavily. Gaura grows naturally in lean soils. Rich, fertile conditions produce excessive leafy growth and fewer flowers. A light layer of compost in spring is all the nutrition these plants typically need.
Common Problems When Propagating Gaura
Rotting cuttings are the most frequent failure. This happens when the propagation medium stays too wet or when humidity is so high that condensation constantly drips on the leaves. If you see mold or blackened stems, remove the affected cutting immediately and let the remaining ones dry out slightly between waterings.
Seedlings that fail to germinate often were planted too deep or the soil dried out during the germination window. Remember: light triggers germination, so seeds must remain on the surface. Cover the tray with clear plastic to lock in moisture, and check daily.
Divided plants that wilt severely after transplanting usually lost too many roots. Minimize root disturbance during division and trim back some top growth to balance the reduced root system. This reduces water loss while the roots re-establish.
Aphids and whiteflies occasionally attack young gaura plants grown indoors. Inspect new growth regularly. A strong spray of water dislodges most pests. For persistent infestations, insecticidal soap is effective.
How Long Until New Gaura Plants Bloom?
Plants grown from cuttings or division typically bloom in their first season, though the display may be modest. Plants grown from seed usually flower in their second year. Some fast-growing seedlings may produce a few flowers in their first fall if started early indoors, but this is not guaranteed.
Gaura is a short-lived perennial. Individual plants often decline after 3 to 4 years, especially in wet or rich soils. This short lifespan is one reason propagation matters — replacing aging plants every few years keeps your garden continuously filled with these airy flowers.
Deadheading spent flower spikes encourages repeat blooming throughout the season. In late fall, leave the foliage in place to protect the crown over winter, then cut back old growth in early spring before new shoots appear.
Frequently Asked Questions
Can you root gaura cuttings in water?
Gaura cuttings root more reliably in a well-draining propagation mix than in water. Stems rooted in water often develop weak roots that struggle to survive the transition to soil.
What is the best month to take gaura cuttings?
Late spring to early summer is the best window, when new growth is soft but firm. Cuttings taken too early in spring wilt easily, while those taken in late summer root more slowly.
Do gaura seeds need cold stratification?
No, gaura seeds do not require cold stratification. They germinate readily at warm room temperatures when sown on the soil surface with light exposure.
Can you divide gaura in the fall?
Yes, fall division works in mild climates where winters are not severe. Spring division is safer in cold regions because it gives plants a full season to establish before freezing temperatures arrive.
