
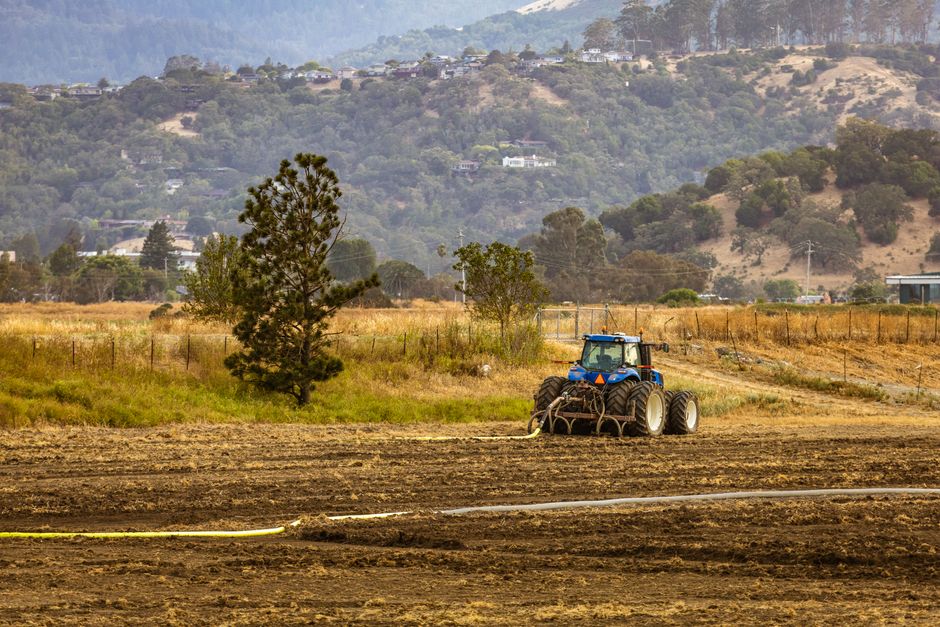
Plowing a field for the first time can feel overwhelming, but the core process is straightforward: you prepare the soil by turning it over to bury crop residue, break up compaction, and create a fresh seedbed. For a beginner, the essential guide starts with choosing the right equipment, setting the correct plow depth, and learning how to make consistent passes across the field. Before you start the tractor, you need to walk the field, check for obstacles, and understand your soil type, as these factors determine how deep and how fast you should work.
What Does Plowing Actually Do to the Soil?
Plowing is a mechanical disturbance of the top layer of soil. The main goal is to invert the soil, bringing fresh, nutrient-rich dirt to the surface while burying weeds, crop stubble, and previous plant material. This process helps with aeration and allows water to penetrate more easily. It also breaks up hardpan, which is a dense layer of soil that forms just below the plowing depth and can restrict root growth.
However, plowing is not always necessary. Many modern farming practices use no-till or minimum-till methods to preserve soil structure and microbial life. For a beginner, understanding that plowing is a tool, not a requirement, is important. If your soil is already loose and free of heavy weeds, you may only need to disk or harrow rather than perform a deep plow. The decision depends on your soil condition and what you plan to plant.
What Equipment Do You Need to Start?
The most common setup for a beginner is a tractor with a mounted moldboard plow. This plow has curved blades that turn the soil over in a series of furrows. For smaller gardens or fields, a walk-behind tiller can work, but it does not produce the same clean furrows as a moldboard plow. A disk harrow is often used after plowing to break up large clods and level the field.
When choosing a plow, match it to your tractor’s horsepower. A general rule is that you need about 10 to 15 horsepower per bottom (the individual plow blade) for most soil conditions. If you have a 30-horsepower tractor, you can typically pull a two-bottom plow in average soil. Heavier clay soil requires more power, while sandy soil requires less. Always consult your tractor and plow manuals for specific matching recommendations.
How To Plow A Field For Beginners: Step-by-Step Process
Start by walking the entire field to identify obstacles. Look for large rocks, tree roots, old fence posts, and low spots that hold water. Hitting a hidden rock can damage your plow blades and cost you time and money. Mark any obstacles with flags so you can avoid them while driving.
Next, check the soil moisture. Plowing wet soil creates large, hard clods that are difficult to break up later. A simple test is to pick up a handful of soil and squeeze it. If it forms a ball that crumbles easily when you poke it, the moisture is right. If it forms a slick, shiny ribbon, the soil is too wet. If it falls apart immediately, it may be too dry and dusty.
Set your plow depth before you enter the field. Most plows have a depth wheel or hydraulic adjustment. For a first plowing, aim for a depth of 6 to 8 inches. This is deep enough to bury residue and break compaction without bringing up too much subsoil, which is often low in organic matter. Adjust the plow so it runs level from front to back and side to side.
Begin plowing along the longest straight edge of the field. This creates your first furrow, which serves as a guide for all subsequent passes. Drive slowly and steadily, keeping the tractor’s front wheel in the furrow you just cut. This technique is called “plowing in the furrow” and it helps keep your passes straight and consistent.





How Deep Should You Plow?
The ideal plowing depth depends on your soil and your goal. For most home gardens and small farms, 6 to 8 inches is standard. This depth is sufficient to bury most weed seeds and crop residue while preserving the nutrient-rich topsoil. Plowing deeper than 8 inches on a regular basis can bring up infertile subsoil and dilute your topsoil’s organic matter.
For breaking up a severe hardpan, you may need to plow deeper, sometimes 10 to 12 inches. This is a one-time operation, not a yearly practice. Some soil types, like heavy clay, benefit from slightly shallower plowing to avoid creating massive clods. Sandy soils can often be plowed deeper without issue. The key is to know your soil and adjust accordingly.
What Is the Best Plowing Pattern?
There are two main plowing patterns: conventional and round-and-round. In the conventional pattern, you start at one edge and plow back and forth in parallel lines. This leaves a dead furrow (a small ditch) at the finish edge. In the round-and-round pattern, you start in the middle and work outward in a spiral, or start at the outside and work inward. This pattern leaves no dead furrow but can be harder to keep straight.
For beginners, the conventional back-and-forth pattern is usually easier to manage. It gives you a clear reference point, the previous furrow, to follow. The dead furrow at the end can be smoothed out with a disk harrow or a drag afterward. If you are plowing a field that will be planted immediately, the round-and-round pattern may be worth learning to avoid the small drainage ditch.
Common Mistakes New Plow Operators Make
The most common mistake is driving too fast. Plowing at high speed creates uneven furrows and leaves gaps between passes. A slow, steady speed of 2 to 3 miles per hour is typical for most plowing work. This allows the plow to cut cleanly and turn the soil completely.
Another frequent error is setting the plow too deep on the first pass. This strains the tractor and can create a rough field. Start shallow, around 4 to 5 inches, and gradually increase depth on subsequent passes. This is easier on your equipment and gives you a chance to feel how the plow handles in your specific soil.
Neglecting to check the plow’s level is also common. A plow that is tilted will cut unevenly, leaving one side too deep and the other too shallow. Check the plow’s levelness on a flat surface before you enter the field. Make small adjustments and test frequently, especially when you change fields or soil types.
What Should You Do After Plowing?
Plowing is only the first step in soil preparation. After plowing, the field is left with large clods and rough surfaces. You will need to go over the field with a disk harrow or a cultivator to break up the clods and level the surface. This is called secondary tillage.
After disking, the soil should be left to settle for a few days before planting. This allows the soil structure to stabilize and any remaining weed seeds to germinate. You can then do a final pass with a harrow or a rake to create a fine, level seedbed. If you are planting soon, avoid overworking the soil, as this can destroy its structure and lead to crusting after rain.
When Is the Best Time to Plow?
Timing matters more than most beginners realize. Plowing in the fall is common in many regions because it allows the soil to weather over the winter. Frost action helps break down large clods and improves soil structure. Fall plowing also buries crop residue early, giving it time to decompose before spring planting.
Spring plowing is also acceptable but carries more risk. If the soil is too wet, you will cause compaction. If you plow too early, the soil may recompact before planting. The general guidance is to plow when the soil is dry enough to crumble in your hand but moist enough to hold together when squeezed. This window is often short, so be prepared to work when conditions are right.
Do You Need to Plow Every Year?
No, you do not need to plow every year. Continuous plowing can deplete soil organic matter and harm beneficial organisms like earthworms and mycorrhizal fungi. Many growers now use a rotational approach, plowing only when necessary to address compaction or heavy weed pressure.
For a small field or garden, consider whether a less invasive method like tilling or disking alone might meet your needs. If your soil is healthy and you are managing weeds well, you can skip the moldboard plow entirely. The goal is to create a good seedbed, not to plow for its own sake. Plowing is a means to an end, and sometimes that end can be achieved with lighter equipment.
Frequently Asked Questions
How fast should I drive when plowing?
Drive slowly, around 2 to 3 miles per hour, to ensure clean furrows and even depth. Faster speeds cause the plow to skip and leave gaps.
Can I plow wet soil?
No, plowing wet soil creates hard clods and causes compaction. Wait until the soil crumbles in your hand instead of forming a slick ribbon.
What is the difference between a moldboard plow and a disk harrow?
A moldboard plow turns the soil over in deep furrows, while a disk harrow breaks up clods and levels the surface. They are used together, not instead of each other.
How deep should a beginner plow?
Start at 4 to 5 inches and work up to 6 to 8 inches on later passes. This protects your equipment and gives you a feel for the soil.
