
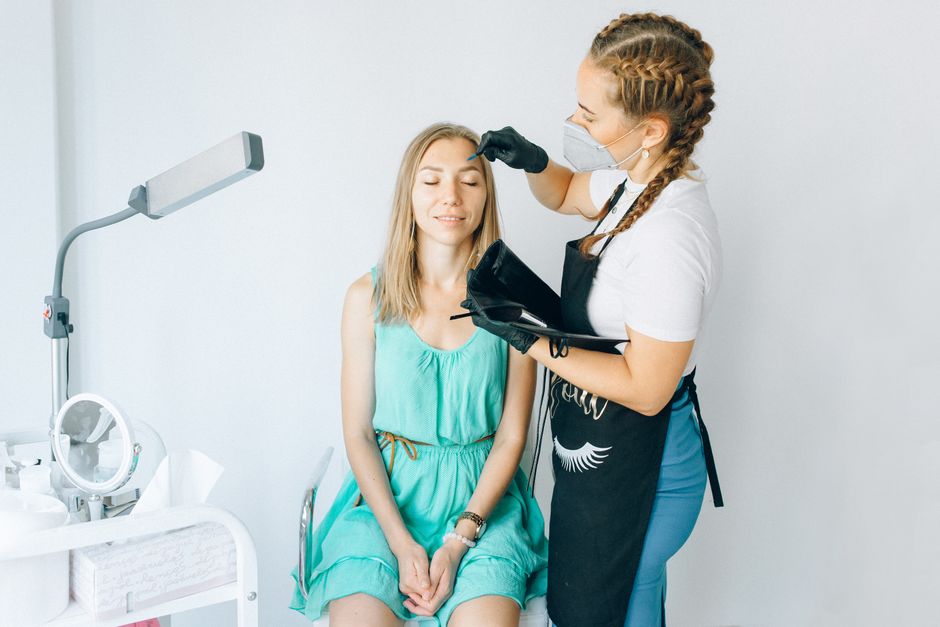
Measuring your eyebrows before microblading is the single most important step in the entire process. It determines where your new brows will sit, how they frame your face, and whether the final result looks natural or off-balance. The process uses facial landmarks to create a symmetrical map that guides every stroke the technician makes. Here is the step-by-step method professionals use to measure eyebrows for microblading, starting with the three core points that create the brow shape.
What Tools Do You Need to Measure Eyebrows for Microblading?
You need very few tools, but each one is essential. A thin brow pencil or eyeliner is the primary tool for marking points. A ruler or a digital caliper helps with precision, though many technicians rely on their eyes and steady hands. A spoolie brush is useful for brushing the brow hairs into place so you can see the natural shape clearly.
For a professional setup, you also need a thread or a piece of string. Holding a taut thread from the nose to the brow points helps you check symmetry with a straight reference line. Some technicians use a brow mapping tool, which is a flexible plastic guide with marked angles. These tools are helpful but not required. A steady hand and accurate eye are the real instruments.
Your skin should be clean and dry. Any makeup, oil, or moisturizer can cause your pencil marks to smear or fade. The face should also be relaxed. Frowning, raising your eyebrows, or squinting will shift the landmarks and produce an asymmetric map.
How To Measure Eyebrows For Microblading Step By Step
The entire measurement process rests on three fixed points on your face. These points are the start of the brow, the arch, and the tail. Each one is located using a straight line drawn from a facial landmark.
Step 1: Find the brow start. Place the pencil or ruler vertically against the side of your nose. The inner edge of the brow should begin where this vertical line crosses your brow bone. This point is often called the “head” of the brow. Both brows should start at the same distance from the center of your nose. Mark this point with a small dot.
Step 2: Find the arch. Keeping the pencil at the side of your nose, pivot it so it passes directly through the center of your pupil while you look straight ahead. The point where this line crosses your brow bone is where the highest part of your arch belongs. Mark this point. This is the most important measurement because it dictates how dramatic or subtle your arch will look.
Step 3: Find the tail. Pivot the pencil again so it runs from the side of your nose to the outer corner of your eye. The line should extend beyond your eye to your brow bone. The point where it lands is where your brow tail should end. Mark this point. The tail should never drop below the start of your brow. If it does, the brow will look like it is frowning.
Once all three points are marked on both sides, step back and look. The two brows should mirror each other. Slight differences in facial symmetry are normal. The goal is not perfect mathematical symmetry but optical balance. Your technician will adjust the marks by a millimeter or two to account for natural asymmetry in your eyes or nose.
Why the Nose Is the Anchor for Brow Mapping
Your nose is the fixed reference point for all brow measurements because it does not move. Your eyes, mouth, and skin shift with expression, but the bridge of your nose stays stable. Every vertical and angled line used in brow mapping originates from the side of the nose.
The width of your nose also influences brow placement. A wider nose creates a wider angle between the inner brow points. A narrow nose brings the brows closer together. The standard rule is that the inner brows should align with the outer edge of the nostrils. If you draw a vertical line from the middle of each nostril upward, that is where the brow should start.
This anchoring method is not just aesthetic. It ensures that the brows sit in proportion to the rest of your face. Brows placed too close together make the nose look wider. Brows placed too far apart make the eyes look farther apart than they are. The nose anchor prevents both errors.



Common Mistakes When Measuring Brows
The most common mistake is measuring with the face in an unnatural position. If you tilt your head up or down while the technician marks points, the measurements will be off. The head must be level and facing forward. Your eyes should look straight ahead without straining.
Another frequent error is placing the arch too far toward the tail. The arch belongs at the point where the pencil crosses the center of the pupil, not the outer edge of the iris. Placing the arch too far out creates a surprised or perpetually raised expression.
Marking the tail too low is also common. The tail should end at or slightly above the level of the brow start. A tail that drops below the head creates a sad or tired look. Check this by drawing an imaginary horizontal line from the start of the brow to the tail mark. The tail should sit level or higher.
Finally, many people forget that the brow hairs themselves affect the final shape. If you have thick, unruly brow hair, the measured shape must account for the direction the hair grows. Brushing the hairs upward and outward before measuring gives you a clearer view of the natural growth pattern.
How the Measured Shape Translates to the Final Result
Once the three points are marked, the technician connects them to create the full outline of the brow. This outline is then filled with a series of hair-like strokes that mimic natural growth. The measured points determine where the strokes begin, where they arc, and where they fade out.
The density of the strokes also depends on your natural brow hair. If you have sparse hair, the technician may recommend a combination of microblading and shading. If you have thicker hair, fewer strokes are needed. The measurement process does not change based on hair density, but the final design does.
Your skin type also matters. Microblading creates fine cuts in the skin that hold pigment. Oily skin tends to blur these cuts over time, which softens the strokes. Dry skin holds the strokes more crisply. Your technician should discuss this before the procedure because it affects how the measured shape will look after healing.
Why You Cannot Measure Your Own Brows Accurately
Measuring your own brows is nearly impossible to do accurately. The process requires you to look straight ahead while holding a pencil at a fixed angle. When you hold the pencil yourself, you naturally tilt your head or shift your gaze to see what you are doing. Both actions distort the measurement.
Your own perception of symmetry is also unreliable. Most people have a dominant side of their face that looks more familiar to them. You may unconsciously favor one brow when marking points. A trained technician has the benefit of a neutral perspective and years of practice in spotting asymmetry.
If you are practicing at home to understand the process, use a mirror and take your time. Mark points lightly. Photograph your face straight-on with your hair pulled back and examine the photo. Photos often reveal asymmetry that you cannot see in a mirror. But for the actual procedure, leave the final measurement to the professional.
What to Expect During a Professional Brow Mapping Session
A professional brow mapping session takes about 15 to 30 minutes. The technician will clean your face, brush your brows, and begin marking points with a white or light-colored pencil. They will check each point multiple times, adjusting by fractions of a millimeter.
You will be asked to sit up straight and look forward. The technician will step back frequently to assess the overall balance. They may take a photo of your face with the marks in place so you can see the proposed shape before any pigment is applied. This is your opportunity to voice concerns about the shape, thickness, or arch height.
Do not approve the mapping if you are unsure. The marks are temporary and can be wiped off and redrawn. A reputable technician will welcome your input. Once you approve the shape, the technician will trace over the marks with a more durable liner and begin the microblading procedure. The measured points are your guarantee that the final result is balanced and proportioned to your face.
Frequently Asked Questions
How long does brow mapping take before microblading?
Brow mapping typically takes 15 to 30 minutes depending on how symmetrical your face is. The technician may remeasure multiple times to ensure accuracy.
Can I measure my own eyebrows for microblading at home?
You can practice the technique at home, but accurate measurement requires a neutral perspective and a steady hand. Most people cannot measure their own brows accurately because they naturally tilt their head or shift their gaze.
What happens if my eyebrows are measured incorrectly?
Incorrect measurement can result in asymmetrical brows, an arch that is too high or too low, or tails that droop. These issues are difficult to correct after pigment is implanted, which is why measurement is the most important step.
Does the brow mapping process hurt?
No. Brow mapping involves only pencil marks on the surface of your skin. You may feel light pressure from the pencil or ruler, but there is no pain during the measurement phase.
