
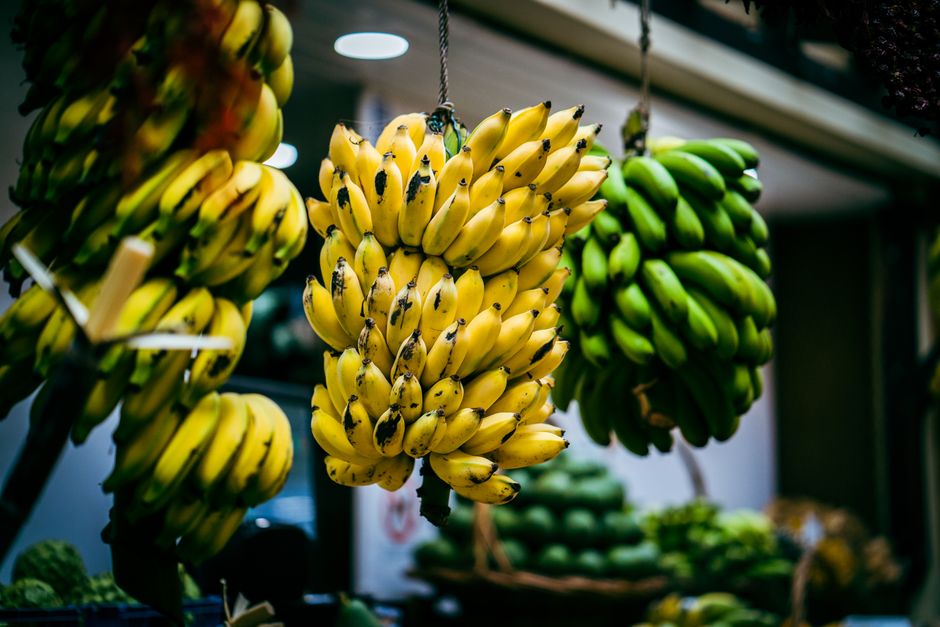
Green banana flour is made by peeling unripe green bananas, slicing them, drying the slices completely, and grinding them into a fine powder. The whole process takes a dehydrator or a low oven, a blender or grinder, and about a day of mostly hands-off time. Nothing about it is complicated, but the drying step is where most home attempts fail.
What makes green banana flour different from regular banana flavoring is starch. Unripe bananas are loaded with resistant starch, a type of carbohydrate your small intestine does not fully digest. That single fact explains most of the interest in this flour, and most of the caveats too.
Why Make Green Banana Flour Instead of Buying It?
Buying it is easier. Making it gives you control over ripeness, which matters more than most people realize.
The starch profile of a banana changes dramatically as it ripens. A fully green banana is mostly resistant starch. As it turns yellow and then spotted, enzymes convert that starch into sugars. By the time a banana is soft and sweet, very little resistant starch remains. If you buy green banana flour, you are trusting the manufacturer to have processed fruit at the right stage. If you make it yourself, you decide.
Cost is the other factor. Green banana flour is often sold at a premium price. If you have access to unripe plantains or green bananas, homemade versions can be considerably cheaper per pound.
There is a catch. Homemade flour will not match commercial flour in consistency or shelf stability. Commercial producers use industrial drying and milling equipment that removes more moisture and produces a finer, more uniform powder. Your version will be coarser and will keep for less time. That is a real trade-off, not a minor one.
What Equipment Do You Need?
A dehydrator is the best tool for this job. An oven on its lowest setting works as a backup, but it is harder to control and easier to accidentally cook the slices instead of drying them.
Beyond drying, you need:
- A sharp knife or a mandoline for thin, even slices
- A blender, food processor, or dedicated grain mill
- A fine mesh strainer for sifting
- An airtight container for storage
A standard blender will produce usable flour but may leave gritty bits. A high-speed blender or a coffee grinder used in small batches gives a finer result. If you plan to make this often, a grain mill is the most effective option, though it is a significant investment for a single-purpose tool.
How To Make Green Banana Flour Step by Step
The process has four stages: peel, slice, dry, grind. The drying stage determines whether the final product is safe to store and pleasant to eat.
Step 1: Choose and peel the bananas
Use bananas that are fully green with no yellow showing. Green plantains work well too and are often easier to find in larger sizes.
Peeling green bananas is harder than peeling ripe ones. The skin is firm and clings to the fruit. A paring knife helps. Some people score the skin lengthwise and pry it away in strips. Work over a bowl so you can catch any pieces.
Green banana sap can stain your hands and your cutting board. It is dark and sticky and does not wash out of fabric easily. Wear gloves if that matters to you, and use a cutting board you are not precious about.
Step 2: Slice thinly and evenly
Aim for slices about one-eighth of an inch thick. Thicker slices take much longer to dry and are more likely to develop mold inside before they are fully dry. Uneven slices dry unevenly, which means some pieces will be done while others are still moist.
A mandoline makes this step fast and consistent. If you are slicing by hand, take your time. This is the step where impatience costs you.
Step 3: Dry completely
This is the step that matters most. Spread the slices in a single layer on dehydrator trays or on a baking sheet lined with parchment. They should not touch or overlap.
In a dehydrator, set the temperature to around 135°F (57°C) and dry for 8 to 12 hours. In an oven, use the lowest setting available, often 170°F (77°C) or the “warm” setting, and prop the door slightly open with a wooden spoon to let moisture escape. Oven drying typically takes 4 to 8 hours but varies widely by oven.
The slices are done when they snap cleanly when bent. Not bend. Snap. If a slice bends without breaking, there is still moisture inside, and that moisture will cause the flour to spoil. When in doubt, dry longer.
Step 4: Grind and sift
Let the dried slices cool completely before grinding. Warm slices can create condensation inside your blender or grinder.
Grind in small batches. Large batches overwhelm most blenders and leave coarse chunks. Pulse rather than running continuously, and give the machine breaks so it does not overheat.
Sift the ground flour through a fine mesh strainer. Return the coarse bits to the grinder and process again. Repeat until most of the material passes through the strainer. What remains after two or three passes can be discarded or used as a coarse meal in cooked dishes.





How Should You Store Green Banana Flour?
Store it in an airtight container in a cool, dark place. A glass jar with a tight lid works well. Keep it away from heat and direct light.
Homemade green banana flour does not have the shelf life of commercial flour. Commercial products are milled and packaged under conditions that minimize moisture and oxygen exposure. Your kitchen does not replicate that. A reasonable approach is to use it within a few weeks for the best quality and to refrigerate or freeze it for longer storage.
Watch for signs of spoilage: a musty smell, clumping, visible mold, or any change in color. If you see or smell any of these, discard the whole batch. Mold in flour is not something you can salvage by scooping out the affected part.
Making smaller batches more often is generally smarter than making a large batch that sits for months.
What Does Green Banana Flour Taste Like?
It does not taste like bananas. This surprises people.
The flavor is mild, slightly earthy, and faintly starchy. Some people describe a very subtle bitterness in the raw flour. It is neutral enough to blend into most recipes without dominating them, which is part of its appeal.
When heated, the starch behaves differently. Green banana flour absorbs more liquid than wheat flour, so recipes usually need adjustment. It also does not contain gluten, so it will not behave like wheat flour in breads that depend on gluten for structure. It works better in pancakes, muffins, and thicker batters where some structure comes from eggs or other binders.
A common starting point is to substitute it for about a quarter of the wheat flour in a recipe rather than replacing all of it. That keeps the texture closer to what you expect while adding the resistant starch.
Does Green Banana Flour Have Health Benefits?
The resistant starch content is the main reason people seek it out. Resistant starch is not digested in the small intestine. It travels to the large intestine, where gut bacteria ferment it. This fermentation produces short-chain fatty acids, which are the primary fuel source for cells lining the colon.
That mechanism is well established. What is less established is how much of a measurable health difference eating green banana flour makes in a typical diet.
Some studies suggest resistant starch may support blood sugar control after meals and may have effects on appetite. The evidence is not uniform across studies, and results vary depending on the amount consumed, the population studied, and what else was in the diet. No clinical evidence currently confirms that green banana flour prevents or treats any specific disease.
One practical point: resistant starch content varies. It depends on how green the bananas were, how they were dried, and how the flour was stored. A homemade batch is not a standardized product. You cannot assume any specific amount of resistant starch in a given scoop.
Green banana flour also contains potassium and some fiber, like bananas generally. It is a food, not a supplement or a medicine. Treating it as a functional ingredient in cooking is reasonable. Treating it as a treatment for a health condition is not supported by the current evidence.
Common Mistakes to Avoid
Under-drying is the most common and the most consequential mistake. Flour made from slices that still contain moisture can grow mold, and the mold may not be visible until the flour has been sitting for a while.
Other frequent problems:
- Slicing too thick, which prevents even drying
- Grinding warm slices, which creates clumping
- Skipping the sifting step, which leaves gritty flour
- Storing in a warm spot, which shortens shelf life
- Assuming it substitutes one-for-one for wheat flour in every recipe
None of these are hard to fix. They just require patience at the drying stage and realistic expectations about how the flour behaves in baking.
Frequently Asked Questions
Can I make green banana flour in an oven instead of a dehydrator?
Yes, an oven on its lowest setting works, though a dehydrator gives more consistent results. Prop the oven door slightly open to let moisture escape, and expect the timing to vary by oven.
How do I know when the banana slices are fully dry?
They should snap cleanly when bent, not bend or feel leathery. Any flexibility means moisture remains, and that moisture will cause the flour to spoil.
Does green banana flour taste like bananas?
No, the flavor is mild and slightly earthy rather than fruity. That neutral taste is why it blends easily into baked goods and other recipes.
How long does homemade green banana flour last?
For best quality, use it within a few weeks and refrigerate or freeze it for longer storage. Homemade flour does not keep as long as commercial flour because it is not processed under the same moisture-controlled conditions.
