
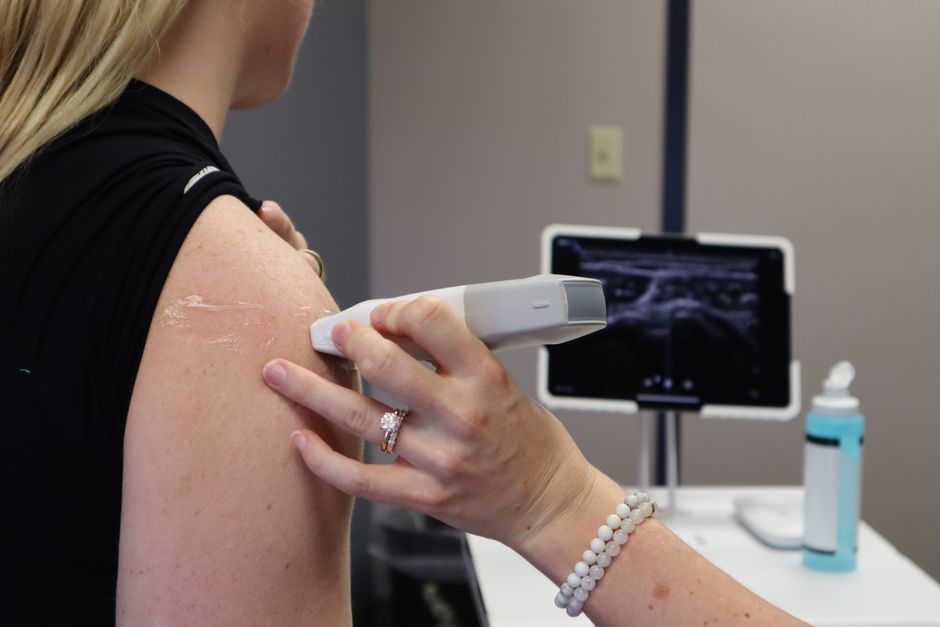
Hold an ultrasound probe with a relaxed, pencil-style grip — thumb and first two fingers on the sides of the probe body near the top, ring and little fingers resting lightly on the patient’s skin or the probe cable. Apply just enough downward pressure to keep steady skin contact, typically light for most exams, and move the probe in slow, smooth slides and tilts rather than quick sweeps. Let your wrist and forearm do the work, not your fingertips.
That is the short version. The longer version matters because grip, pressure, and movement are the three mechanical variables you actually control during a scan. Get them right and you get clearer images, less patient discomfort, and less strain on your own hand and wrist. Get them wrong and you fight the machine all day.
Why does grip technique change the image you get?
A transducer is a rigid object that has to sit flat against a curved, moving body surface. Your hand is the only thing connecting the two. If your grip is tense, that tension travels down through the probe and shows up as tremor in the image, as unintended rocking, and as uneven contact pressure across the face of the probe.
Uneven contact is the real problem. When only part of the probe face touches skin, you lose the acoustic window in that area. The ultrasound beam needs a continuous path of coupling gel and skin to travel through. Air gaps scatter the sound waves almost completely. A light, even grip keeps the whole footprint in contact.
A tense grip also tires you faster. Sonographers who scan for hours develop repetitive strain in the thumb, wrist, and shoulder. Research on work-related musculoskeletal disorders in sonographers consistently identifies grip force and awkward wrist posture as contributing factors. A relaxed hold is not just a comfort preference — it is a recognized way to reduce cumulative strain.
How should you actually position your fingers on the probe?
Think of holding a pencil you are about to write with, then scale that up to the size of the probe. Your thumb and index finger sit on opposite sides of the probe body, with the middle finger supporting from below or the side. The ring and little fingers extend down toward the patient’s skin.
Those last two fingers matter more than people expect. Resting them lightly on the patient gives you a stable base. It also lets you feel the skin surface, which helps you keep contact pressure steady as the body curves.
- Thumb and index finger: control tilt and rotation
- Middle finger: supports the probe body
- Ring and little fingers: anchor and sense the skin surface
- Wrist: stays relatively neutral, not bent sharply up or down
Avoid gripping the cable to steer the probe. The cable is not a control surface, and pulling on it strains the connection point over time. It also transmits movement up into the probe head.
Some sonographers hold the probe closer to the top, others lower down. Both can work. What matters is that the grip stays loose enough that your knuckles are not white.
How much pressure should you apply with an ultrasound probe?
For most abdominal and soft tissue exams, use light pressure — just enough to maintain full contact with the skin. The probe should feel like it is resting on the body, not pressing into it.
Pressure does two things. It improves contact and it changes what you see. Pushing down compresses tissue, which can bring deeper structures closer to the surface and improve resolution. It also displaces gas and fluid, which sometimes helps and sometimes hurts.
There is no universal number for how much pressure to use. It depends on the exam, the body part, the patient’s body composition, and what you are trying to visualize. A general rule is to start light and add pressure only when you have a specific reason.
Pressure that is too firm causes problems:
- Patient discomfort, especially over tender or inflamed areas
- Tissue compression that distorts measurements
- Collapse of superficial veins during vascular exams
- Displacement of small structures you are trying to locate
In vascular scanning, excessive pressure can compress a vein enough that it looks like it is not there. That is a real diagnostic pitfall, not a minor annoyance. Light pressure and generous gel are the standard approach for venous imaging.





What does correct probe movement look like?
Movement should be slow and deliberate. Fast sweeps produce motion artifact and make it harder to track a structure as it passes through the field of view. Most diagnostic scanning is done at a pace that feels almost slow.
There are a few basic motions, and each has a purpose:
- Slide: moving the probe along the skin to follow a structure
- Tilt: angling the probe face without moving its position, to steer the beam
- Rotate: turning the probe to change the imaging plane
- Rock: gently rolling the probe side to side to sweep through tissue
Tilting is the most underused. Many scanning problems that look like they need more pressure are actually solved by tilting the probe a few degrees. The beam angle changes, and suddenly the structure you were chasing appears.
Keep movements continuous rather than stop-start. A steady slide gives you a smooth sweep of anatomy. Jerky motion breaks the image into fragments that are harder to interpret.
How do grip, pressure, and movement work together?
They are not separate skills. They form one continuous feedback loop between your hand, the probe, and the image on screen.
Your grip sets the baseline. If it is relaxed, you can feel small changes in resistance as the probe moves over different tissue. That feedback tells you when to adjust pressure or tilt. If your grip is tight, you lose that sensitivity and you end up correcting with bigger, clumsier movements.
Pressure and movement interact too. More pressure usually means you can move faster without losing contact, but it also means more tissue distortion. Less pressure gives you a truer picture but demands slower, more careful movement to keep the probe face flat.
The practical takeaway is that a light grip and light pressure give you the most control, not the least. Beginners often press harder because it feels more stable. It usually is not.
What mistakes do people make with probe handling?
The most common error is over-gripping. It feels like control but it produces tremor and fatigue. If your hand aches after a short scan, your grip is probably too tight.
Second is using pressure to solve a problem that angle would fix. If you cannot see a structure, try tilting before you try pushing. Compression changes the anatomy you are trying to measure.
Third is moving too fast. Speed feels efficient but costs image quality. Slow, steady scanning is faster overall because you spend less time repeating views.
Fourth is ignoring ergonomics. Neutral wrist position, a relaxed shoulder, and a grip that does not require constant force all reduce strain over a career. Sonographer injury rates are high enough that this is a recognized occupational concern, not a personal weakness.
Finally, forgetting gel. Insufficient coupling gel forces you to press harder to get contact, which compounds every other problem. Use more gel than feels necessary.
Does probe type change how you hold it?
Yes, to some degree. Curved and linear probes are held similarly, but their shape affects where your fingers naturally land. A linear probe used for vascular work is often held with a lighter, more precise grip because the structures are small and superficial.
Endocavitary probes require a different handling approach entirely and are outside the scope of surface scanning technique. Intracavitary and intraoperative probes follow their own protocols.
The core principles stay the same across surface probes: relaxed grip, even contact, light pressure, slow movement. The probe shape changes the details, not the fundamentals.
Frequently Asked Questions
How tight should you grip an ultrasound probe?
Loose enough that your knuckles are not white and your hand does not ache. A relaxed pencil-style grip gives you better control and less tremor than a tight one.
How much pressure should you use with an ultrasound probe?
Light pressure is enough for most exams — just enough to keep full contact with the skin. Add pressure only when you have a specific reason, since firm pressure distorts tissue and can collapse veins.
What is the best way to move an ultrasound probe?
Use slow, smooth slides, tilts, and rotations rather than quick sweeps. Tilting the probe often solves problems that pressure cannot.
Why does my hand hurt after scanning?
Over-gripping is the most common cause. A tense grip produces fatigue and repetitive strain, so relaxing your hold and keeping your wrist neutral usually helps.
