

Collecting a well water sample is a simple process, but the details matter more than most people expect. Use a clean, lab-supplied container, avoid contaminating the inside of the cap or bottle, and sample from a tap that has not been softened, filtered, or treated. For most standard tests, you collect the sample after letting the water run long enough to clear the line, then deliver it to the lab within the time frame the lab specifies.
Private wells serve millions of households in the United States, and unlike public water systems, they are not regulated under the Safe Drinking Water Act. That means testing is the responsibility of the homeowner. How you collect the sample can affect the results as much as the water itself, so getting the collection step right is worth the effort.
Why Does Sample Collection Method Matter So Much?
A water test measures what is in the bottle you hand to the lab. If your hands, the faucet aerator, or a dirty container introduces bacteria or debris, the lab may report a problem that is not actually in your water. The reverse can also happen. A sample collected from a filtered or softened tap can hide a contaminant that is present in the raw well water.
Most labs provide specific instructions with their test kits, and those instructions take priority over general advice. Collection requirements vary depending on what is being tested. A bacteria test has different rules than a test for arsenic or lead.
The core principle is the same across tests: the sample must represent the water as it comes out of the ground, not water that has passed through treatment equipment or picked up contamination during collection.
How To Collect A Well Water Sample For Testing: Step By Step
Start by contacting a certified laboratory before you collect anything. In most states, laboratories that test drinking water must hold certification, and your state health department or environmental agency can provide a list. The lab will supply the correct bottles, preservatives, and instructions for the tests you need.
Once you have the kit, follow these general steps. Adjust them to match the lab’s written instructions.
- Choose the right tap. Use a cold-water tap that has no filter, softener, or other treatment attached. An outdoor spigot or a kitchen tap that bypasses treatment works well. Remove any aerator or screen if possible.
- Let the water run. Run the cold water for several minutes to clear water that has been sitting in the pipes. The exact time depends on your plumbing and how far the tap is from the well. The goal is to draw fresh water from the well, not water that has been sitting in the system.
- Wash your hands. Clean hands reduce the chance of introducing bacteria into the sample.
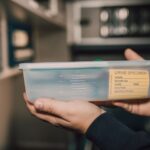
- Open the container carefully. Do not touch the inside of the cap or the inside of the bottle. Set the cap down with the inside facing up.
- Fill the bottle. For most chemical tests, fill to the line the lab marked or leave the small air space the instructions specify. For bacteria tests, fill to the line and do not rinse the bottle first, since some bacteria test bottles contain a preservative.
- Cap it immediately. Seal the bottle tightly and do not reopen it.
- Label and chill if required. Write the date, time, and location on the label. Some tests require refrigeration, and some do not. Follow the lab’s instructions exactly.
- Deliver promptly. Get the sample to the lab within the time window the lab specifies. Bacteria samples in particular have a short holding time, and delays can make results unreliable.
If you are collecting more than one type of sample, use separate bottles for each. Never pour water from one bottle into another.
Which Tap Should You Use, and Should You Remove the Aerator?
Use a tap that delivers untreated water. If your home has a whole-house filter, water softener, or point-of-use filter, sampling from a tap downstream of that equipment tells you about the treated water, not the well itself. For most testing purposes, you want to know what is coming out of the ground.
The aerator is the small screen at the tip of many kitchen faucets. It traps debris and can harbor bacteria, so removing it before sampling reduces the chance of a false positive on a bacteria test. Some labs recommend leaving it in place for certain chemical tests, which is another reason to read the kit instructions carefully.
If you cannot access an untreated tap, tell the lab. They can advise you on how to interpret results or whether a different sampling point makes sense.



How Long Should You Run the Water Before Sampling?
There is no single correct run time, and anyone who gives you an exact number without knowing your plumbing is guessing. The purpose of running the water is to purge the line so the sample reflects water from the aquifer rather than water that has been sitting in pipes or a pressure tank.
As a general approach, run the cold water until the temperature stabilizes and the water feels consistently cold, then continue for a few more minutes. Wells with long runs of pipe or large pressure tanks may need more time than a shallow well close to the house.
Some labs and health departments publish recommended purge times for their test kits. When in doubt, follow the lab’s guidance rather than a rule of thumb from the internet.
What Mistakes Ruin a Water Sample?
Most bad samples fail for predictable reasons. Knowing them helps you avoid a wasted test and a wasted fee.
- Sampling from a filtered or softened tap when the test is meant to assess raw well water.
- Touching the inside of the bottle or cap.
- Rinsing a bacteria bottle that contains a preservative.
- Letting the sample sit too long before delivery.
- Using a household jar or container instead of the lab-supplied bottle.
- Collecting during or right after heavy rain, which can temporarily change some test results.
- Filling the bottle to the very top when the instructions call for an air space, or leaving too much air when the test requires a full bottle.
If you are unsure whether a sample is still valid, call the lab before delivering it. In many cases they will tell you to recollect rather than run a test on a compromised sample.
How Often Should You Test a Private Well?
Testing frequency depends on what you are testing for and what is known about your area. Many state health departments recommend annual testing for bacteria and nitrates, since these can change quickly and have clear health implications. Other contaminants, such as arsenic, lead, and radon, may be tested less often unless there is a known local concern.
Test sooner if you notice a change in taste, odor, or color, if the well has been serviced or the pump replaced, if there has been flooding near the wellhead, or if someone in the household develops unexplained gastrointestinal illness. Newly drilled wells should be tested before the water is used for drinking.
Your state health department or a certified lab can tell you which contaminants are common in your region. That local context matters more than a generic testing schedule.
Do You Need a Professional to Collect the Sample?
For most routine tests, homeowners can collect samples themselves using a lab kit. The process is straightforward and the labs design their kits for this purpose.
Some situations call for a professional. If you need to sample from a specific point in the system, if the well has known structural issues, or if a prior test showed a problem that needs to be traced to its source, a licensed well contractor or environmental professional may be better equipped. Some real estate transactions also require sampling by a qualified third party.
If you are not sure whether you can collect a valid sample, ask the lab. They would rather walk you through it than receive a sample that cannot be used.
What Happens After You Drop Off the Sample?
The lab analyzes the sample using methods specific to each contaminant and reports results against regulatory or health-based limits. For public water systems, the EPA sets enforceable standards for many contaminants. Private wells are not covered by those standards, but the same limits are often used as reference points when interpreting results.
If a result comes back above a health-based limit, the lab or your state health department can explain what it means and what options exist. Treatment depends on the contaminant, and not every treatment works for every problem. A water treatment specialist can help match a system to your specific results.
Keep your test reports. Comparing results over time is one of the most useful things you can do, because it shows whether a contaminant is stable, rising, or has appeared for the first time.
Frequently Asked Questions
Can I use a regular jar to collect a well water sample?
No. Household jars and containers can introduce contamination and are not designed for the preservatives some tests require. Always use the bottle supplied by the certified lab.
Should I run the water before collecting a sample?
Yes. Running the cold water clears the line so the sample reflects water from the well rather than water that has been sitting in pipes. Follow the lab’s recommended purge time if they provide one.
How long can a water sample sit before I take it to the lab?
It depends on the test, and bacteria samples have the shortest holding time. Deliver the sample as soon as possible and within the window the lab specifies.
Do I need to test my well water every year?
Many state health departments recommend annual testing for bacteria and nitrates, though the right schedule depends on your local conditions and prior results. Check with your state health department for guidance specific to your area.
