
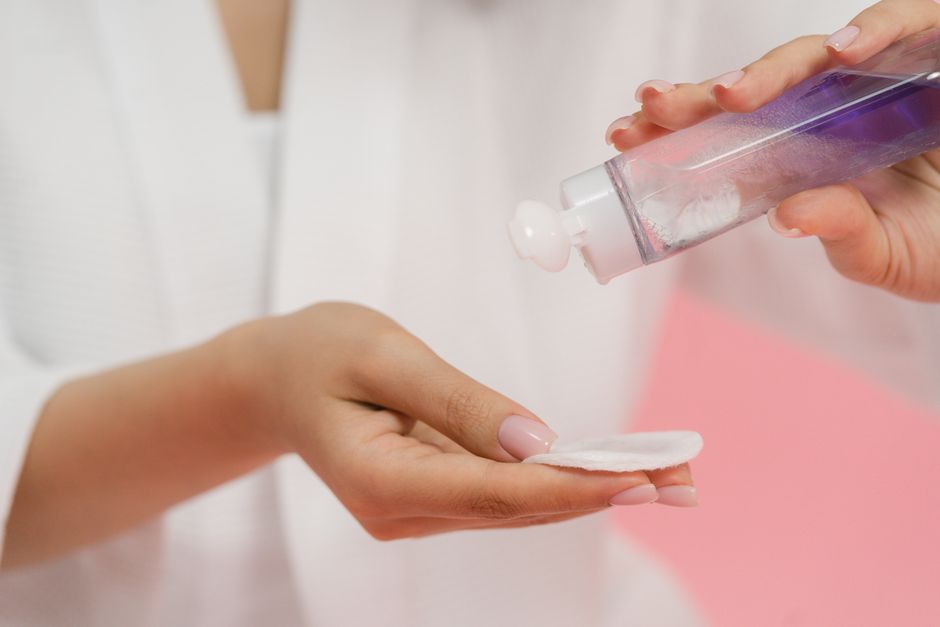
Removing glued-on eyelashes does not require harsh pulling or risky solvents. The safest method is to use an oil-based makeup remover or a dedicated eyelash adhesive remover, applied gently along the lash line to dissolve the glue before the lashes slide off naturally. Never pull or yank the lashes, as this can damage your natural lashes or the delicate skin of your eyelid.
Why You Should Never Pull Glued On Eyelashes
Pulling at glued lashes is the single most common cause of lash damage. The skin on your eyelid is the thinnest skin on your body, and the hair follicles of your natural lashes are delicate. When you pull against the bond of the adhesive, you risk tearing out natural lashes, breaking them mid-shaft, or causing micro-tears in the eyelid skin.
The glue used for eyelashes is designed to create a strong bond. That bond is often stronger than the anchor holding your natural lash in place. So when you pull, something has to give—and it is usually your natural lash. This can lead to permanent thinning of your lash line over time if it happens repeatedly.
In addition to lash loss, pulling can irritate the skin and lead to redness, swelling, or even an infection if the skin breaks. The goal is to dissolve the adhesive, not break the bond by force.
The Best Method: Oil-Based Remover
The most effective and safest way to remove glued-on eyelashes is to use an oil-based makeup remover. The science behind this is straightforward: most eyelash adhesives, especially latex-based or cyanoacrylate formulas, break down when they come into contact with oils.
Here is the step-by-step process that eye care professionals and makeup artists commonly recommend:
- Wash your hands thoroughly before touching your eyes.
- Soak a cotton pad or a cotton swab with oil-based remover. You can also use a gentle cleansing oil, coconut oil, or olive oil if you do not have a commercial remover.
- Press the soaked pad against your closed eyelid. Hold it there for 20 to 30 seconds. This contact time is critical—it gives the oil time to penetrate and dissolve the adhesive.
- Gently press and slide the pad outward, away from your nose, along the lash line. Do not rub back and forth aggressively.
- If the lashes do not come off easily, apply more oil and wait another 15 to 20 seconds. Repeat until they slide off.
- Once the lashes are off, gently cleanse the area to remove any remaining adhesive residue.
This method works because the oil breaks the chemical bond of the adhesive without putting mechanical stress on your natural lashes. It is the same principle used in oil-based cleansers for removing waterproof mascara, except the bond is stronger, so more contact time is needed.
What About Store-Bought Adhesive Removers?
Dedicated eyelash adhesive removers are available at most beauty supply stores. These products are usually either oil-based or contain a solvent specifically formulated to dissolve lash glue. They are generally safe for use around the eyes when used according to the package instructions.
These products can be more effective than plain oil because they are formulated to target the specific chemicals in lash adhesives. However, they also carry a slightly higher risk of irritation because of the solvents involved. If you have sensitive skin or a history of allergic reactions, patch-test the product on your inner arm first.
When using a commercial remover, follow the same application technique as with oil: soak, press, wait, and slide. The contact time may be shorter with a dedicated remover, but you should still never pull or force the lashes off.


How to Remove Glued On Eyelashes Without Remover
If you do not have oil or a commercial remover on hand, you can use a few household items that are safe for the eye area. Steaming is one of the gentlest alternatives. The steam softens the adhesive and makes it less brittle.
To use steam, fill a bowl with hot water and lean over it with a towel draped over your head to trap the steam. Keep your eyes closed and allow the steam to hit your closed lids for a few minutes. After steaming, the glue should be softer, and the lashes may peel off with very light pressure. Do not use water that is boiling—you want steam that is warm and comfortable, not hot enough to burn your skin.
Another option is a warm compress. Soak a clean washcloth in warm water, wring it out, and hold it against your closed eye for several minutes. Re-warm the cloth as needed. This method works best for lashes applied with a softer, latex-based adhesive.
Warm water alone is rarely enough to dissolve strong adhesives. If the lashes do not come off after a few attempts, stop and get an oil-based product. Forcing them off with water alone can cause the same damage as pulling.
How to Remove Glued On Eyelashes Safely When They Are Waterproof or Extra Strong
Some adhesives are marketed as “waterproof,” “long-wear,” or “extra hold.” These formulas are designed to withstand moisture, oil, and friction. They require more effort to remove, but the same principles apply.
For extra-strong adhesives, you may need to increase the contact time with the oil. Instead of 20 seconds, you may need to hold the soaked pad against your lash line for a full minute or two. You can also try using a cotton swab dipped in oil and running it along the base of the lashes, right where the glue meets your natural lash line. This targets the adhesive directly.
If you know you are wearing a strong-hold adhesive, do not attempt removal until the end of the day when you have time to be patient. Rushing the process leads to pulling. Give yourself 10 to 15 minutes for removal, and do not be surprised if it takes a few rounds of oil application.
Some lash glues are designed for professional application and are not intended for at-home removal. If you have had lashes applied by a professional and you are unsure what adhesive was used, contact the salon and ask for their recommended removal method. Forcing a professional-grade adhesive off at home can cause significant lash damage.
What Not to Use on Glued-On Eyelashes
There are several products and methods that people try out of desperation that are genuinely dangerous. Avoid these entirely:
- Nail polish remover or acetone: These solvents are far too harsh for the eye area and can cause chemical burns to the cornea and eyelid skin.
- Rubbing alcohol: Alcohol dries out the skin and can cause severe stinging and irritation if it gets into the eye. It does not dissolve lash glue effectively.
- Petroleum jelly (Vaseline): While it is an oil-based product, it is too thick to penetrate the adhesive bond effectively. It also leaves a greasy film that can blur vision if it gets in the eye.
- Any product not labeled for eye use: If a product does not say it is safe for the eye area, do not put it near your eyes. The cornea is easily damaged by chemicals.
- Scissors or tweezers: Never cut or pry at the lashes while they are on your eye. One slip can cause a serious eye injury.
If you cannot remove the lashes with oil, and you are experiencing pain, redness, or vision changes, see a doctor or an eye care professional. Do not continue trying increasingly aggressive methods at home.
What to Do After the Lashes Are Off
Once the lashes are removed, your natural lashes and eyelid skin need a bit of care. Cleanse the area gently with a mild, fragrance-free cleanser to remove any oily residue. Pat the skin dry with a clean towel—do not rub.
Your natural lashes may feel weak or look sparse immediately after removal. This is normal, especially if you wear lashes frequently. The hair follicles need time to recover. If you notice significant lash loss that does not improve within a few weeks, or if you have patches of missing lashes, see a dermatologist. This can sometimes indicate an allergic reaction to the adhesive or a condition called traction alopecia, which is hair loss caused by pulling.
Give your eyes a break. If you wear lashes daily, consider going without them for a few days between applications. This gives your natural lashes time to rest and reduces the cumulative stress on the follicles.
How to Prevent Damage in the Future
Prevention is the best strategy. When applying lashes, use a thin layer of adhesive and let it get tacky before placing the lash. A thinner glue layer is easier to remove later. Applying the glue too thickly creates a larger surface area for the bond, which makes removal harder.
Always remove your lashes at night before sleeping. Sleeping in lashes can cause them to bend or twist, and the adhesive can harden overnight, making morning removal much harder. It also increases the risk of eye irritation from the adhesive breaking down.
If you find that your lashes always require significant force to remove, consider switching to a different adhesive. There are gentle, latex-free formulas available that are designed for daily wear and easier removal. Some people have sensitivities to latex-based glues, which can cause the adhesive to bond more aggressively to the skin.
Frequently Asked Questions
Can I use coconut oil to remove glued-on eyelashes?
Yes, coconut oil is an effective option because it is an oil-based product that can break down lash adhesive. Apply it generously, let it sit for 20 to 30 seconds, and gently slide the lashes off.
Is it safe to remove eyelash glue with micellar water?
Micellar water can work for light adhesives, but it is often not strong enough for heavy or waterproof glues. For best results, use an oil-based micellar water and give it enough contact time to dissolve the bond.
What happens if I pull my eyelashes off with glue?
Pulling can tear out your natural lashes, damage the hair follicle, and irritate the eyelid skin. Repeated pulling can lead to permanent thinning of your natural lash line.
How long should I wait before reusing my false eyelashes?
After removal, you should clean the false lashes to remove all adhesive residue before reusing them. If the band is bent, warped, or covered in dried glue that will not come off, discard them and use a new pair.
