
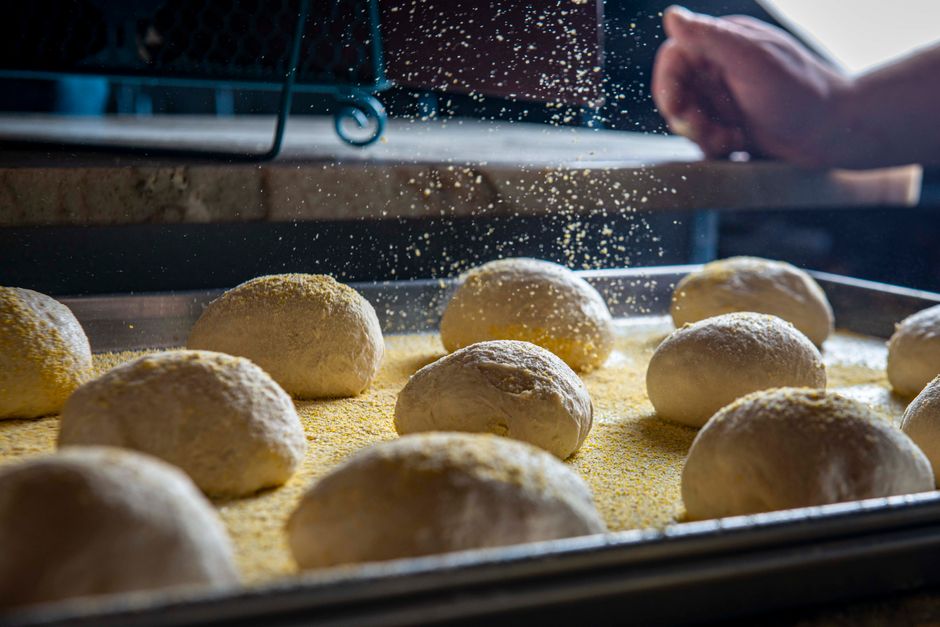
Proofing bread is the final rise that happens after you shape the dough and before it goes into the oven. It is the last chance for the yeast to produce gas and for the dough to develop its structure and flavor. Doing it right means giving the dough enough time to double in size without letting it overproof and collapse.
What Is Proofing Bread And How Do You Do It Right
Proofing, sometimes called the final proof or second rise, is the period when shaped dough ferments before baking. During this time, yeast consumes sugars and releases carbon dioxide gas. That gas gets trapped in the dough’s gluten network, which makes the bread rise and gives it an airy crumb.
Doing it right starts with knowing your dough. A properly proofed loaf is puffy, nearly doubled in size, and holds a gentle fingerprint when pressed. If the dough springs back immediately, it needs more time. If the indentation stays and the dough looks deflated, it has gone too far.
The ideal proofing temperature is around 75–80°F (24–27°C). At this temperature, most bread doughs proof in one to two hours. Cooler temperatures slow the process down. Warmer temperatures speed it up but also increase the risk of overproofing.
Why Is Proofing Different From The First Rise?
The first rise, or bulk fermentation, happens right after you mix the dough. The dough rests as one large mass. This is when most of the flavor develops through fermentation byproducts like organic acids and alcohols.
Proofing happens after you divide and shape the dough into its final form. The dough is now a single loaf or roll. The goal here is less about flavor and more about structure and volume.
Many bakers use a proofing basket or a covered container for this stage. The shape of the vessel helps the dough hold its form as it rises. If you skip shaping and go straight to the oven, you get a flat, dense loaf.
How Can You Tell When Dough Is Done Proofing?
The most reliable test is the finger poke test. Lightly flour your finger and press it about half an inch into the dough. Watch how the dough responds.
- If the indentation fills back in quickly, the dough is underproofed. Give it more time.
- If the indentation stays and the dough feels soft and pillowy, it is ready to bake.
- If the dough deflates or the indentation remains with a wrinkled look, it is overproofed.
Another sign is the jiggle test. Gently shake the pan or tray. A properly proofed loaf should wobble slightly, like gelatin. A dough that feels stiff or firm on the sides is not ready.
Visual cues matter too. The dough should look noticeably larger than when you shaped it. For most standard bread recipes, that means nearly doubled in size. Some enriched doughs with butter and eggs may rise less dramatically but should still feel airy and light.




What Happens If You Overproof Or Underproof Bread?
Underproofed bread is dense and has a tight crumb. The dough has not produced enough gas to create an open structure. The crust may tear or burst in the oven because the dough is still expanding when it hits the heat.
Overproofed bread is a different problem. The gluten structure has stretched too far and weakened. When you bake it, the dough may collapse or spread out flat. The crumb will be coarse with large, irregular holes. The flavor can turn sour or yeasty because fermentation went on too long.
In severe cases, overproofed dough becomes slack and sticky. It may not hold its shape at all. Some bakers try to save overproofed dough by punching it down and reshaping it for a shorter second rise. This can work sometimes, but the final loaf will rarely have the same quality as properly proofed bread.
Does Proofing Temperature Change The Result?
Yes, temperature is one of the biggest factors in proofing. Yeast activity roughly doubles for every 15–18°F (8–10°C) increase in temperature, within its active range. This means a warm kitchen will proof dough much faster than a cool one.
Cold proofing in the refrigerator is a popular technique. The dough rises slowly over 12 to 48 hours. This slow fermentation develops more complex flavors because enzymes have more time to break down starches and proteins. Many artisan bakers use cold proofing for sourdough and ciabatta.
Warm proofing is faster but produces a milder flavor. If you are in a hurry, a warm spot around 80°F (27°C) will get the job done. Just check the dough frequently. A warm environment can push dough from perfectly proofed to overproofed in a matter of minutes.
One common mistake is proofing in a hot oven with only the pilot light on. This can easily exceed 90°F (32°C), which is too warm for most doughs. At that temperature, the butter in enriched doughs melts out, and the yeast may die off.
How Do You Proof Bread In Different Conditions?
You do not need a proofing box to get good results. A simple covered bowl on the counter works for most home bakers.
For a warm environment, place the dough in an oven with the light on and the door closed. The light bulb generates enough warmth to keep the oven around 80°F (27°C). Make sure the oven is off and no one accidentally turns it on.
For a cool environment, use the refrigerator. This is the cold proofing method mentioned earlier. It takes longer, but the flavor improves significantly. Some recipes are specifically designed for an overnight cold proof.
Humidity also plays a role. Dry air can form a crust on the dough’s surface as it proofs. This crust restricts expansion and can cause the bread to tear. Cover the dough with a damp towel or plastic wrap to keep the surface moist. You can also lightly oil the dough before covering it.
Can You Proof Dough In The Microwave Or A Warm Water Bath?
Yes, but with caution. A microwave can work if you first heat a cup of water until it is steaming. Then place the dough inside with the water and close the door. The steam creates a warm, humid environment. Just do not run the microwave while the dough is inside.
A warm water bath is another option. Fill a large bowl with warm water around 100°F (38°C). Place the covered dough bowl in the water, making sure no water gets inside. This method is effective but requires monitoring because the water cools quickly.
Neither method is better than a consistent room-temperature proof. They are workarounds for unusual conditions. The key is to check the dough regularly and rely on the poke test rather than a timer.
How Long Should You Proof Bread?
There is no single correct time. It depends on the recipe, the amount of yeast, the temperature, and the hydration of the dough.
As a general guide, a standard yeasted bread proofed at room temperature takes about 60 to 90 minutes. Enriched doughs with butter, eggs, or sugar may take longer because the fat slows down gluten development. Lean doughs with just flour, water, yeast, and salt often proof faster.
Sourdough breads take longer because wild yeast is less active than commercial yeast. A sourdough proof can run two to four hours at room temperature. Cold proofed sourdough can take 12 to 24 hours.
The recipe’s instructions are your starting point. The dough’s appearance and feel are the final authority. A timer tells you when to check. The poke test tells you when to bake.
Frequently Asked Questions
What is the difference between proofing and rising?
Rising, or bulk fermentation, is the first rest after mixing the dough. Proofing is the final rise after shaping, right before baking.
How do I know if my dough is overproofed?
Overproofed dough looks deflated and feels slack. A poke test leaves a deep indentation that does not spring back, and the dough may have a sour smell.
Can I proof bread in the refrigerator?
Yes, cold proofing in the refrigerator is a common technique. It slows fermentation, develops more flavor, and allows you to bake the dough on your own schedule.
What temperature is best for proofing bread?
The ideal proofing temperature is about 75–80°F (24–27°C). Most doughs double in one to two hours at this temperature.
