
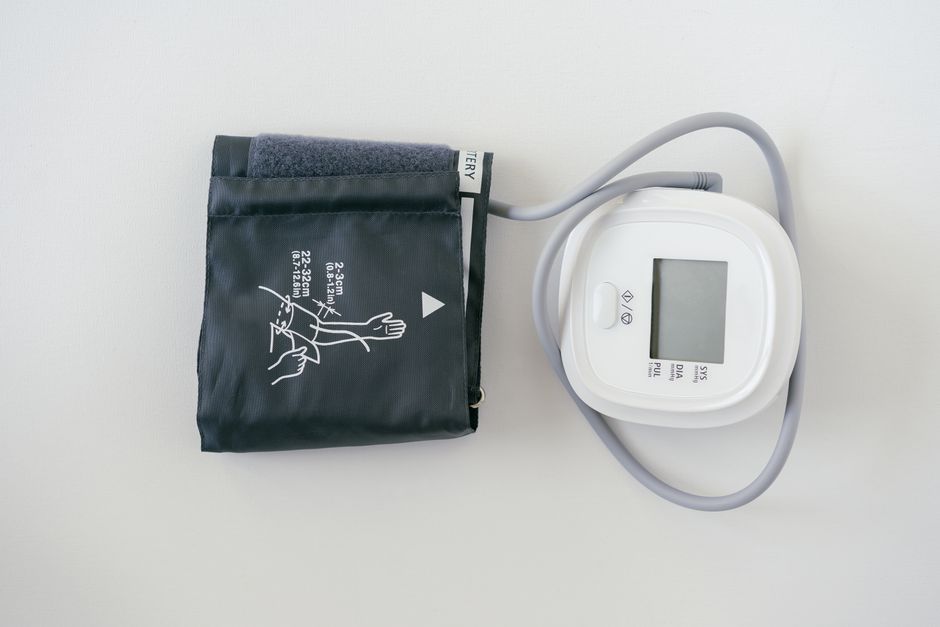
Using a blood pressure cuff correctly comes down to a few basics: sit still with your back supported and feet flat, rest your arm at heart level on a table, wrap the cuff on bare skin about one inch above the bend of your elbow, and stay quiet while the machine inflates and deflates. A reading taken this way is far more reliable than one grabbed while walking through the door or talking on the phone. The steps below walk you through the whole process, plus the mistakes that quietly push numbers up or down.
How To Use Blood Pressure Cuff? Step by Step Instructions
Most home monitors are automated and do the inflating for you. The steps are the same whether you use an upper-arm or wrist model, though upper-arm cuffs are generally the more reliable choice for home use.
Here is the sequence that gives you a clean reading:
- Rest first. Sit quietly for about five minutes before you measure. Rushing straight from activity to the cuff skews the number.
- Empty your bladder. A full bladder can raise a reading.
- Avoid caffeine, exercise, and smoking for at least 30 minutes before you measure.
- Sit properly. Back supported, feet flat on the floor, legs uncrossed. Crossing your legs or slouching changes what the cuff picks up.
- Rest your arm. Place it on a table so the cuff sits at roughly heart level. An arm hanging down or held too high shifts the reading.
- Wrap the cuff on bare skin. Roll up your sleeve rather than measuring over fabric. The bottom edge of the cuff should sit about one inch above the bend of your elbow.
- Check the fit. The cuff should be snug but not tight — you should be able to slip a fingertip under the edge. Too loose and the reading runs high; too tight and it can run low.
- Stay still and quiet. No talking, no scrolling, no moving during the measurement.
- Press start and wait. Let the machine inflate and deflate completely. Don’t touch the cuff while it’s working.
- Record the numbers. Write down the top number (systolic) and bottom number (diastolic), plus the date and time.
- Repeat once. Wait about a minute, then take a second reading. Many clinicians suggest averaging the two for a more stable picture.
The five-minute rest and the quiet-during-measurement rule are the two steps people skip most often. They also happen to matter a lot.
Why Does Cuff Placement and Fit Matter So Much?
Blood pressure cuffs work by sensing pressure in the artery under the cuff. If the cuff is in the wrong spot or the wrong size, the machine is measuring something other than what it should.
Position matters because the pressure in your arm changes with height. If the cuff sits below heart level, the reading runs high. If it sits above, the reading runs low. That is why arm support on a table is not a fussy detail — it keeps the cuff at the same level as your heart.
Fit matters even more. A cuff that is too small for your arm will give a falsely high reading, sometimes by a noticeable margin. A cuff that is too large can read low. Cuffs are sized by arm circumference, not by body size or age. Many home monitors come with a standard adult cuff, and people with larger or smaller arms may need to order the right size separately. Check the packaging for the arm range the cuff is designed for.
One detail that surprises people: for automated monitors, the cuff goes on the bare upper arm, not the forearm and not the wrist unless you are using a wrist monitor. Wrist monitors are more sensitive to position and are generally considered less accurate than upper-arm models, so many clinicians steer people toward upper-arm cuffs for home tracking.
What Common Mistakes Throw Off a Reading?
Small habits can move a reading by enough to matter. Most of them are easy to fix once you know to look for them.
- Talking during the measurement. Conversation can push the numbers up.
- Measuring over a sleeve. Fabric between the cuff and your skin affects the reading.
- Crossed legs or unsupported back. Both can nudge numbers higher.
- A full bladder. Discomfort from a full bladder can raise blood pressure.
- Measuring right after coffee, a cigarette, or exercise. All three can temporarily raise readings.
- Taking one reading and stopping. A single reading is a snapshot. Averaging two, or tracking over days, tells a truer story.
- Using the wrong cuff size. This is one of the most common and most overlooked errors.
If your numbers look unusually high or low, don’t panic and don’t adjust anything on your own. Recheck after a few quiet minutes with correct technique. If it stays off, that’s information worth sharing with your clinician.
When and How Often Should You Measure?
For people tracking blood pressure at home, many clinicians suggest measuring at consistent times — often morning and evening — rather than randomly through the day. Measuring at the same times makes patterns easier to spot.
Home monitoring is generally more useful as a series of readings than as a single number. One high reading after a stressful morning means little on its own. A week of readings taken the same way tells you and your clinician much more.
Bring your log to appointments. A written or app-based record of dates, times, and numbers gives your clinician far more to work with than a single measurement taken in the office, which can be affected by the setting itself. Some people even show higher numbers at the doctor’s office than at home — a well-recognized pattern.
If you take blood pressure medication, ask your clinician whether they want readings at particular times relative to your dose. That timing can matter for interpreting the numbers.
What Do the Numbers Mean?
The top number is systolic pressure — the pressure in your arteries when your heart beats. The bottom number is diastolic pressure — the pressure when your heart rests between beats. Both are measured in millimeters of mercury (mmHg).
For adults, the general categories used in clinical guidance look like this:
| Category | Systolic (mmHg) | and/or | Diastolic (mmHg) |
|---|---|---|---|
| Normal | Less than 120 | and | Less than 80 |
| Elevated | 120–129 | and | Less than 80 |
| High blood pressure (stage 1) | 130–139 | or | 80–89 |
| High blood pressure (stage 2) | 140 or higher | or | 90 or higher |
| Hypertensive crisis | Higher than 180 | and/or | Higher than 120 |
A reading in the hypertensive crisis range is a reason to seek medical care promptly, especially if you have symptoms like chest pain, shortness of breath, weakness, or vision changes. Do not wait to see if it comes down on its own.
These categories are general guides for adults. They are not a diagnosis, and they do not replace an evaluation by a clinician. A single elevated reading does not mean you have high blood pressure — diagnosis generally relies on repeated measurements over time, sometimes confirmed with home monitoring or a 24-hour monitor.
Do Home Monitors Give Accurate Readings?
A validated home monitor used correctly can give readings close to what you’d get in a clinic. The key word is validated. Not every device sold online has been checked against a standard, and some inexpensive models perform poorly.
Look for a monitor that has been validated for accuracy by a recognized body or listed in a reputable validation registry. Your clinician’s office can often point you toward a brand they trust. Bring your monitor to an appointment if you can — comparing your device against the office equipment is a practical way to check it’s in the right range.
Automated upper-arm monitors are the type most often recommended for home use. Wrist and finger monitors are more prone to error from position and are generally less reliable for tracking.
What If You Have Trouble Getting a Reading?
Some people struggle with home monitors — the cuff won’t inflate properly, the numbers jump around, or readings feel inconsistent. A few things to check:
- Make sure the cuff is the right size for your arm.
- Check that the tube connecting the cuff to the monitor isn’t kinked or loose.
- Confirm the batteries are fresh — weak batteries can affect performance.
- Try measuring on the other arm. Blood pressure can differ slightly between arms, and your clinician may want to know if it does.
- If readings stay erratic, ask your clinician’s office to check your technique or your device.
If you have a condition that affects circulation in your arms, or you’ve had surgery on an arm or breast, ask your clinician which arm is safe to use before you start measuring at home.
Frequently Asked Questions
Should I use my left or right arm for blood pressure?
Either arm works, but pick one and use it consistently so your readings are comparable over time. If the numbers differ noticeably between arms, tell your clinician, since a consistent difference can be worth checking.
How long should I wait between blood pressure readings?
About one minute between readings is a common approach, then average the two results. Waiting lets the arm recover from the pressure of the first measurement.
Can I take my blood pressure over a sleeve?
No — the cuff should sit on bare skin for an accurate reading. Fabric between the cuff and your arm can affect what the monitor measures.
What is a dangerously high blood pressure reading?
A reading higher than 180 systolic or higher than 120 diastolic falls in the hypertensive crisis range and warrants prompt medical attention, especially with symptoms like chest pain or shortness of breath. Call for emergency help if symptoms are severe.
