
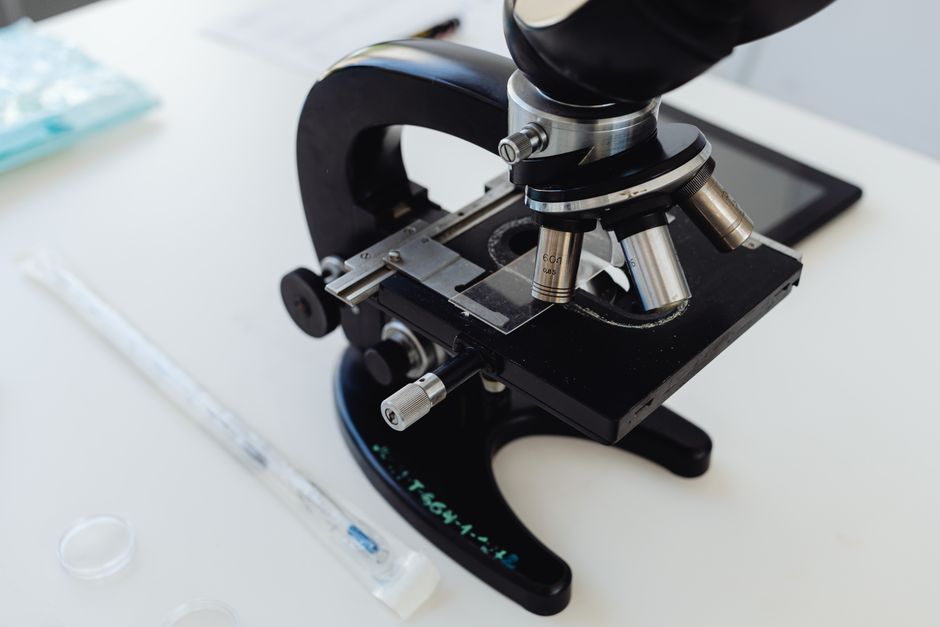
A stereo microscope lets you see the surface of a coin, the veins of a leaf, or the legs of a bee in three dimensions. You set it up by placing it on a stable surface, adjusting the eyepieces to your eyes, focusing on your sample with the lowest magnification first, and then increasing magnification as needed. The steps below walk through the full process in order, from unboxing to safe shutdown.
Unlike a compound microscope, which shines light up through a thin slice of specimen, a stereo microscope lights the sample from above and shows it the way your eyes would see it, just larger. That difference shapes how you use it.
What Is a Stereo Microscope and How Does It Differ From a Compound Microscope?
A stereo microscope uses two separate light paths, one for each eye, to produce a true three-dimensional view of a solid object. A compound microscope sends light up through a thin, translucent specimen and produces a flat, two-dimensional image at much higher magnification.
That design difference has practical consequences. Because each eyepiece has its own light path, you get depth perception, which matters when you are working with tweezers or a soldering iron under the lens. Stereo microscopes typically magnify in the range of roughly 10x to 40x, though models vary. Compound microscopes commonly reach 400x to 1000x.
Stereo microscopes are used for inspecting insects, plants, fabrics, circuit boards, gems, and small mechanical parts. They are also common in dissection labs and quality control work. If you need to see individual cells or bacteria, a stereo microscope will not get you there. If you need to see the structure of a whole insect leg in three dimensions, it will.
How Do You Set Up a Stereo Microscope Before Use?
Setup matters more than most people expect. A microscope that is not adjusted to your eyes and your workspace will produce eye strain and a poor image, no matter how good the optics are.
Choose a stable, well-lit surface
Place the microscope on a solid table at a height where you can sit upright with your forearms roughly level. A wobbly surface blurs the image at higher magnifications. Keep the base clear of clutter so nothing bumps the stand while you are looking through it.
Check the light source
Most stereo microscopes use built-in LED illumination, either from above (reflected light) or below (transmitted light), and many offer both. Reflected light is the default for opaque objects. Transmitted light works for thin, translucent samples like leaf tissue or prepared slides. Turn the light on and set it to a comfortable brightness before you look through the eyepieces.
Adjust the eyepieces to your eyes
If the eyepieces have rubber cups, fold them out if you wear glasses and in if you do not. If your microscope has a diopter adjustment ring on one or both eyepieces, set both to zero to start. You will fine-tune this later.
Set the lowest magnification first
If your microscope has a rotating objective turret or a zoom knob, start at the lowest setting. This gives you the widest field of view and the greatest depth of field, which makes it much easier to find and center your sample. Starting at high magnification is the most common beginner mistake.
How To Use A Stereo Microscope Step By Step
Once the microscope is set up, the actual viewing process follows a fixed sequence. Doing it in this order saves time and protects both the optics and your sample.
- Step 1: Place the sample on the stage. Center it under the objective lens, leaving a small gap between the top of the sample and the lens. If the sample is tall, lower the stage or raise the head before you look.
- Step 2: Focus with the coarse knob while watching from the side. Bring the objective down close to the sample, then look through the eyepieces and raise it slowly until the image comes into focus. Watching from the side prevents you from driving the lens into the sample.
- Step 3: Adjust the interpupillary distance. Slide the eyepieces together or apart until you see a single circular field of view rather than two overlapping circles. This is the step most people skip, and it causes eye strain.
- Step 4: Set the diopter for each eye. Close your left eye and focus the right eyepiece on your sample using the focus knob. Then close your right eye and adjust the left eyepiece’s diopter ring until the image is sharp for that eye. Both eyes should now see a focused image.
- Step 5: Increase magnification gradually. Rotate to the next objective or turn the zoom knob, then refocus slightly with the fine focus knob. At higher magnification the depth of field narrows, so small focus adjustments become necessary.
- Step 6: Adjust the light. Angle the reflected light or adjust brightness so the sample is evenly lit without glare. Glare washes out surface detail.
- Step 7: Work with both eyes open. Keep both eyes open even when looking through the eyepieces. Closing one eye defeats the purpose of a stereo microscope and tires your eyes quickly.
How Do You Focus on Small or Awkward Samples?
Small, uneven, or reflective samples are where stereo microscopes earn their keep, but they also cause the most frustration. A few adjustments solve most problems.
For very small items like a single seed or an insect, use a plain background such as a white card or a shallow dish. This improves contrast and makes the object easier to find at low magnification. For reflective objects like coins or metal parts, angle the light from the side rather than straight down. Side lighting creates shadows that reveal surface texture, which direct lighting flattens out.
For samples that are too tall for the stage, many stereo microscopes allow you to lower the stage or raise the head assembly. Check your manual before forcing anything. If your sample is translucent, switch to transmitted light from below, which can reveal internal structure that reflected light misses.
Depth of field is the main limitation at higher magnification. Only a thin slice of the sample will be in sharp focus at once. This is normal and expected. You refocus as you move across the sample rather than trying to get everything sharp at once.
What Common Mistakes Should You Avoid?
Most problems with stereo microscopes come from a handful of avoidable habits. Fixing these makes a noticeable difference.
Starting at high magnification is the most frequent error. It narrows the field of view and depth of field, making it hard to locate your sample. Always begin low and work up.
Skipping the interpupillary and diopter adjustments is the second. Without these, your eyes fight each other and the image never feels comfortable. The adjustment takes under a minute and pays off every time you use the scope.
Forcing focus knobs when they feel stiff is another. If a knob resists, stop. Something may be at the end of its travel or the sample may be jammed against the lens. Never force optics.
Leaving the microscope uncovered between sessions lets dust settle on the lenses. Dust on the objective or eyepiece shows up as blurry spots in the image. Use a dust cover when the scope is not in use.
How Should You Clean and Store a Stereo Microscope?
Cleaning is simple but needs care. Use a soft lens brush or a bulb blower to remove loose dust first. For smudges, use lens tissue and a small amount of lens cleaning solution, wiping gently in a circular motion. Never use household glass cleaner or paper towels on optical glass, since these can scratch coatings.
Clean the stage and body with a soft, slightly damp cloth. Keep liquids away from the eyepieces and any openings in the housing. After use, turn off the light, lower the magnification to its lowest setting, and cover the microscope. Store it in a dry place away from direct sun.
If the image looks hazy or has dark spots that do not move when you rotate the eyepieces, the dirt is likely on the objective lens or inside the optics. Internal cleaning is best left to a professional.
When Should You Use a Stereo Microscope Instead of a Compound Microscope?
Choose a stereo microscope when you need to see the surface of a solid object in three dimensions, or when you need room to work with tools under the lens. Choose a compound microscope when you need to see structures too small for stereo optics, such as cells, blood cells, or bacteria, usually on a prepared slide.
One practical rule: if the object is opaque and you want to see its surface, a stereo microscope is the right tool. If the object is thin and translucent and you want to see what is inside it at high magnification, a compound microscope is the right tool. Some work, like insect dissection, benefits from both.
Frequently Asked Questions
What magnification should I start with on a stereo microscope?
Start at the lowest magnification your microscope offers, often around 10x. This gives the widest field of view and makes it easier to find and center your sample.
Do I need to adjust the eyepieces if I wear glasses?
Yes, but fold the rubber eyecups down so your glasses sit close to the lens. You can usually leave your glasses on and still set the diopter for each eye.
Why does my stereo microscope image look blurry at high magnification?
Depth of field narrows as magnification increases, so only a thin slice of the sample stays in focus. Refocus slightly as you move across the sample, and check that the lenses are clean.
Can I use a stereo microscope to look at cells?
No, stereo microscopes generally do not magnify enough to see individual cells clearly. You need a compound microscope for that level of detail.
