
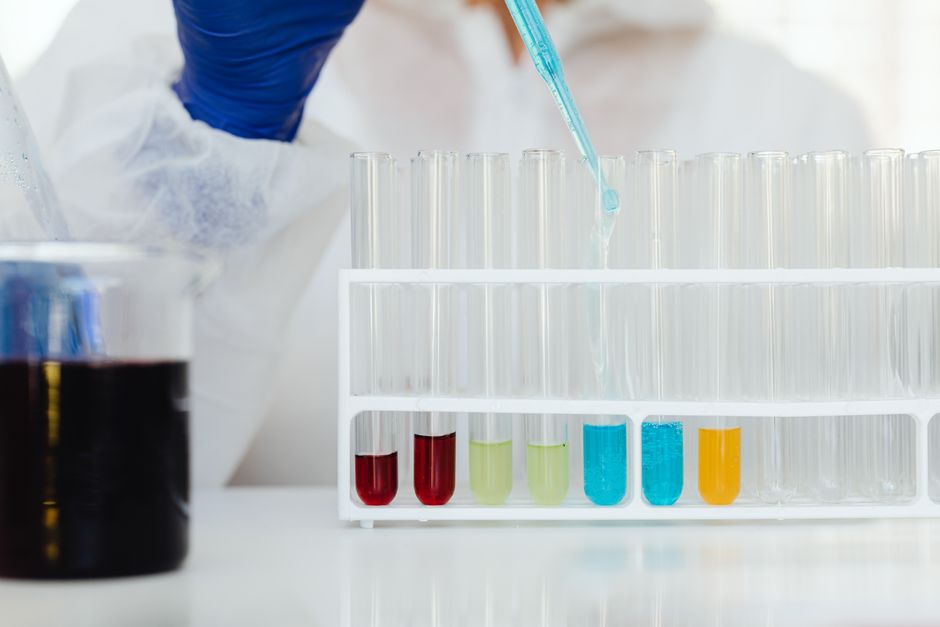
A Pasteur pipette is a simple tool, but small mistakes with it cause real problems — contaminated cell cultures, inaccurate volumes, and in a lab setting, exposure to chemicals or biological material. Using one safely and correctly comes down to four habits: inspect the pipette before every use, keep the tip below the liquid surface while drawing up, control the bulb slowly and deliberately, and never mouth-pipette or reuse a disposable tip across different samples. Get those right and the pipette does exactly what it was designed to do.
Most people who use a Pasteur pipette are not trained microbiologists. Students, hobbyists, home brewers, and technicians in small labs all reach for one. The device is forgiving, but it is not risk-free. This guide explains how it works, where the real hazards sit, and what correct technique looks like in practice.
What Is A Pasteur Pipette And How Does It Work?
A Pasteur pipette is a narrow glass or plastic tube with a tapered tip and a wider opening at the top. You attach a rubber bulb to the top, squeeze the bulb to push air out, then release it to draw liquid up into the tube. The tapered tip controls the drop size and lets you deliver liquid precisely into small containers.
The design dates back to Louis Pasteur, who used similar ungraduated pipettes in his work on fermentation and microbiology. The modern version comes in two main forms. A disposable plastic pipette is used once and discarded. A glass pipette is reusable, but it must be cleaned and sterilized between uses.
One clarification that surprises people: a standard Pasteur pipette has no volume markings. It transfers liquid, but it does not measure it. If you need a known volume, you need a graduated pipette or a micropipette. A Pasteur pipette is for moving fluid from one place to another, not for delivering a precise quantity.
How To Use A Pasteur Pipette Safely And Correctly
Correct technique follows a fixed sequence. Skipping steps is how contamination and spills happen.
- Inspect first. Check the glass for chips or cracks, and check the tip for a rough or broken edge. A cracked pipette can shed glass into your sample or cut you.
- Fit the bulb securely. The bulb should seat firmly with no gap. A loose bulb can pop off mid-transfer and spray liquid.
- Compress the bulb before entering the liquid. Squeeze the bulb fully while the tip is still in the air. This expels air so the pipette can draw up on release.
- Lower the tip below the surface. Keep the tip well under the liquid line to avoid drawing in air.
- Release slowly. Let the bulb expand gradually. Drawing too fast pulls liquid into the bulb, which contaminates it and ruins the transfer.
- Keep the pipette upright. Hold it roughly vertical so liquid stays in the lower tube and does not reach the bulb.
- Deliver by controlled pressure. Gently squeeze the bulb to release drops. For a slow, steady delivery, apply light, even pressure rather than a quick squeeze.
- Never invert the pipette. Tilting it far enough that liquid touches the bulb defeats the whole design.
If liquid does reach the bulb, stop. Discard the contents and clean or replace both the bulb and the pipette. A contaminated bulb will carry over into the next sample.
Why Is Mouth Pipetting Dangerous?
Mouth pipetting means drawing liquid up by suction from your mouth instead of using a bulb. It was once routine in laboratories. It is now prohibited in professional labs, and for good reason.
The hazard is straightforward. Any liquid you draw by mouth can splash or be inhaled, and if you misjudge the pull, it reaches your mouth. That risk applies to chemicals, biological samples, and solvents alike. There is no safe category of liquid to mouth-pipette, because you cannot guarantee what is in a sample or how it will behave.
The fix is simple: always use a bulb, a pipette pump, or a mechanical aid. If you do not have one, do not pipette. No transfer is worth the exposure risk.
How Do You Prevent Contamination Between Samples?
Cross-contamination is the most common error with reusable glass Pasteur pipettes. A pipette that touched one sample and then another carries material between them. In a microbiology or cell culture setting, that can invalidate an entire experiment.
The rule is one pipette per sample. For disposable plastic pipettes, use a fresh one each time and discard it. For glass pipettes, clean and sterilize between uses. Standard cleaning involves rinsing, washing, and then sterilization by autoclave or another validated method appropriate to your setting.
There is a practical detail many people miss. The bulb itself is a contamination risk. If you use the same bulb across multiple samples and it ever contacts liquid, it becomes a reservoir. Keep bulbs dry, and replace or clean them if liquid reaches them. When working with sterile samples, use a fresh sterile pipette and avoid touching the tip to any non-sterile surface.
What Safety Precautions Apply To Hazardous Liquids?
When the liquid is hazardous — a chemical, a solvent, a biological sample, or an unknown — the pipette is only part of the equation. Your personal protection and workspace matter just as much.
Wear appropriate gloves and eye protection. Work in a ventilated area or a fume hood when the liquid gives off vapors. Keep the pipette tip pointed away from your face and body. Never point a loaded pipette at anyone.
For biological material, follow the handling rules of your setting. Treat all human-derived samples as potentially infectious unless you have documented reason to believe otherwise. Dispose of used disposable pipettes and contaminated materials according to your local waste rules, not in general trash.
Glass Pasteur pipettes deserve a specific warning. They break. A broken pipette can cut through a glove and skin. If one breaks, do not pick up the pieces with bare hands. Use forceps or a scoop, and dispose of glass in a sharps or broken-glass container.
Glass Or Plastic: Which Should You Use?
The choice depends on what you are doing and what the sample requires. Neither type is universally better.
| Feature | Glass Pasteur pipette | Plastic disposable pipette |
|---|---|---|
| Reusability | Reusable after cleaning and sterilization | Single use |
| Breakage risk | Breaks; can cause cuts | Flexible; low breakage risk |
| Chemical compatibility | Good with most solvents; check for specific incompatibilities | Some plastics react with certain solvents |
| Sterility | Requires validated sterilization | Often supplied sterile |
| Best for | Repeat use, solvent work, heat-resistant needs | Convenience, sterile single transfers, biological samples |
For sterile biological work, a fresh sterile plastic pipette is usually the simpler choice because it removes the cleaning variable. For solvent work where plastic may degrade, glass is often preferred. Check compatibility for your specific liquid rather than assuming.
What Are The Most Common Mistakes?
Most problems trace back to a handful of errors. Recognizing them prevents most accidents.
- Drawing liquid too fast and pulling it into the bulb.
- Using one pipette for multiple samples.
- Mouth pipetting instead of using a bulb.
- Ignoring a chipped or cracked tip.
- Tilting the pipette until liquid reaches the bulb.
- Measuring volume with an ungraduated pipette.
- Disposing of broken glass in general waste.
None of these require advanced skill to avoid. They require attention. A Pasteur pipette rewards care and punishes haste, which is true of most lab tools.
Frequently Asked Questions
Can you mouth pipette with a Pasteur pipette?
No. Mouth pipetting is prohibited in professional laboratories because it risks exposure to chemicals and biological material. Always use a bulb or mechanical pipette aid.
How do you clean a glass Pasteur pipette?
Rinse it, wash it, and then sterilize it by a validated method such as autoclaving before reuse. The exact method depends on your setting and what the pipette contacted.
Can a Pasteur pipette measure exact volumes?
No. A standard Pasteur pipette has no graduations, so it transfers liquid but does not measure a known volume. Use a graduated pipette or micropipette when you need an exact amount.
What should you do if liquid gets into the bulb?
Stop the transfer and discard the contents. Clean or replace both the bulb and the pipette before using them again, since the bulb can carry contamination into later samples.
