
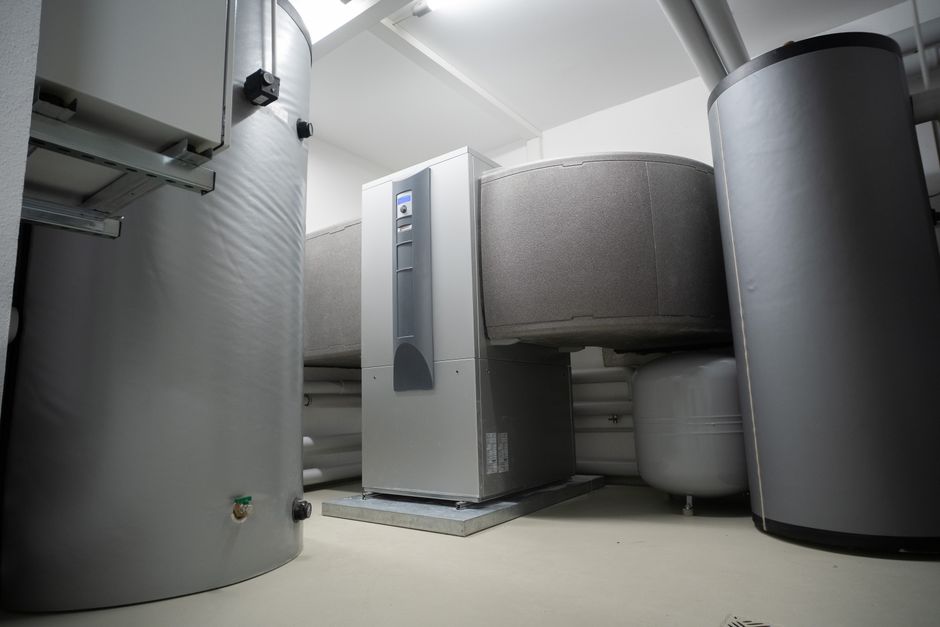
Testing a heat pump regularly is the best way to catch small problems before they turn into expensive repairs. This guide walks you through the essential checks you can do yourself, covering airflow, electrical connections, refrigerant lines, and thermostat accuracy. You will learn what to look for, what is normal, and when it is time to call a licensed HVAC technician.
Why Regular Heat Pump Testing Matters
A heat pump moves heat from one place to another. In summer it moves heat from inside to outside. In winter it reverses and pulls heat from the outdoor air into your home. This makes it efficient, but it also means both indoor and outdoor units work year-round.
When a component fails, you notice it in your comfort and your energy bill. A system that is low on refrigerant, has a dirty coil, or runs on a faulty capacitor uses more electricity to produce less heating or cooling. Regular testing catches these issues early, often before they cause a complete breakdown.
Skipping basic checks does not just shorten the life of the unit. It also costs you real money in wasted energy every month. A system running at reduced efficiency can increase your utility costs noticeably over a single season.
What You Need Before You Start Testing
Gather a few basic tools before you begin. Most homeowners already own these items.
- Screwdriver (flathead and Phillips)
- Multimeter with voltage and continuity settings
- Thermometer (an instant-read kitchen thermometer works)
- Fin comb for straightening bent coil fins
- Shop vacuum or soft brush for cleaning
- Flashlight
Turn the system off at the thermostat and at the breaker before opening any panel. Heat pumps contain high-voltage components. Even with the power off, capacitors can store a dangerous charge. If you are not comfortable working near electrical parts, stop at the visual checks and call a professional.
How To Test A Heat Pump Step By Step Checks: Airflow First
Airflow is the most common cause of poor heat pump performance. A system with restricted airflow cannot move enough air across the indoor coil to transfer heat effectively. This makes the compressor work harder and raises your energy bill.
Start with the filter. Pull it out and hold it up to the light. If you cannot see light through it, replace it. A clogged filter is responsible for a large percentage of heat pump service calls. Check it monthly during peak heating and cooling seasons.
Next, check the supply vents in each room. Make sure furniture, rugs, or curtains are not blocking them. Closed or blocked vents increase pressure in the ductwork, which reduces airflow and can damage the blower motor over time.
Finally, inspect the return air grille. This is the larger vent that pulls air back into the system. Vacuum away dust and debris. If you have pets, check this vent more often because pet hair accumulates quickly.




Testing the Thermostat and Control Settings
Set the thermostat to a temperature that clearly differs from the current room temperature. For example, if your home is 72°F and you want to test cooling, set the thermostat to 68°F. The system should start within a few minutes.
Listen for the sequence of operation. You should hear the blower start first, followed by the outdoor unit kicking on. If the outdoor unit does not start, the issue could be the thermostat, the control board, or a safety switch trip.
Check the thermostat display for error codes. Most modern thermostats show a code when something is wrong. Refer to your unit’s manual for what the specific code means. Some codes indicate a problem you can fix, like a dirty filter. Others point to refrigerant or electrical faults that require a technician.
Test the fan-only setting as well. It should run continuously without the compressor cycling on. If the fan runs but the compressor never starts, you have isolated the problem to the compressor circuit, not the blower.
Checking the Outdoor Unit
The outdoor unit works hard all year. It sits in the weather and pulls large volumes of air across its coil. Debris, leaves, and dirt accumulate quickly and restrict this airflow.
Start with a visual inspection. Look for obvious damage like dents, bent fins, or signs of animals nesting inside the unit. Clear away leaves, grass clippings, and branches within two feet of all sides of the unit.
Bent coil fins block airflow just like a dirty filter does. Use a fin comb to straighten them gently. These combs are inexpensive and available at hardware stores. Work slowly to avoid tearing the thin aluminum fins.
Inspect the refrigerant lines. These are the two copper tubes running between the indoor and outdoor units. The larger line should feel cool to the touch in cooling mode and slightly warm in heating mode. The smaller line should feel warm in cooling mode. If both lines feel the same temperature, the system may be low on refrigerant.
Look for oil stains near the refrigerant line connections. Oil residue often indicates a refrigerant leak. Do not touch the lines if the system has been running recently. They can be hot enough to burn you.
Measuring Temperature Difference Across the Indoor Coil
Temperature difference is a reliable indicator of heat pump health. You can measure this yourself with a simple thermometer.
Place the thermometer in the return air grille to get the incoming air temperature. Then place it in the supply vent closest to the indoor unit to get the outgoing air temperature. Subtract the two numbers.
A healthy heat pump in cooling mode produces a temperature difference of 15 to 20 degrees Fahrenheit. In heating mode, the difference is typically 20 to 30 degrees. These numbers vary slightly by system design and outdoor conditions, but a difference well below these ranges points to a problem.
If the temperature difference is too small, the system is not transferring heat properly. Common causes include low refrigerant, a dirty coil, or a failing compressor. All of these require professional diagnosis.
Inspecting Electrical Connections and Components
Loose electrical connections cause intermittent operation. The system may run fine for weeks, then suddenly stop working. This is often a loose wire or a failing capacitor.
With the power off, open the access panel on the outdoor unit. Look for discolored wires, burn marks, or signs of overheating. Gently tug on each wire connection to check that it is secure. A loose connection creates resistance, which generates heat and eventually damages the component.
The capacitor is a cylindrical component that stores electrical charge to help start the compressor and fan motor. A bulging top or leaking fluid means it is failing. Do not touch the capacitor terminals even with the power off. Capacitors can hold a lethal charge for hours after power is removed.
If you own a multimeter and know how to use it safely, you can test the capacitor for the correct microfarad rating. This number is printed on the side of the component. A reading more than 6 percent below the rated value means the capacitor should be replaced. If you are not comfortable with this test, leave it to a professional.
When to Call a Professional
Some heat pump problems are beyond the scope of a homeowner. Refrigerant handling requires an EPA license in the United States. You cannot legally add refrigerant to your system without proper certification.
Call a technician if you notice any of these signs:
- Ice or frost building up on the outdoor coil or refrigerant lines
- Water pooling around the indoor unit
- Unusual noises from either unit, like grinding, rattling, or hissing
- A burning smell from any vent
- The system short-cycles, turning on and off every few minutes
- Your energy bill jumps significantly without a change in usage
These symptoms point to issues that require specialized tools and training. Attempting to fix them yourself risks injury and can void your manufacturer’s warranty.
Regular professional maintenance once a year is still recommended. A technician can measure refrigerant charge, test electrical components, and inspect the compressor in ways you cannot at home. This annual checkup catches problems early and keeps your system running at peak efficiency.
Seasonal Testing Schedule
Test your heat pump at the start of each heating and cooling season. This catches problems before you depend on the system daily.
Before summer, focus on cooling performance. Check the filter, clean the outdoor coil, and measure the temperature difference in cooling mode. Before winter, repeat the same checks and pay attention to the defrost cycle. The outdoor unit should periodically run a defrost cycle that melts ice off the coil. If ice builds up and stays, the defrost control board may be faulty.
Between seasons, do a quick visual check monthly. Look for debris around the outdoor unit and check the filter. These two simple habits prevent most common heat pump problems.
Frequently Asked Questions
How do I know if my heat pump is working properly?
Measure the temperature difference between the return air and supply air. A healthy system shows a 15 to 20 degree difference in cooling mode and a 20 to 30 degree difference in heating mode.
Why is my heat pump running but not heating or cooling?
Low refrigerant, a dirty coil, or a failing compressor are the most common causes. Check the air filter first, then measure the temperature difference to confirm the system is underperforming.
Can I test my heat pump capacitor myself?
Yes, if you have a multimeter and know how to discharge a capacitor safely. A reading more than 6 percent below the rated microfarad value means the capacitor needs replacement. If you are unsure, call a technician.
How often should I test my heat pump?
Run a full set of checks at the start of each heating and cooling season. Do a quick visual inspection and filter check monthly throughout the year.
