
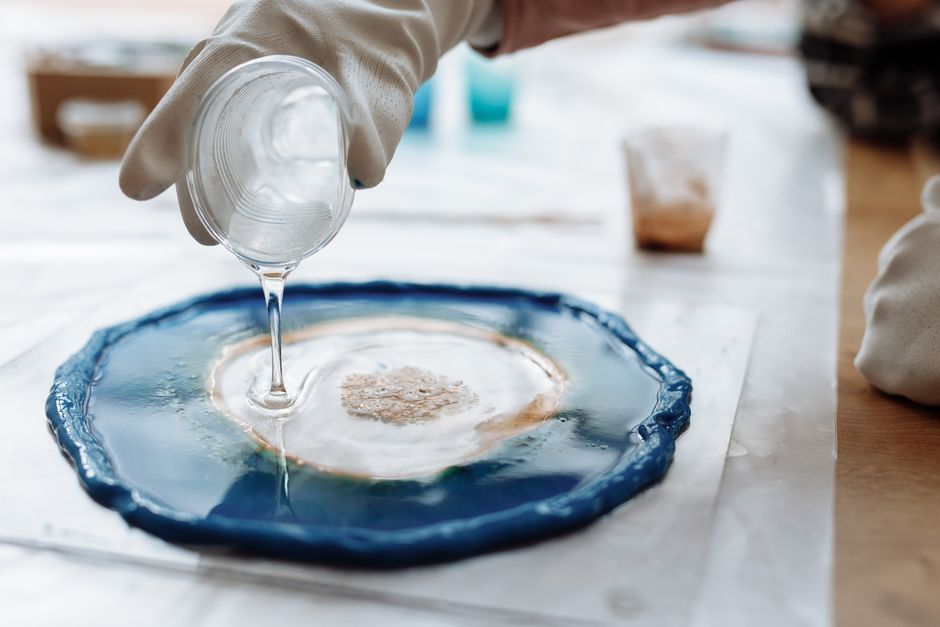
Getting a glass-like finish on epoxy resin is the goal for most projects, but it rarely happens straight out of the mold. Bumps, dust specks, and dull spots are common. The good news is that you can fix these flaws and reach a true glossy finish with a few reliable methods. The most dependable approach is wet sanding with progressively finer grits, followed by a polishing compound. For small imperfections, a fresh coat of epoxy is the simpler fix. The method you choose depends on how bad the surface is and what you are working on.
Why Does Epoxy Resin Dry Dull or Bumpy?
Epoxy resin cures to a hard, durable plastic. But the surface finish depends on the mold or the environment. If you pour into a silicone mold, the resin copies the mold’s surface exactly. A matte mold gives a matte finish. A glossy mold gives a glossy finish. If you pour on a flat surface like a table or a painting, the resin is exposed to air. Dust, lint, and pet hair can land on it while it cures. Tiny air bubbles can also rise to the surface and pop, leaving small craters.
Another common cause is curing conditions. Resin that cures in a cold room can develop a slightly sticky or dull surface. This is called amine blush. It is a waxy film that forms on the surface when moisture reacts with the resin during curing. Even with perfect pouring, the surface may still need work if you want a mirror-like shine.
How To Smooth Epoxy Resin To A Glossy Finish with Wet Sanding
Wet sanding is the most reliable way to get a glossy surface on cured epoxy. It works by removing the top layer of resin and smoothing out any imperfections. The process is simple but requires patience.
Start with a coarse grit to remove deep scratches or bumps. Use 220 or 320 grit sandpaper. Always sand wet. Dip the sandpaper in water and keep the surface wet while you work. This prevents the resin from heating up and clogging the paper. It also washes away the dust so you can see your progress.
Sand in a circular motion or back and forth. Apply even, light pressure. Do not press hard. The goal is to level the surface, not to dig into it. After a few minutes, wipe the surface dry and check for any remaining dull spots or scratches. Move to the next grit only when the surface looks uniform.
Progress through the grits in order. A typical sequence is 220, 400, 800, 1200, 1500, and 2000. Some people stop at 2000 and go straight to polishing. Others prefer to go up to 3000 or 5000 grit for an even smoother base. The higher the grit, the finer the scratches. Fine scratches are what the polishing compound will remove.
Between each grit, wipe the surface clean and check your work. Never skip grits. Skipping from 400 to 1500 will leave deep scratches that are hard to remove later. Each grit removes the scratches left by the previous one.
Polishing Epoxy Resin to a Mirror Shine
Once you reach the highest grit, the surface should look dull but smooth. This is normal. The fine scratches from the sandpaper scatter light, which makes the surface look hazy. Polishing compound removes those fine scratches and restores the gloss.
Use a polishing compound designed for plastics or automotive finishes. Apply a small amount to a soft cloth or a foam polishing pad. If you have a rotary tool or a drill with a polishing attachment, you can use that. Hand polishing works too, but it takes longer.
Work in small sections. Apply the compound and rub in a circular motion. Keep the surface slightly damp if needed. You should see the haze disappear and a shine appear. Wipe off the excess compound and check the result. If the shine is not complete, apply more compound and repeat.
For the final step, some people use a finer polish or a resin-specific polishing product. This step is optional but can enhance the shine. The result should be a clear, reflective surface that looks like glass.
-
 How To Polish Stainless Steel Welds To A Mirror Finish?
 -
Mounjaboost Reviews & Complaints: Does Drops Work for Weight Loss?
-
Yu Sleep Weight Loss Supplement Reviews. Critical March 2026 Update.
-
Neuro Energizer Review 2026. Legit Brain Tool or Just Hype?
-
Acupuncture for Weight Loss: Does It Really Work?




Using a Fresh Coat of Epoxy Instead of Sanding
Wet sanding is not always necessary. If the surface has minor imperfections like dust specks or a dull patch, you can pour a fresh, thin coat of epoxy over the top. This is called a flood coat or a topcoat. It fills in small flaws and cures to a glossy finish on its own.
This method works best when the existing resin is fully cured and clean. Lightly sand the surface with a fine grit like 320 to give the new layer something to grip. Wipe off the dust with a clean cloth and isopropyl alcohol. Then mix a small batch of fresh resin and pour it over the surface. Spread it evenly with a squeegee or a spreader. Let it cure in a dust-free area.
The new layer will self-level and dry with a natural gloss. This method is faster than sanding and polishing, but it only works when the existing surface is already level. If the surface has deep scratches, waves, or thick bumps, a new coat will not fix them. You need to sand those out first.
What About Resin Spray or Liquid Polish?
There are products sold as resin polishes or gloss sprays. Some of them work, but you need to read the label carefully. Many of these are simply polishing compounds in a liquid form. They will only work if the surface is already smooth. They do not remove scratches or bumps.
Some sprays are designed to be a final protective layer. They may add a temporary shine, but they are not a substitute for proper sanding and polishing. The shine from a spray will wear off or may look uneven on a rough surface.
A common misconception is that a spray can fix a dull or cloudy epoxy surface. It cannot. Cloudiness is usually caused by trapped moisture, uneven curing, or deep scratches. A spray sits on the surface and does not penetrate or correct these issues. The only reliable fixes are wet sanding, polishing, or adding a fresh coat of resin.
How to Prevent an Imperfect Finish in the First Place
Prevention is easier than repair. A few simple steps can save you hours of sanding. First, work in a clean, dust-free room. Close windows and doors. Turn off fans and air conditioning while the resin cures. Cover nearby surfaces with plastic sheeting. Wear clean clothes and consider wearing a lint-free apron.
Second, use a torch or a heat gun after pouring. Pass the flame over the surface to pop air bubbles. Do this a few minutes after pouring and again after 10 to 15 minutes. This pulls bubbles to the surface and pops them before the resin starts to gel.
Third, control the temperature. Resin cures best in a warm room, around 70 to 75 degrees Fahrenheit. Cold temperatures slow the cure and increase the chance of amine blush. If you are working in a cold garage, move the project indoors or use a space heater.
Finally, consider using a dust cover. You can buy a collapsible drying tent or make your own with cardboard and plastic wrap. Place it over the project while the resin cures. This keeps dust and pet hair off the surface.
Why Amine Blush Makes the Surface Dull
Amine blush is a waxy film that can form on epoxy resin as it cures. It happens when moisture in the air reacts with amines in the resin. The film is not always visible. It can look like a dull haze or feel slightly greasy to the touch. It can also prevent a new coat of resin from sticking properly.
If you suspect amine blush, wash the surface with warm water and a mild detergent. Some resin brands recommend using white vinegar or a specialized resin cleaner. Scrub gently with a soft cloth or sponge. Rinse thoroughly and dry with a clean, lint-free cloth. Do not sand the surface before washing it. Sanding can push the waxy film into the resin and make it harder to remove.
Once the blush is removed, you can proceed with sanding or applying a new coat. Some resin brands are formulated to resist amine blush. Check the technical data sheet for your specific product to see if it mentions blush resistance.
Frequently Asked Questions
Can I use a heat gun to smooth epoxy resin?
Yes, but only while the resin is still liquid. A heat gun or torch pops air bubbles and helps the resin self-level. It does not work on cured resin.
What is the fastest way to get a glossy finish on epoxy?
Pouring a fresh thin topcoat is the fastest method if the surface is already level. Wet sanding and polishing takes longer but is the most reliable for fixing any surface.
Do I need to sand epoxy before adding another coat?
Yes. Lightly sand the cured surface with 320-grit sandpaper and wipe it clean. This gives the new resin a rough surface to bond to.
Why is my epoxy resin still sticky after curing?
Sticky resin usually means the mix ratio was off or the resin did not cure fully. Cold temperatures can also cause this. The only fix is to remove the sticky layer and recoat with a properly mixed batch.
