
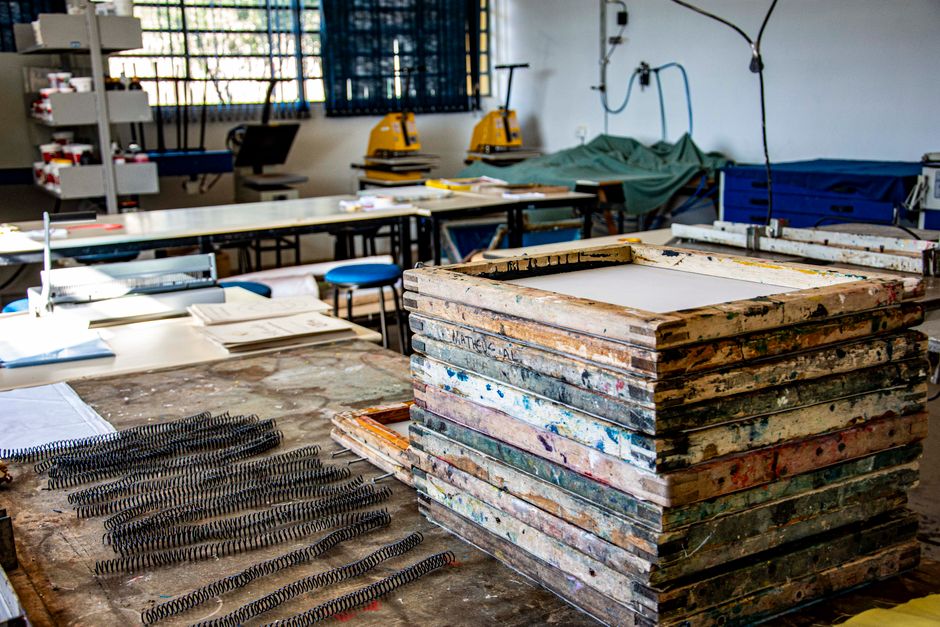
Screen printing works because of one simple idea: you push ink through a mesh screen onto fabric, then heat the ink until it bonds with the fibers. The setup, printing, and curing stages each have their own requirements, and getting any one of them wrong shows up in the final result. Curing is the step most beginners underestimate — ink that looks and feels dry is not necessarily bonded, and uncured ink will wash out or crack over time.
What Is Screen Printing and How Does It Actually Work?
Screen printing is a stencil process. A fine mesh is stretched tight over a frame, and a light-sensitive emulsion is coated onto it. When you expose that coated screen to light through a film positive, the areas blocked by the image stay soft while the exposed areas harden. Wash out the soft parts and you have an open stencil.
Ink is then pushed through those open areas with a squeegee. The mesh controls how much ink passes through. A thin mesh deposits less ink; a coarser mesh lays down more. The ink sits on top of the fabric surface and, after curing, mechanically locks into the fibers.
This is different from digital printing, where ink is jetted onto the surface. Screen printing deposits a thicker layer of ink, which is why prints feel heavier and last longer under repeated washing. It is also why the process is slower to set up but faster to run once the screens are ready.
One detail that surprises many people: the squeegee does not just push ink through the mesh. It also shears the ink, which lowers its viscosity momentarily so it flows through the openings. That is why squeegee angle and speed matter more than most beginners expect.
What Do You Need for a Screen Print Setup?
Every screen printing project starts with the same core materials. What you choose at each step determines how the print looks and how long it lasts.
- Mesh screens — available in different mesh counts. Higher counts (finer mesh) are used for detailed line work. Lower counts deposit more ink and suit bold, solid areas.
- Emulsion — the light-sensitive coating that forms the stencil. Different emulsions are formulated for water-based or plastisol inks.
- Film positive — a transparent sheet with your design printed in opaque black. This blocks light during exposure.
- Exposure unit — a light source that hardens the emulsion. UV light sources are standard.
- Squeegee — a rubber blade with a sharp edge. Durometer (hardness) affects ink deposit.
- Ink — plastisol, water-based, or discharge inks are the main types used on fabric.
- Platen — the flat surface the garment sits on during printing.
Mesh count matters more than any other single variable for print quality. If the mesh is too fine for your ink, the ink will not pass through cleanly. If it is too coarse for your design, fine details will fill in and disappear.
How To Screen Print Setup Printing And Curing Step by Step
The process follows a fixed order. Skipping or rushing any step creates problems that show up later — usually after the first wash.
Step 1: Prepare the artwork. Separate your design into colors. Each color needs its own screen and its own film positive. Registration marks help you line up the screens later.
Step 2: Coat the screen with emulsion. Apply a thin, even layer using a scoop coater. Coat both the print side and the squeegee side. Dry the screen in a dark, dust-free space. Heat can speed drying, but too much heat will fog the emulsion.
Step 3: Expose the screen. Place the film positive on the screen and expose it to your light source. Exposure time depends on your emulsion, mesh count, and light source. Underexposure means the stencil will break down during printing. Overexposure means fine details will not wash out.
Step 4: Wash out the screen. Spray with water to remove the unexposed emulsion. The image area opens up. Dry the screen fully before printing.
Step 5: Set up the press. Mount the screen, align it with the platen, and register it to any other screens. Adjust off-contact — the small gap between the screen and the garment. Off-contact lets the screen snap back after the squeegee passes, which helps prevent smearing.
Step 6: Print. Flood the screen with ink first (a light pass that fills the mesh openings without pushing ink through). Then make a firm, even print stroke with the squeegee. Consistent speed and pressure matter more than speed alone.
Step 7: Cure the ink. This is the step that determines whether the print survives washing. More on this below.




What Temperature and Time Does Curing Require?
Plastisol ink cures when the entire ink film reaches a specific temperature — not when the surface looks dry. The standard target for plastisol is 320°F (160°C) throughout the ink layer. The dwell time depends on your heat source and ink thickness, but the temperature of the ink itself is the variable that matters.
This is where many beginners go wrong. A heat gun can make the surface of plastisol ink look dry within seconds, but the ink underneath may still be far below curing temperature. That print will crack, fade, or wash out.
Water-based inks cure differently. They need both water evaporation and, for many formulations, a chemical crosslinking reaction that requires heat. Some water-based inks are formulated to cure at lower temperatures, but the manufacturer’s specified temperature and time should be followed.
To verify curing, use a non-contact infrared thermometer to check the ink temperature immediately after it exits the heat source. A wash test — printing a sample, curing it, and running it through several wash cycles — gives you a real-world check that temperature readings alone cannot provide.
Why Does Ink Crack, Fade, or Wash Out?
Almost every print failure traces back to one of four causes: undercuring, too much ink, poor mesh tension, or wrong ink for the fabric.
Undercuring is the most common. The ink never fully bonds, so it flakes or washes away. The fix is more heat or longer dwell time — not more ink.
Too much ink deposit causes the print to feel thick and rubbery. It also cracks when the fabric stretches because the ink layer cannot flex with the garment. Using a higher mesh count or a harder squeegee reduces deposit.
Low mesh tension causes the screen to deform during the print stroke. The image edges blur and registration drifts between colors. Retensioning or replacing the screen solves this.
Wrong ink type is a problem on synthetic fabrics. Plastisol ink does not adhere well to untreated polyester, for example. Some fabrics require a catalyst additive or a different ink chemistry entirely.
If you are printing on dark garments with light ink, you may also need an underbase — a layer of white ink printed first to make the top color opaque. Underbases need to be gelled (partially cured) before the top color goes down, or the two layers will mix.
Do You Need a Heat Press or Just a Heat Gun?
A heat press gives consistent, even heat across the entire print. A heat gun applies heat unevenly and is difficult to control. For plastisol ink, a heat press or a conveyor dryer is the reliable option. Heat guns are sometimes used for spot-curing or for very small prints, but they are not a substitute for proper equipment.
A conveyor dryer is the standard for production work. It moves garments through a heated tunnel at a controlled speed, so every print gets the same temperature and dwell time. For small batches, a heat press works well if you follow the ink manufacturer’s temperature and time specifications.
If you are curing with a heat press, place a sheet of parchment or silicone paper over the print to protect it from the press surface. Apply the specified temperature for the specified time. Do not guess — check the ink manufacturer’s technical data sheet.
Frequently Asked Questions
How do I know if my screen print is fully cured?
Check the ink temperature with a non-contact infrared thermometer — plastisol needs to reach 320°F (160°C) throughout the ink layer. A wash test on a sample print is the most reliable real-world confirmation.
Can I cure screen printed shirts in a regular oven?
No. Home ovens cannot maintain the consistent, controlled temperature needed for proper curing, and plastisol fumes are not safe to breathe in an enclosed space. Use a heat press or conveyor dryer designed for screen printing.
Why does my screen print crack after washing?
Cracking almost always means the ink was undercured or too thick. Undercured ink never fully bonds to the fabric, and a thick ink layer cannot flex with the garment during washing.
What mesh count should I use for screen printing?
Mesh count depends on the detail level and ink type. Finer mesh (higher count) holds fine detail but deposits less ink; coarser mesh lays down more ink for bold, solid areas. Your ink manufacturer’s guidelines are the best starting point.
