
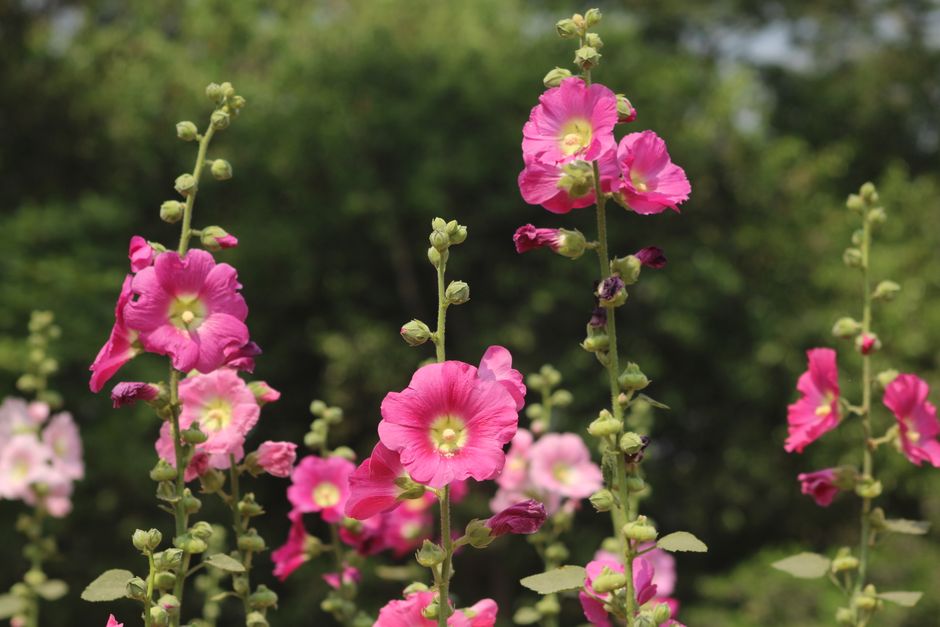
Hollyhocks are a garden classic, but many gardeners are surprised to learn they are short-lived perennials. They often act like biennials, blooming in their second year before fading. The good news is that you can keep them going indefinitely by propagating new plants. The three reliable methods are growing from seed, dividing existing plants, and taking cuttings. Seed is the most common and easiest method, while division and cuttings are useful for preserving a specific color or variety.
How To Propagate Hollyhocks Seeds Division Cuttings
The best method depends on your goal. Seeds are simple, cost-effective, and produce many plants, but they may not grow true to the parent plant’s color. Division works only on established clumps and produces identical plants. Cuttings are the most reliable way to clone a specific plant, though they require more patience and care.
For most home gardeners, starting with seeds is the practical first step. Division is a quick win if you already have a large plant. Cuttings are for the gardener who wants an exact copy of a prized flower.
How Do You Propagate Hollyhocks From Seed?
Hollyhock seeds are easy to handle and germinate readily. You can sow them directly outdoors or start them indoors for earlier blooms.
For outdoor sowing, wait until after the last spring frost. Scatter the seeds on the soil surface and press them in lightly. Hollyhock seeds need light to germinate, so do not bury them deeply. A thin dusting of soil or a gentle press into the surface is enough. Keep the area consistently moist until seedlings appear, which usually takes 10 to 14 days.
For indoor starts, sow seeds about 6 to 8 weeks before your last expected frost. Use a standard seed-starting mix and press seeds onto the surface. Provide bright light and keep the soil warm, around 65 to 70 degrees Fahrenheit. Once the seedlings have two sets of true leaves, they can be hardened off and transplanted outdoors.
Some gardeners cold-stratify hollyhock seeds before planting. This mimics winter conditions and can improve germination rates. Place the seeds in a damp paper towel inside a plastic bag and refrigerate them for 2 to 3 weeks before sowing. This step is not strictly necessary but can help in cooler climates or with older seed stock.
Can You Divide Hollyhocks?
Yes, you can divide hollyhocks, but timing matters. Hollyhocks have a taproot, which makes them different from many other perennials that have fibrous root systems. A taproot grows straight down, and dividing it can be tricky.
The best time to divide hollyhocks is in early spring or early fall when the plant is not actively blooming. Dig around the plant carefully to avoid cutting the main root. Lift the entire clump and look for natural divisions where the crown separates. Use a sharp, clean knife to cut through the crown, ensuring each division has some roots attached.
Be aware that division is not always successful with hollyhocks. The taproot does not always split cleanly, and the plant may struggle after transplanting. If you want to be certain of success, cuttings or seeds are more dependable methods.





How Do You Take Hollyhock Cuttings?
Taking cuttings is the most reliable way to clone a specific hollyhock plant. The best type of cutting is a basal cutting, taken from new growth at the base of the plant in spring.
Look for young shoots that are 3 to 4 inches tall and have not yet flowered. Cut them cleanly at the base with a sharp knife. Remove the lower leaves, leaving just a few at the top. Dip the cut end in rooting hormone powder to encourage root development, though this is optional.
Plant the cuttings in a pot filled with moist, well-draining potting mix. Insert each cutting about an inch deep. Cover the pot with a clear plastic bag or a propagator lid to maintain humidity. Place it in bright, indirect light, not direct sun. Keep the soil consistently moist but not waterlogged.
Roots typically form in 2 to 4 weeks. You will know the cutting has rooted when you see new growth at the top or feel slight resistance when you gently tug on the stem. Once rooted, transplant each cutting into its own pot and let it grow on before planting outdoors.
What Is the Best Time of Year to Propagate Hollyhocks?
Timing influences success more than most gardeners expect. Each propagation method has an ideal window.
Seeds are most flexible. You can sow them in spring after the last frost for blooms the following year. You can also sow them in late summer or early fall, allowing them to establish roots before winter. Fall-sown seeds often bloom earlier the next season.
Division works best in early spring just as new growth appears, or in early fall after the plant has finished blooming. Avoid dividing during hot summer months, as the stress can kill the plant.
Cuttings should be taken in spring when the plant is actively growing. This is when new basal shoots are plentiful and have the highest chance of rooting successfully. Taking cuttings too late in the season often results in woody stems that root poorly.
Why Do Hollyhocks Not Bloom the First Year?
Many gardeners worry when their hollyhocks do not flower in the first year. This is normal behavior for the plant.
Hollyhocks are biennials in most climates. In the first year, they put energy into growing leaves and establishing a strong root system. They bloom in their second year, then set seed and often die. This is why they are sometimes called short-lived perennials.
Some varieties bred for annual performance will bloom in their first year if started early indoors. Check the seed packet for information about whether the variety is a true biennial or an annual type. Even so, most hollyhocks follow the two-year cycle naturally.
If your hollyhock does not bloom in its second year, the issue is often light. Hollyhocks need full sun, meaning at least 6 hours of direct sunlight daily. Too much shade reduces flowering. Poor soil fertility can also delay blooming, though over-fertilizing with nitrogen produces lush leaves at the expense of flowers.
How Do You Prevent Rust Disease When Propagating?
Hollyhocks are prone to rust, a fungal disease that causes orange-brown pustules on the undersides of leaves. Rust can weaken plants and spread quickly through a garden.
When propagating, start with clean material. Inspect parent plants for any signs of rust before taking cuttings or divisions. Do not propagate from a plant that shows orange spots or yellowing leaves.
For seedlings, use fresh, sterile potting mix. Garden soil can harbor rust spores from previous seasons. Keep seedlings well-spaced to allow air circulation, which reduces humidity around the leaves.
If rust appears on established plants, remove and dispose of affected leaves promptly. Do not compost them, as the spores can survive and reinfect next year’s plants. Water at the base of the plant rather than overhead to keep foliage dry. Some gardeners apply a preventive fungicide in early spring, but this is only necessary if rust has been a recurring problem in your garden.
How Long Do Propagated Hollyhocks Take to Bloom?
Patience is part of growing hollyhocks. The timeline depends on the method you choose.
Plants grown from seed sown in spring typically bloom in their second summer. Plants grown from seed sown in late summer or fall also bloom the following summer, which is roughly the same timeline. Starting seeds indoors in late winter may produce blooms by late summer of the same year, but this is not guaranteed.
Divided plants may bloom in the same season if divided early in spring and given good care. However, division can set the plant back, and some divided hollyhocks skip a year of blooming to recover.
Cuttings taken in spring usually flower the following year. The cutting spends its first season developing roots and foliage. By the next summer, it should be mature enough to produce flowers.
What Is the Easiest Method for Beginners?
If you are new to propagating hollyhocks, start with seeds. They require the least equipment and have the highest success rate.
Seeds do not need special tools or controlled conditions. Scatter them on the soil, keep them moist, and wait. Even if germination is not perfect, a single seed head produces hundreds of seeds, so you have plenty of chances.
Cuttings are more demanding. They require humidity control, careful watering, and patience while roots form. Division is simple in theory but can fail because of the taproot structure.
For the most reliable results, collect seeds from your healthiest plants each year. This ensures a continuous supply of new hollyhocks without any additional effort.
Frequently Asked Questions
Can hollyhocks be grown from root cuttings?
Yes, root cuttings can work for hollyhocks, but they are less common than stem cuttings. Take 2 to 3 inch sections of healthy root in late winter and plant them horizontally in potting mix.
Do hollyhock seeds need cold stratification?
Cold stratification is optional but can improve germination. Refrigerating seeds in a damp paper towel for 2 to 3 weeks mimics winter and often produces more uniform sprouting.
How long do hollyhock seeds stay viable?
Hollyhock seeds remain viable for 3 to 4 years when stored in a cool, dry place. Older seeds germinate at lower rates, so fresher seed is always preferable.
Why are my hollyhock cuttings rotting?
Rotting cuttings are usually caused by too much moisture or poor drainage. Ensure your potting mix is well-draining and do not let the pot sit in standing water.
