
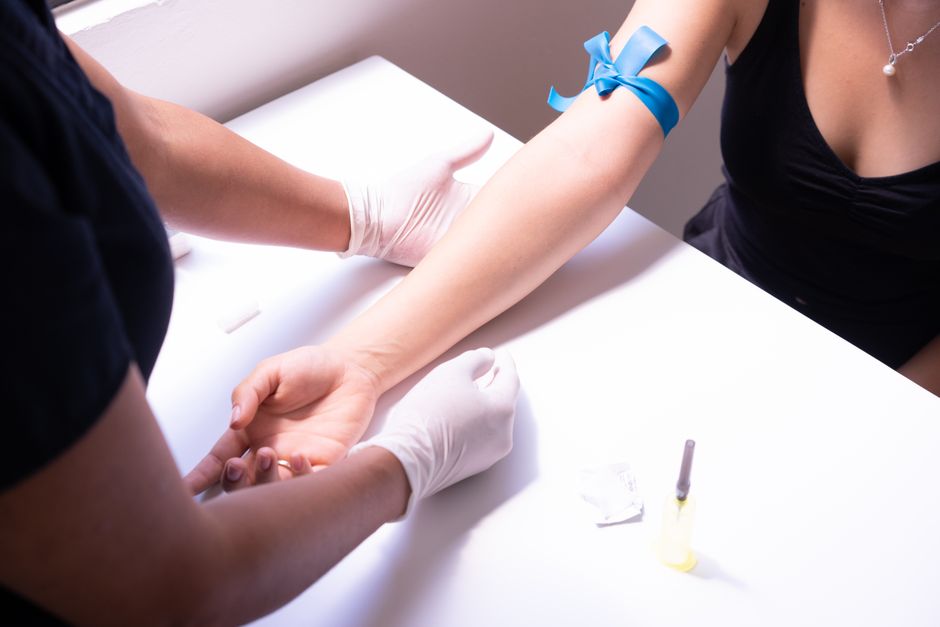
Phlebotomy is the practice of drawing blood from a vein for testing, transfusion, or donation. The standard technique is venipuncture using a needle and collection tube. You perform it by locating a suitable vein, cleaning the site, inserting the needle at the correct angle, and filling the collection tubes in the proper order. This guide explains the step-by-step technique used in clinical settings, along with the reasons behind each step.
What Is the Standard Phlebotomy Technique?
The most common method is evacuated tube phlebotomy. A double-ended needle attaches to a plastic holder. You insert one end into the patient’s vein and the other into a vacuum-sealed collection tube. The vacuum pulls blood into the tube automatically.
This method is preferred because it is fast, reduces the risk of needle sticks for the phlebotomist, and delivers accurate blood-to-additive ratios. The additives in the tubes — such as anticoagulants or clot activators — only work correctly if the tube fills to the marked line.
Step 1: Verify the Patient and Gather Supplies
Ask the patient to state their full name and date of birth. Compare this to the lab requisition form. This step prevents mislabeled samples, which are a leading cause of laboratory errors.
Gather all supplies before you begin. You need gloves, a tourniquet, antiseptic wipes (usually 70% isopropyl alcohol), gauze, bandages, a needle and holder, and the correct collection tubes. Having everything within reach prevents you from leaving the patient mid-procedure.
Step 2: Position the Patient and Apply the Tourniquet
Have the patient sit comfortably with their arm extended and supported. The arm should be straight at the elbow. This position makes the veins easier to find and reduces the chance of the patient fainting.
Apply the tourniquet 3 to 4 inches above the puncture site. It should be tight enough to stop venous blood flow but not arterial flow. You should still be able to feel a radial pulse at the wrist. If the tourniquet is too tight, it can cause hemolysis — the breakdown of red blood cells — which ruins the sample.
Do not leave the tourniquet on for more than one minute. Prolonged application changes the blood composition and can affect test results, particularly potassium and lactate levels.





Step 3: Select the Vein
The median cubital vein in the antecubital fossa — the inner elbow — is the first choice. It is large, well-anchored, and less painful for the patient. The cephalic vein is the second choice, followed by the basilic vein.
Palpate the vein with your gloved index finger. Veins feel bouncy and springy compared to tendons, which feel firm, and arteries, which pulsate. Never choose a site that is scarred, bruised, burned, or has an IV line running into it. Avoid areas with a hematoma or where the skin is broken.
Step 4: Clean the Site
Use a 70% isopropyl alcohol wipe. Start at the puncture site and move outward in a circular motion. This reduces the number of skin bacteria that could contaminate the sample.
Allow the alcohol to dry completely. This takes about 30 seconds. If you puncture through wet alcohol, it stings the patient and can hemolyze the sample. Once you have cleaned the site, do not touch it again. If you must re-palpate, put on a fresh glove first.
Step 5: Insert the Needle
Anchor the vein by pulling the skin taut below the puncture site with your thumb. This holds the vein in place and prevents it from rolling.
Hold the needle holder at a 15 to 30 degree angle relative to the skin surface, with the bevel facing up. Insert the needle smoothly and steadily. You will feel a slight “pop” or give as the needle enters the vein.
You should see a small flash of blood in the needle hub. This confirms you are in the vein. Lower the angle of the needle so it is nearly parallel to the skin, then advance it another fraction of an inch to ensure the tip is fully inside the vein lumen.
Step 6: Fill the Collection Tubes
Push the first tube firmly onto the needle inside the holder. The vacuum will draw blood into the tube. Hold the tube in place until the blood stops flowing and the vacuum is exhausted.
Fill tubes in the correct order to prevent cross-contamination from additives. The standard order is:
- Blood culture bottles (if ordered) — sterile collection
- Light blue tube — contains sodium citrate for coagulation tests
- Red or gold tube — contains clot activator or no additive for serum tests
- Green tube — contains heparin for plasma tests
- Lavender or purple tube — contains EDTA for complete blood counts
- Gray tube — contains fluoride for glucose testing
Gently invert each tube as soon as you remove it from the holder. Inverting mixes the blood with the additive. The number of inversions depends on the tube type — typically 5 to 8 times for most tubes. Do not shake the tubes. Shaking can hemolyze the red blood cells.
Step 7: Remove the Needle and Apply Pressure
Release the tourniquet as soon as the last tube is filled. Place a clean gauze pad over the puncture site and withdraw the needle smoothly. Do not press the gauze down before the needle is out — this causes pain and can damage the vein.
Apply firm pressure to the site for at least 2 to 3 minutes. Patients on blood thinners may need 5 minutes or more. Ask the patient to hold the gauze in place with their arm straight. Bending the elbow can cause a hematoma because it does not apply direct pressure to the puncture site.
Dispose of the needle immediately in a sharps container. Do not recap the needle. Recapping is a common cause of accidental needle sticks.
What Are the Most Common Errors?
The most frequent error is missing the vein entirely. This happens when the needle angle is too steep, the vein is not anchored properly, or the vein rolls away from the needle. If you miss, you may withdraw slightly and redirect, but you should not make more than two attempts. After two failed attempts, ask another phlebotomist to try.
Hemolysis is the second most common problem. It occurs when red blood cells rupture and release their contents into the serum or plasma. Causes include using a needle that is too small, drawing from a hematoma, excessive probing, vigorous shaking of tubes, or leaving the tourniquet on too long. Hemolyzed samples are rejected by most laboratories because they produce inaccurate results for potassium, lactate, and several enzymes.
A third error is underfilling tubes. Each tube has a marked fill line. Underfilled tubes have the wrong blood-to-additive ratio. For example, a light blue tube that is only half full contains too much citrate relative to blood, which produces falsely prolonged clotting times.
How To Perform Phlebotomy Step By Step Technique: Safety Considerations
Wear gloves for every draw. Change gloves between patients. This protects you from bloodborne pathogens and protects the patient from cross-contamination.
Never draw blood from a site above an IV line. The blood will be diluted with the IV fluid and produce inaccurate results. If the patient has an IV, choose a site on the opposite arm. If both arms have IVs, the clinical team may need to pause the IV for a period before the draw.
Watch the patient for signs of fainting. These include paleness, sweating, dizziness, and nausea. If a patient feels faint, remove the tourniquet immediately, lower their head between their knees, and call for help. Never leave a patient who feels faint unattended.
What Happens After the Blood Is Drawn?
Label the tubes at the bedside immediately after collection. The label should include the patient’s name, date of birth, date and time of collection, and your initials. Labeling away from the patient risks mixing up samples from two different people.
Send the tubes to the laboratory as soon as possible. Some tests require processing within a specific time window. For example, blood gases must be analyzed within minutes, while a complete blood count can wait several hours at room temperature. If transport will be delayed, check whether the tubes need refrigeration or protection from light.
Frequently Asked Questions
How long does a phlebotomy procedure take?
The actual blood draw takes 1 to 2 minutes. The full process including patient identification, vein selection, and labeling takes about 5 to 10 minutes.
Is it safe to draw blood from a patient who is fasting?
Yes, fasting blood draws are routine. Fasting typically means no food or drink except water for 8 to 12 hours before the test. The phlebotomist should confirm the patient has actually fasted before drawing tests that require it, such as fasting glucose or lipid panels.
What should I do if the vein is difficult to find?
Apply a warm compress to the area for 2 to 3 minutes to dilate the veins. Ask the patient to make a fist — not pump their hand — which increases venous filling. If the vein is still not visible or palpable, consider an alternate site or ask for assistance from a more experienced phlebotomist.
Can phlebotomy cause nerve damage?
Nerve injury is rare but possible if the needle strikes a nerve. Symptoms include sharp shooting pain, tingling, or numbness that lasts beyond the procedure. If this occurs, stop the draw immediately and document the incident. Most nerve injuries from phlebotomy resolve over weeks to months, but persistent symptoms require medical evaluation.
