
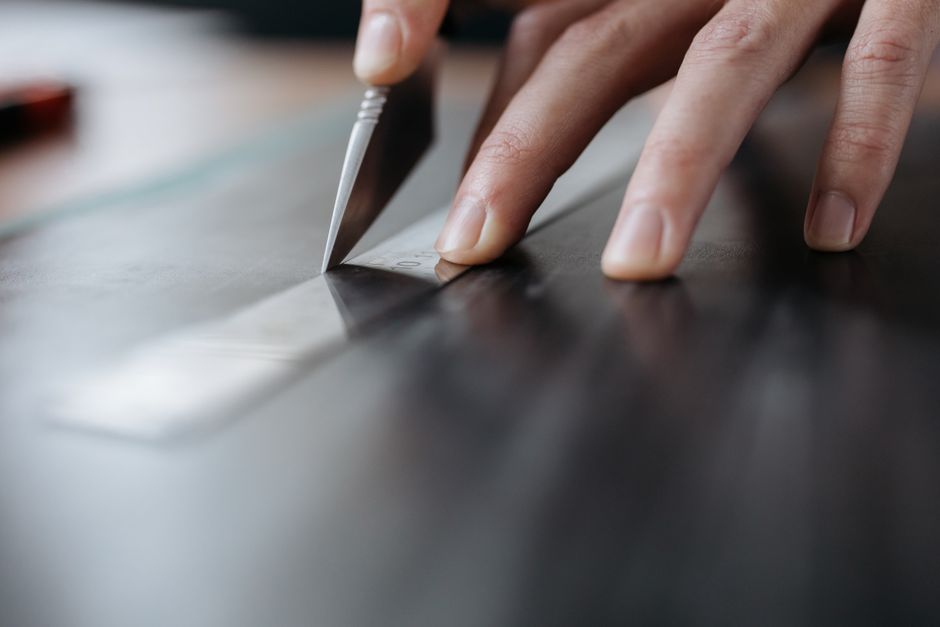
There is no single lab-grade test that tells you how sharp a blade is. What you can do is use a small set of practical checks, each suited to a different job: the paper test for a quick read on a kitchen knife, the tomato and printer-paper tests for everyday kitchen use, the shaving and hair tests for razors and fine edges, and a visual inspection under bright light for any blade at all. The key is matching the test to the blade and the task, and knowing what each test can and cannot tell you.
What Does Blade Sharpness Actually Mean?
Sharpness is not one property. It is a combination of two things: how thin the edge is at its very tip, and how cleanly the two bevels meet. A sharp edge has a tip that is only a few microns wide and a geometry that lets it part material without pushing it aside.
This is why a blade can feel sharp on your thumb but fail on a tomato. A slightly rounded edge with a rough micro-tooth pattern may grip skin but crush soft produce. A polished edge with no tooth may glide through paper but skid on a waxy tomato skin. Sharpness and edge character are different things.
Two other factors matter as much as the edge itself:
- Edge angle. A narrower angle cuts more easily but is weaker. A wider angle is durable but needs more force.
- Steel and heat treatment. The same angle in soft steel and hard steel behaves differently. Hard steel holds a thin edge longer; soft steel rolls or dents.
So when you test a blade, you are really testing whether its current edge geometry suits the job you want it to do. That is why no single test is universal.
How To Measure Blade Sharpness Tests For Every Need
The right test depends on what the blade is for and how precise you need to be. Here is how the common tests map onto real jobs.
| Test | Best for | What it tells you | Limitation |
|---|---|---|---|
| Printer paper slice | Kitchen and utility knives | General cutting ability | Crude; passes even on moderately dull edges |
| Newsprint or phone book cut | Fine edges, pocket knives | Sensitivity to small dulling | Needs consistent technique |
| Tomato test | Kitchen knives | Real-world food performance | Tomato ripeness varies |
| Shaving arm hair | Razors, fine edges | Very fine edge condition | Not safe for large blades |
| Hanging hair test | Straight razors, high-end edges | Extreme sharpness | Very hard to pass; discouraging |
| Visual and light inspection | Any blade | Damage, chips, burrs | Cannot measure cutting ability |
| Sharpness testers (instrumented) | Commercial, research | Repeatable cut-force numbers | Cost; not needed at home |
Notice that the tests run from crude to extremely sensitive. A blade that fails the hanging hair test may still be perfectly sharp for cooking. A blade that passes the paper test may still be too dull for shaving. Match the sensitivity of the test to the demands of the task.
How Do You Do the Paper Test Correctly?
The paper test is the most common starting point, and it is easy to do wrong. The goal is to see whether the edge slices cleanly or tears.
Hold a sheet of standard printer paper by one corner so it hangs free. With the blade held at a shallow angle, draw it downward through the paper in one smooth motion. Do not saw. Do not press hard.
Interpretation:
- Slices cleanly with light pressure. The edge is in good working condition.
- Catches or tears. The edge is dull, rolled, or has a burr.
- Only cuts with force or a sawing motion. The edge needs sharpening.
One caution: this test damages the edge slightly each time. Micro-chips and rolls can be created by cutting paper, especially if you twist the blade. Do not run it after every use. Use it when you genuinely want to know the state of the edge.
For a more sensitive version, use newsprint or thin catalog paper. The thinner and floppier the paper, the more the test reveals about small dulling. A blade that cuts printer paper but tears newsprint is on its way down.




What Is the Tomato Test and When Should You Use It?
The tomato test is the practical kitchen standard. It answers the question you actually care about: will this knife cut food the way I want?
Place a ripe tomato on a cutting board. Hold the knife with the tip down and draw it back through the tomato skin without pressing down. A sharp knife bites into the skin immediately and slices cleanly. A dull knife skids across the skin and crushes the tomato.
Two things to know:
- Ripeness matters. A hard, underripe tomato is a tougher test than a soft one. Use the same ripeness each time for a fair comparison.
- This tests real cutting, not extreme sharpness. A knife that passes the tomato test may not pass a hanging hair test — and that is fine. It is sharp enough for cooking.
The tomato test is also useful because it reveals edge tooth. Some kitchen edges are deliberately finished with a slightly rough micro-tooth pattern, which grips tomato skin better than a polished edge. This is why a polished razor-sharp edge can sometimes perform worse on tomatoes than a slightly toothy edge.
How Do the Shaving and Hair Tests Work?
These tests are for fine edges: razors, straight razors, and high-end knives. They are more sensitive than paper and can be discouraging if you expect every blade to pass.
Arm hair test. Hold the blade at a shallow angle against arm hair and draw it lightly. A sharp edge catches and cuts hair with little pressure. A dull edge skids over the hair. Do this carefully — a truly sharp blade will cut skin with the same light motion. Never run this test on a large kitchen knife or any blade you cannot fully control.
Hanging hair test. Hold a single hair by one end and draw the blade through it. A blade that severs the hair cleanly with light contact is extremely sharp. This is a demanding test. Many perfectly useful kitchen knives will not pass it, and that does not mean they are dull.
These tests measure the finest part of the edge. They are useful when you are sharpening to a very high standard and want to confirm the edge is clean. For everyday kitchen use, they are overkill.
How Do You Inspect a Blade Visually for Sharpness?
Visual inspection will not tell you how sharp a blade is, but it will tell you why it is not cutting well. This is often the most useful test of all.
Hold the blade under a bright light and look straight down at the edge. A sharp edge appears as a thin, even line with no bright reflection. A dull or damaged edge shows problems:
- A bright line along the edge. This is a flat spot or rounded edge catching the light. It needs sharpening.
- Chips or nicks. Small missing pieces of edge. These catch on material and cause tearing.
- A burr. A thin flap of metal folded over one side. It feels sharp but folds over and cuts poorly. Run a finger across the edge (never along it) or use a fingernail to feel for a burr on the opposite side of the bevel.
- Rolls or dents. The edge is bent rather than worn. Common in soft steel.
This inspection takes seconds and tells you more than any cutting test about what is actually wrong with the edge.
Are There Instrumented Ways to Measure Sharpness?
Yes, and they are used in commercial and research settings. Instrumented sharpness testers measure the force required to cut a standard medium, such as a length of thread or a strip of test film. The result is a repeatable number, which is why manufacturers and researchers use them.
These devices are not necessary for home use. They are expensive, and the numbers they produce are most useful when comparing many blades under identical conditions. For a home sharpener, the practical tests above give you everything you need.
One honest note: even instrumented tests have limits. Cut force depends on the medium, the angle, and the speed of the cut. There is no single number that captures “sharpness” for all uses.
What Are the Common Mistakes People Make When Testing Sharpness?
Most bad sharpness readings come from testing technique, not the blade.
- Sawing instead of slicing. A sawing motion hides dullness. A truly sharp edge cuts in one smooth draw.
- Pressing hard. Force masks a dull edge. Use light pressure so the test is meaningful.
- Using the wrong test. A hanging hair test on a chef’s knife tells you nothing useful about cooking performance.
- Testing a wet or dirty edge. Residue changes how the edge interacts with paper and food.
- Testing too often. Paper and hair tests wear the edge. Test when it matters, not constantly.
- Ignoring the burr. A burred edge feels sharp but cuts poorly. Always check for a burr before deciding the blade is sharp.
The most useful habit is consistency. Use the same test the same way each time so you can compare results over weeks and months. That tells you more about your blade and your sharpening than any single test ever will.
Frequently Asked Questions
What is the easiest way to test if a knife is sharp?
The paper test is the easiest. Draw the blade through a hanging sheet of printer paper with light pressure — a sharp knife slices cleanly, a dull one tears or catches.
Does the tomato test really measure sharpness?
It measures real-world cutting performance on food, which is usually what matters for a kitchen knife. A knife can pass the tomato test and still fail a hanging hair test, so it is a practical test rather than an absolute one.
Why does my knife feel sharp but not cut well?
A burr — a thin flap of metal folded over the edge — can feel sharp to the touch but fold over and cut poorly. Check for a burr along the edge under bright light or with a fingernail.
Do I need a professional sharpness tester?
No. Instrumented testers give repeatable numbers for commercial or research use, but practical tests like paper, tomato, and visual inspection cover everything a home user needs.
