
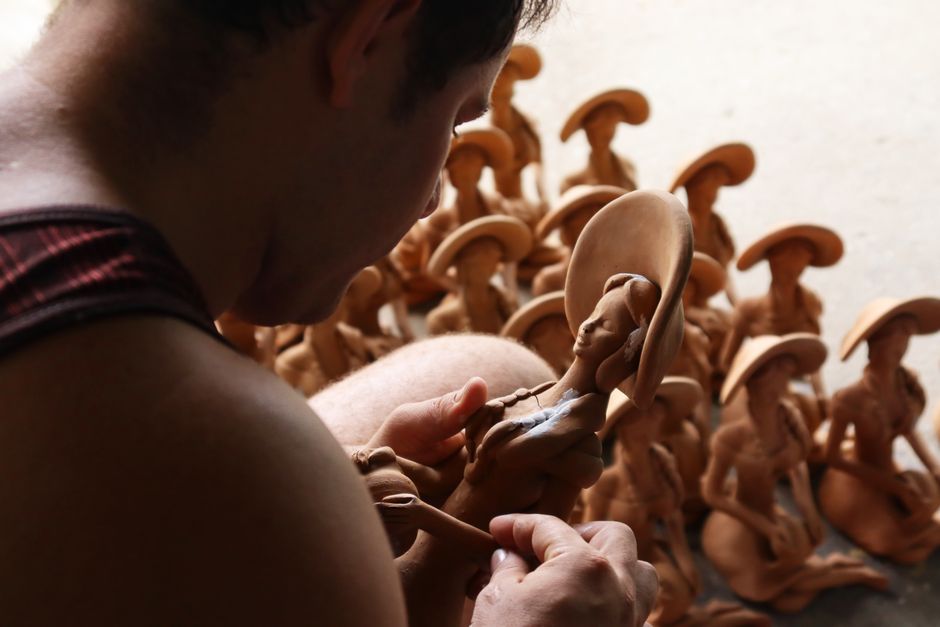
Making a ceramic figurine from clay to glaze comes down to six stages: shaping the clay, drying it slowly and completely, firing it once in a kiln (the bisque fire), applying glaze, firing it a second time (the glaze fire), and cooling it gradually. Each stage has to finish properly before the next one starts. Rushing any step — especially drying and firing — is the most common reason figurines crack, warp, or lose their glaze.
This guide walks through that process in plain terms. It covers which clay suits small sculpted figures, why hollow forms need a vent hole, what actually happens inside the kiln, and where home studios honestly differ from professional ones.
What Kind of Clay Should You Use for Figurines?
Choose a clay body made for the firing temperature you can actually reach. For most beginners working at home or in a community studio, that means a mid-range stoneware or a low-fire earthenware clay.
Clay bodies are grouped by the temperature at which they mature — the point where the clay becomes dense and strong. Low-fire earthenware matures at roughly 1700–1950°F (about 950–1060°C). Mid-range stoneware matures around 2160–2260°F (roughly 1180–1240°C). High-fire porcelain and stoneware need about 2300–2400°F (roughly 1260–1300°C). Your clay must match your kiln’s capability and your glaze’s rated firing range.
For small sculpted figures, a stoneware or earthenware body with some added grog — fine fired clay particles — holds detail well and resists cracking better than very smooth, plastic clays. Porcelain can produce beautiful translucent results, but it is less forgiving to shape and more prone to slumping in the kiln. Many experienced sculptors avoid it until they have several firings behind them.
One clarification that surprises people: air-dry and polymer clays are not ceramics. They never go in a kiln, and they cannot be glazed with ceramic glaze. If your goal is a fired, glazed piece, start with real clay.
How Do You Shape and Build a Ceramic Figurine?
Small figures are usually built by hand, either solid or hollow, depending on size and firing method. The shaping stage sets up everything that follows, so build with the firing in mind.
Solid figures
Figures under roughly a few inches in every dimension can often be sculpted solid, provided the clay is not too thick. Thick solid clay is risky: moisture trapped deep inside cannot escape during firing and turns to steam, which can crack or even explode the piece. If a solid figure feels heavy and damp in the middle, hollow it out before it dries.
Hollow figures
Larger figures are usually built hollow, either by pinching and coiling, by sculpting over a support and removing it, or by joining slabs. Hollow work needs two things:
- Even wall thickness. Aim for walls of similar thickness throughout. Thin next to thick is where cracks begin.
- A vent hole. A small hole — often in the base — lets air and moisture escape during firing. An unvented hollow form can trap expanding air and rupture.
Join pieces with the score-and-slip method: roughen both surfaces, paint on slip (clay mixed with water to a creamy consistency), press firmly, and blend the seam. Weak joins are a frequent failure point after firing.
Why Does Drying Take So Long?
Clay must be bone dry before it enters the kiln. Not dry to the touch — dry all the way through. Any remaining moisture becomes steam at firing temperatures, and steam expands dramatically. That is what causes the classic kiln “pop.”
Drying should be slow and even. Rapid drying — near a heater, in direct sun, or in a draft — dries the outside faster than the inside. The surface shrinks while the core does not, and cracks appear. Cover work loosely with plastic to slow the process, then uncover gradually over days or longer, depending on thickness and humidity. A thick hollow figure can take weeks to dry fully.
A useful check: hold the piece against your cheek or the back of your hand. If it feels cool, moisture is still evaporating. It is not ready.
What Happens During the Bisque Fire?
The first firing, called the bisque fire, turns fragile raw clay into a porous, durable ceramic body. It is fired to a lower temperature than the final glaze fire — commonly in the range of about 1700–1950°F (roughly 950–1060°C), depending on the clay and studio practice.
During bisque firing, three things happen. Chemically bound water is driven off. Organic material burns away. And the clay particles begin to fuse at their edges, giving the piece strength while leaving it open enough to absorb glaze. Bisqued clay is matte and slightly rough — a good surface for glaze to grip.
Two practical points. First, pieces should be loaded so they do not touch each other or the kiln elements. Second, firing schedules matter, and kilns vary. Follow your kiln manufacturer’s guidance or your studio’s established schedule rather than inventing one. This is one area where established practice genuinely matters, because the wrong schedule can ruin a whole load.
How Do You Glaze a Ceramic Figurine?
Glaze is a suspension of minerals in water that melts into a glassy coating during firing. Applying it well is mostly about evenness and thickness.
Common application methods:
- Brushing. Layers of glaze are painted on. Best for small areas and detailed figures. Aim for even coverage — usually a few thin coats rather than one thick one.
- Pouring. Glaze is poured over the piece, often while holding it with tongs. Good for larger or hollow forms.
- Dipping. The piece is briefly submerged. Fast and even, but needs a well-mixed bucket and consistent timing.
- Spraying. Requires a spray booth and proper respiratory protection. Not a casual home method.
Keep glaze off the base where the piece sits on the kiln shelf, and off any contact points. Glaze that melts onto the shelf fuses the piece to it. Many studios use kiln wash or stilts to manage this, and some glazes are formulated to be safe on the base — but check before assuming.
Glaze thickness genuinely matters. Too thin and it looks washed out or underfired. Too thick and it can run, pool, or crawl away from the clay. Glaze also behaves differently on vertical surfaces, where it tends to run. On a detailed figurine, that means testing on scrap pieces first. No amount of careful reading replaces a test tile.
Note that not every piece needs glaze. Unglazed fired clay — sometimes called bisque ware — is a legitimate finish for sculptural work. Glaze is a choice, not a requirement.
What Happens During the Glaze Fire?
The glaze fire melts the glaze into a smooth, glassy surface and further matures the clay body. It is fired to the temperature your clay and glaze are rated for — often around 2160–2260°F (roughly 1180–1240°C) for mid-range work, or lower for earthenware.
During this firing, the glaze melts, flows slightly, and then — critically — must cool slowly. Fast cooling can cause crazing (fine cracks in the glaze) or dunting (cracks through the clay itself). Most kilns are programmed with a controlled cooldown, and pieces should not be unloaded until the kiln is fully cool. Opening a hot kiln can crack a piece from thermal shock alone.
Results vary. Glaze color and surface depend on firing temperature, atmosphere, thickness, and cooling rate. Two identical pieces fired in different kilns can look different. That is normal, not a mistake.
Can You Make Ceramic Figurines Without a Kiln?
No — not if you want true ceramic. Firing is what transforms clay into ceramic. There is no home substitute that reaches the required temperatures safely.
The practical routes without owning a kiln are community studios, art centers, and ceramic supply shops that offer firing services. Many will bisque-fire and glaze-fire pieces made elsewhere, usually for a fee. This is the most realistic path for most beginners.
Be cautious with improvised firing methods. A kitchen oven cannot reach ceramic temperatures. Outdoor pit firing is a real historical technique, but it produces unpredictable results and carries genuine fire safety risks. It is not a beginner substitute for a kiln, and it will not properly melt standard glazes.
What Are the Most Common Reasons Figurines Fail?
Most failures trace back to a few predictable causes:
- Trapped moisture. Firing before the piece is bone dry. The most common cause of cracks and explosions.
- Uneven wall thickness. Thin and thick sections dry and shrink at different rates.
- No vent hole in hollow work. Trapped air expands and ruptures the piece.
- Weak joins. Seams that were not properly scored, slipped, and blended separate in the kiln.
- Glaze too thick or pooled. Causes running, crawling, or fusing to the shelf.
- Fast cooling. Crazing or dunting.
None of these require special talent to avoid. They require patience at each stage — which is genuinely the hardest part of the craft.
Frequently Asked Questions
How long does it take to make a ceramic figurine from start to finish?
Usually several weeks, because drying and two firings each take time. A small figure might be finished in two to three weeks; a thick hollow piece can take longer just to dry.
Can you glaze a ceramic figurine without firing it first?
No, the piece should be bisque-fired before glazing so the raw clay is strong enough to handle and porous enough to grip the glaze. Glazing raw clay usually fails.
Do ceramic figurines need a hole in them?
Hollow figures need a small vent hole so trapped air and moisture can escape during firing. Without one, the piece can crack or rupture in the kiln.
What temperature is needed to fire a ceramic figurine?
It depends on the clay and glaze. Low-fire earthenware matures around 1700–1950°F, mid-range stoneware around 2160–2260°F, and high-fire clay around 2300–2400°F.