
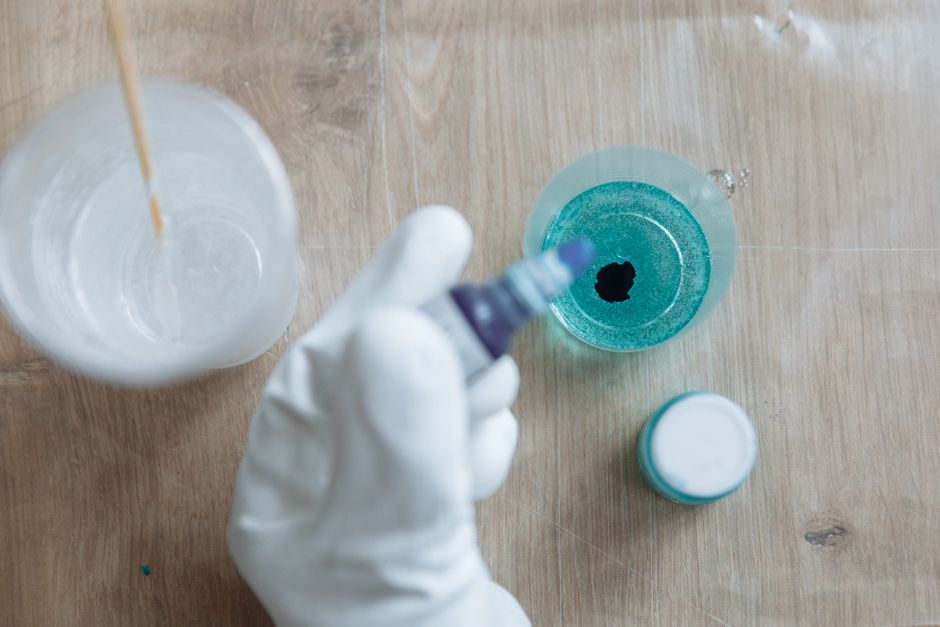
Acrylic resin is a two-part liquid plastic that hardens into a solid, glass-like material. You mix a resin base with a hardener or catalyst, pour it into a mold, and let it cure. The process takes patience, precise measuring, and proper ventilation, but it is a skill you can learn with practice.
What Is Acrylic Resin and How Does It Work?
Acrylic resin is different from epoxy resin, though people often confuse the two. Acrylic resin consists of a liquid monomer called methyl methacrylate and a catalyst that starts the chemical reaction. When mixed, the catalyst triggers polymerization — the monomers link together into long chains that turn the liquid into a solid.
The reaction generates heat. This is called an exothermic reaction. Understanding this heat matters because it affects how fast the resin cures and whether it cracks or bubbles.
Acrylic resin cures differently from epoxy. Epoxy has a longer working time and is more forgiving. Acrylic sets faster, shrinks more as it cures, and produces a stronger, harder final product. It is often used for dental work, bone cement in orthopedics, and industrial parts. Crafters more commonly use epoxy for jewelry and art because epoxy is easier to work with in small batches.
How To Make Acrylic Resin Mixing Casting Curing?
The core process has three steps: mix the components accurately, pour or cast the mixture into a mold, and allow it to cure fully.
Start by reading the manufacturer’s instructions for your specific product. Ratios vary by brand. Some acrylic resins mix at a 2:1 ratio of resin to hardener by volume. Others use a small amount of catalyst powder or liquid. Measuring by weight is more accurate than measuring by volume if your product provides weight ratios.
Work in a well-ventilated area. Acrylic resin releases strong fumes during mixing and curing. Wear nitrile gloves to protect your skin. Uncured resin can cause skin irritation and allergic reactions over time.
Mix slowly to avoid trapping air bubbles. Stir the bottom and sides of your container thoroughly. A wooden stir stick or silicone spatula works well. Scrape as you mix. Undermixed resin will cure soft or stay sticky in spots.
Pour the mixed resin into your mold in a thin stream. Pouring from a height helps release some bubbles. After pouring, you can pass a heat gun briefly over the surface to pop surface bubbles. Keep the heat gun moving and do not hold it in one spot — the resin gets hot enough to burn.
Curing time depends on the product and the room temperature. Most acrylic resins harden within 15 to 30 minutes but need 24 hours to reach full strength. The resin gives off heat as it cures. If your piece is thick, it will get hotter than a thin piece. Very thick pours can crack from the internal heat.
What Safety Precautions Do You Need?
Acrylic resin requires more caution than many hobby materials. The fumes are not just unpleasant — they can irritate your eyes, nose, and throat. Some people develop sensitivity after repeated exposure. Once sensitized, even small amounts of resin can trigger a reaction.
Use a respirator with organic vapor cartridges if you work with resin regularly. A simple dust mask does not filter chemical fumes. Open windows and use a fan to pull fumes away from your work area.
Wear nitrile gloves, not latex. Latex gloves do not protect against resin chemicals. Long sleeves protect your arms from splashes.
Keep resin away from heat sources and open flames. The liquid monomer is flammable. Store unused resin in a cool, dry place with the lids tightly sealed.
Never pour unused mixed resin down the drain. It will harden in your pipes. Let leftover resin cure completely in its mixing cup, then throw the solid mass in the trash.





How Do You Choose the Right Mold?
Mold material matters more than most beginners expect. Acrylic resin generates heat as it cures. Some molds handle that heat better than others.
Silicone molds are the most popular choice for craft casting. They are flexible, which makes demolding easy, and they withstand the heat of curing resin. Silicone molds come in countless shapes and do not require release agents.
Plastic molds work for some projects but can be damaged by the heat of curing resin. Thin plastic molds may warp or melt. If you use plastic molds, check whether they are rated for resin casting.
Metal molds conduct heat away from the resin, which can help prevent overheating in thick pieces. However, acrylic resin bonds to metal. You need a release agent to remove the cured piece.
Glass molds produce a smooth surface but require a release agent. Resin can bond permanently to glass if you do not use one.
For silicone molds, you generally do not need a release agent. For other mold materials, apply a commercial release agent or a thin coat of mold release wax before pouring.
What Causes Bubbles and How Do You Prevent Them?
Air bubbles are the most common problem in resin casting. They appear as small round voids on the surface or inside the cured piece.
Bubbles form during mixing. Every time you stir, you fold air into the liquid. Mix slowly and deliberately to minimize trapped air. Avoid vigorous whisking or shaking.
Some crafters let the mixed resin sit for a few minutes before pouring. This allows larger bubbles to rise to the surface. However, acrylic resin has a short working time. Do not let it sit too long or it will thicken and become difficult to pour.
A heat gun or torch passed over the surface after pouring pops surface bubbles quickly. The heat expands the air in the bubbles, causing them to rise and burst. Do not hold the heat source too close or too long — you can scorch the resin.
For deep molds, pour in thin layers. Pour a layer, pop the bubbles, and let it partially cure before adding the next layer. This technique prevents bubbles from getting trapped deep in the piece.
Pressure pots are the professional solution for bubble-free casting. A pressure pot applies high air pressure to the curing resin, compressing bubbles until they are invisible. These pots are expensive and require a compressor. Most hobbyists manage without one.
How Do You Handle Curing Problems?
Sticky or soft spots after the expected curing time usually mean the resin was not mixed thoroughly. The unmixed areas never polymerize. Unfortunately, you cannot fix this after the resin has set. You must remove the sticky resin and start over.
Surface tackiness can also happen if the resin ratio was off. Too much or too little hardener prevents complete curing. Follow the measured ratio exactly.
Cold temperatures slow the curing reaction. If your workspace is below 70°F, the resin will take longer to cure or may not cure completely. Warm the resin bottles in warm water before mixing if your room is cold. Do not microwave resin.
Cracks appear when the resin cures too quickly or the piece is too thick. The heat of the reaction builds up faster than it can escape, causing internal stress. Pour thinner layers and allow each layer to cool before adding the next.
Cloudiness or a white film can come from moisture. Water in the mold or in the resin prevents proper curing. Ensure your mold is completely dry before pouring.
How Do You Demold and Finish the Piece?
Wait until the resin has fully cured before removing it from the mold. If you demold too early, the piece may bend, dent, or hold fingerprints.
For silicone molds, flex the mold gently to release the edges. The cured piece should pop out easily. If it resists, place the mold in the freezer for a few minutes. The cold shrinks the resin slightly and makes removal easier.
Cured acrylic resin is hard and durable. You can sand it with fine-grit sandpaper to remove mold lines or imperfections. Use wet sanding to reduce dust. Start with a coarser grit like 400 and work up to 2000 or higher for a smooth finish.
After sanding, you can polish the surface with a plastic polish or a buffing wheel. Acrylic resin polishes to a high gloss similar to glass.
You can drill, cut, and machine cured acrylic resin with standard woodworking tools. Use sharp bits and go slowly to avoid melting the resin from friction heat.
What Are Common Mistakes Beginners Make?
Measuring by eye is the most common mistake. Acrylic resin ratios matter. Guessing leads to soft spots, sticky surfaces, or resin that never cures. Use graduated mixing cups and follow the product instructions.
Working in a poorly ventilated space is another frequent error. The fumes can cause headaches and nausea. Even if you feel fine during the pour, the cumulative exposure adds up over time.
Pouring too thick is a third mistake. Thick pours generate more heat than thin pours. That heat can crack the resin or cause it to yellow. If your project is thick, pour it in layers.
Checking the piece too early is also common. Acrylic resin may feel hard within minutes but continues curing internally for hours. Disturbing it during this time can leave marks or cause warping.
Finally, many beginners use the wrong type of resin for their project. If you want to embed objects or create jewelry, epoxy resin is often the better choice. Acrylic resin works best for projects that need strength and heat resistance, but it shrinks more and has a shorter working time.
Frequently Asked Questions
How long does acrylic resin take to cure?
Most acrylic resins harden within 15 to 30 minutes but need about 24 hours to reach full strength. Curing time varies by brand, room temperature, and the thickness of your pour.
Can you use acrylic resin for jewelry making?
Yes, but epoxy resin is usually easier for jewelry because it has a longer working time and less shrinkage. Acrylic resin sets too fast for detailed work in many cases.
Why is my acrylic resin sticky after curing?
Sticky resin usually means you mixed the wrong ratio or did not stir thoroughly enough. Uneven mixing leaves some areas unpolymerized, and those areas stay soft permanently.
Do you need a respirator for acrylic resin?
Yes, for regular use you should wear a respirator with organic vapor cartridges. The fumes can irritate your respiratory system, and repeated exposure can cause sensitivity.
