
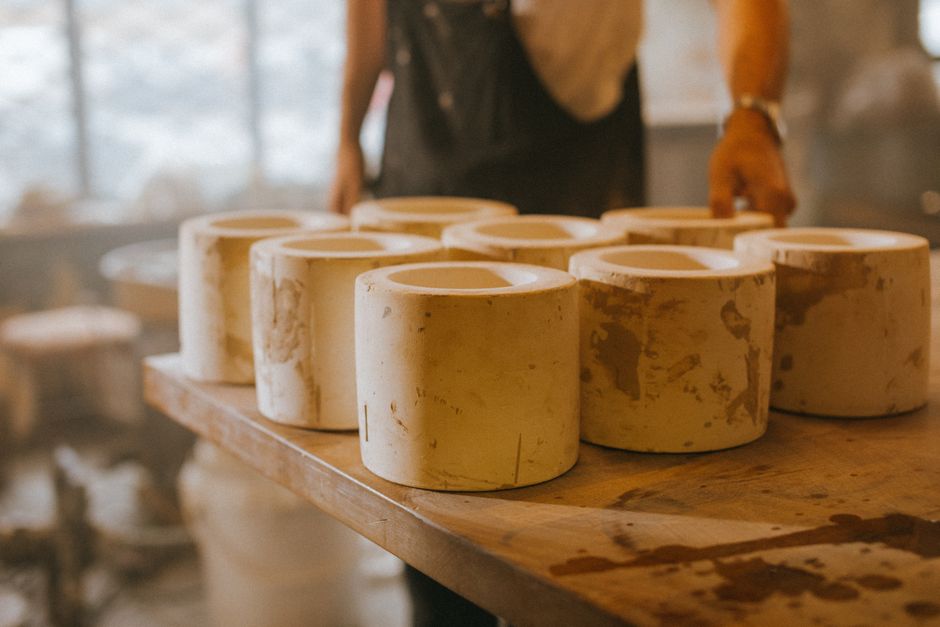
Slip casting lets you make multiple identical ceramic pieces from a single plaster mold. The process starts with building a mold from plaster, which absorbs water from liquid clay (called slip) and leaves a solid clay shell behind. You can make a simple one-piece plaster mold at home with just plaster, a container, and a model to cast around.
What Do You Need To Make A Plaster Mold?
Gather everything before you mix plaster. Plaster sets fast, and you will not have time to search for tools mid-pour.
You need plaster of Paris or pottery plaster (pottery plaster is denser and more durable). You also need a model to cast — this can be a thrown clay bowl, a found object, or a sculpted form. You need a mold frame, which is simply a container that holds the liquid plaster while it sets. Cardboard tubes, plastic tubs, or walls made from clay slabs all work.
- Plaster (pottery plaster or plaster of Paris)
- A model to cast
- A mold frame or container
- Water
- Mixing bucket and stirring tool
- Soft brush and mold soap or release agent
Mold soap is critical. Without a release agent, the plaster will stick to your model and ruin both. You can buy commercial mold soap or use a thin layer of soft soap like Murphy’s Oil Soap.
How Do You Prepare The Model And Mold Frame?
Your model must be clean and dry. Any dust or grease will create surface defects in the mold. Attach the model to a flat base so it does not float when you pour plaster around it.
Build the mold frame around the model. The frame should sit about 1 to 2 inches above the highest point of your model. This thickness gives the mold enough strength to survive repeated use. Seal all seams with clay so liquid plaster cannot leak out.
Apply mold soap to the model and the inside of the frame. Use a soft brush to apply a thin, even coat. Let it dry, then apply a second coat. The soap forms a barrier that lets you separate the cured plaster from the model.
How Do You Mix Plaster Correctly?
Plaster mixing is the step where most beginners go wrong. The ratio matters. A standard mix is about 1 part water to 1.4 to 1.5 parts plaster by weight. Weigh both ingredients with a scale rather than guessing by volume.
Start with room-temperature water in your bucket. Sift or sprinkle the plaster into the water slowly. Do not dump it all at once. Let the plaster soak for about two minutes, then stir. Stir gently to avoid whipping air bubbles into the mix. Air bubbles in the plaster create pits on the mold surface, which then show up on every piece you cast.
You have roughly 10 to 15 minutes of working time before the plaster starts to thicken. When it reaches the consistency of heavy cream, it is ready to pour.





How Do You Pour The Plaster?
Pour the plaster into the lowest corner of the mold frame. Let it flow up and around the model naturally. Pouring directly onto the model can trap air against the surface, creating bubbles that leave voids in the finished mold.
After pouring, gently tap the table or frame to vibrate the mold. This helps trapped air rise to the surface. Do not tap so hard that the model shifts. Let the plaster sit undisturbed until it hardens.
The plaster will get warm as it sets. This is a normal chemical reaction, not a problem. Once the mold has cooled back to room temperature, it is ready to remove from the frame.
How Do You Remove And Clean The Mold?
Remove the frame carefully. If you used a cardboard or plastic frame, you can often just peel or cut it away. If you used clay walls, cut them off with a knife.
Gently separate the mold from your model. If you applied mold soap properly, this should happen with minimal resistance. If the model sticks, do not force it — you can damage both the model and the mold. Try running a thin blade between the model and the plaster, or place the mold in warm water for a few minutes to help release it.
Clean up any rough edges with a sponge or fine sandpaper. Rinse the mold cavity with water to remove dust and plaster residue. Let the mold dry completely before you use it for slip casting. A wet mold will not absorb water from the slip properly.
How Does Slip Casting Work With A Plaster Mold?
Once your plaster mold is dry, you can start casting. Fill the mold cavity with slip — liquid clay with a creamy consistency. The plaster acts like a sponge, pulling water out of the slip that touches it. This creates a solid clay layer against the mold wall.
Leave the slip in the mold for a set time, usually 10 to 30 minutes depending on the size of the piece and the thickness you want. Then pour out the excess slip. The clay shell that remains is your piece. Let it firm up in the mold, then remove it carefully.
Each time you use the mold, the plaster absorbs water. The mold must dry fully between castings to work effectively. Most potters rotate between several molds, using one while others dry. A well-made plaster mold can produce dozens or even hundreds of pieces before it wears out.
What Mistakes Ruin A Plaster Mold?
The most common mistake is using too little plaster. A thin mold cracks quickly and may break during demolding. Give yourself at least an inch of plaster around the entire model.
Skipping mold soap is a close second. Plaster bonds mechanically to porous surfaces. Without soap, your model may become permanently embedded in the mold. Even with soap, some materials are difficult to cast. Wood and unsealed clay absorb water from the plaster and can be very hard to separate. Test your release method on a small piece before committing to a full mold.
Air bubbles are another frequent issue. They appear as small pits on the mold surface. You can reduce them by mixing gently, pouring slowly, and tapping the frame after pouring. Some potters also paint a thin layer of plaster onto the model with a brush before pouring, which pushes air away from the surface.
How Do You Make A Two-Piece Mold?
A one-piece mold works only for models with a shape that releases cleanly in a single direction. If your model has undercuts — areas where the plaster locks around a bulge or overhang — you need a two-piece mold.
For a two-piece mold, embed the model halfway in clay. The clay supports one half while you pour the first half of the mold. Once that half sets, flip everything over, remove the clay, and apply mold soap to the exposed model and the first plaster half. Then pour the second half. Keys — small dimples or bumps in the first half — help align the two halves when you reassemble the mold for casting.
Two-piece molds are more complex but allow you to cast forms with handles, spouts, or sculptural details that would lock into a one-piece mold. If you are new to mold making, start with a simple bowl or cylinder shape before attempting a two-piece mold.
How Long Does A Plaster Mold Last?
The lifespan of a plaster mold depends on the plaster quality, the slip used, and how carefully you handle it. Pottery plaster is denser than plaster of Paris and withstands more casting cycles. Plaster of Paris molds work for small projects but wear down faster.
Each casting cycle removes a tiny amount of plaster from the mold surface. Over time, the mold cavity grows slightly larger, and the surface becomes less smooth. Eventually, the mold loses its sharp detail or develops chips. Most hobbyist molds produce between 20 and 100 pieces before needing replacement. Production potters may get fewer cycles because they use molds more aggressively.
Handle molds gently. Never bang them together to remove slip or clay. Store them dry and stacked with padding between surfaces. A crack in a plaster mold can sometimes be repaired with fresh plaster, but the repair line will often show on cast pieces.
Frequently Asked Questions
What is the best plaster for making slip casting molds?
Pottery plaster, such as USG No. 1 Pottery Plaster, is the best choice because it is denser and more durable than regular plaster of Paris. It absorbs water evenly and lasts through more casting cycles.
How long does plaster take to dry before I can use the mold?
Plaster hardens within 30 to 60 minutes, but it takes several days to dry fully. Wait until the mold feels dry and warm — not cool and damp — before using it for slip casting.
Can I use a plastic or glass container as a model for a plaster mold?
Yes, smooth non-porous materials like plastic and glass work well because they release easily from cured plaster. Apply mold soap to the surface before pouring to make removal even easier.
Why are there bubbles in my plaster mold?
Bubbles form when air gets trapped against the model during pouring. Mix plaster gently, pour slowly into the lowest corner of the frame, and tap the table after pouring to release trapped air.
