
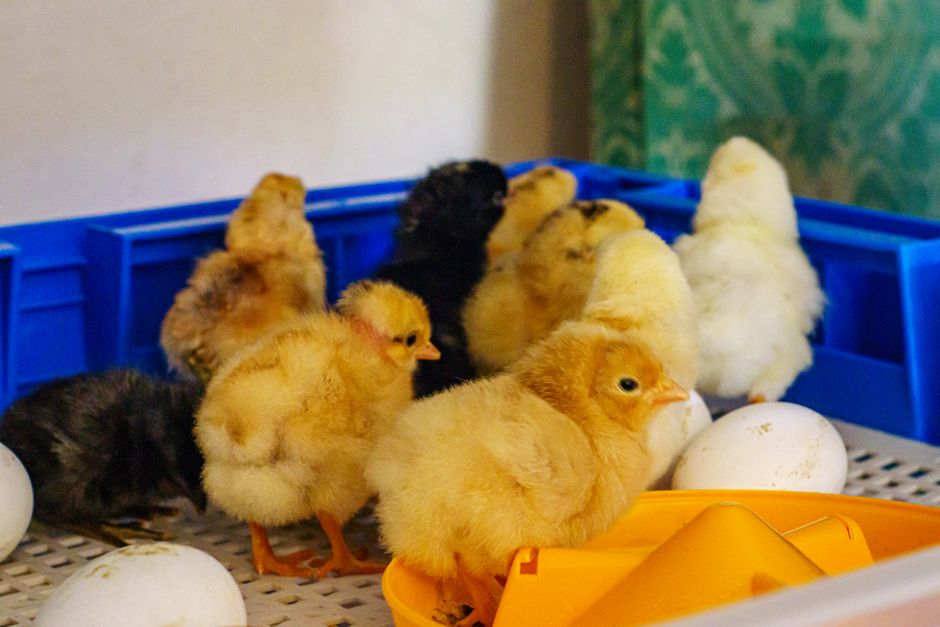
Building a homemade egg incubator is a practical weekend project, but it demands precision. The core requirements are a stable temperature of 99.5°F (37.5°C), consistent humidity between 40-50% for most species, and automatic egg turning. You can achieve this with a simple styrofoam cooler, a heating element, a thermostat, and a humidity source. This guide walks you through each step, focusing on the accuracy needed for eggs to actually hatch.
What You Need Before You Start
Gathering the right parts is the difference between a fun experiment and a successful hatch. You do not need expensive equipment, but you do need reliable components. The most critical piece is a thermostat that can hold a steady temperature. A cheap heating pad alone will not work because it cycles too broadly.
Here is the essential shopping list:
- A styrofoam cooler (about 1-2 cubic feet) or a thick plastic tote
- A heating element: a 40-watt light bulb, a reptile heat cable, or a seedling heat mat
- A digital thermostat with a probe (also called an inkbird or similar controller)
- A digital hygrometer to measure humidity
- A small computer fan (12V) for air circulation
- A water pan or shallow dish
- An egg turner or materials to build one (or a marker for hand turning)
- A thermometer to double-check the thermostat probe
Do not skip the fan. Still air incubators exist, but they have hot spots. A fan keeps the temperature uniform throughout the box, which is essential for even embryo development. Without it, eggs near the heat source will develop faster than those on the opposite side.
How To Make A Homemade Egg Incubator Step By Step
Start by cleaning the cooler thoroughly with warm soapy water. Rinse it well and let it dry completely. Any residue can harbor bacteria that may harm developing embryos.
Cut a small hole in the side of the cooler for the thermostat probe. The probe should sit at egg level, roughly in the middle of the box. Do not place it near the heat source, or the incubator will run too cold. A second hole is needed for the power cord of the heating element and fan.
Mount the heating element at the top or on one side. If you are using a light bulb, make sure it is in a ceramic socket, not a plastic one, to prevent melting. Secure the fan opposite the heat source so air moves across the eggs. Position the water pan in a corner, away from the eggs, to add humidity without wetting the shells.
Run the incubator empty for 24 hours before adding eggs. This is critical. Adjust the thermostat until the temperature stabilizes at 99.5°F (37.5°C). Check it with your separate thermometer. Do not trust the thermostat reading alone. Small fluctuations of half a degree are acceptable, but anything over 1°F (0.5°C) for more than a few minutes is a problem.
How To Manage Temperature And Humidity Correctly
Temperature is the single most important factor in hatching eggs. The ideal range for chicken eggs is 99-102°F (37.2-38.9°C), with 99.5°F being the target. If the temperature runs too high, embryos die. If it runs too low, development slows or stops entirely. There is no room for guesswork here.
Humidity is more forgiving but still vital. Aim for 40-50% relative humidity during the first 18 days. During the final three days before hatching, called lockdown, raise it to 65-75%. This higher humidity helps the chick break through the shell membrane. You raise humidity by adding more water to the pan or placing a damp sponge inside.
Do not open the incubator during lockdown. Every time you open the lid, humidity drops and temperature fluctuates. This can shrink the air cell inside the egg, trapping the chick. Plan your water additions before lockdown begins.
Ventilation matters as much as temperature. Embryos need oxygen and produce carbon dioxide. Cut small vent holes in the top and sides of the cooler. Start with a few small holes and enlarge them if humidity stays too high. The fan will pull fresh air in and push stale air out.





Egg Turning: Why It Matters And How To Do It
Eggs must be turned several times a day during the first 18 days. This prevents the embryo from sticking to the shell membrane. It also keeps the yolk centered. Without turning, most embryos will die before hatching.
Commercial incubators turn eggs automatically every few hours. For a homemade version, you have two options. You can mark each egg with an X on one side and an O on the other, then turn them by hand three to five times daily. Or you can build a simple automatic turner using a small motor and a tilted tray.
Hand turning is perfectly adequate if you are consistent. Set a phone alarm. Turn eggs at the same times each day. Wash your hands before handling eggs. Do not turn eggs during the final three days of incubation. The chick needs to position itself for hatching, and movement can disorient it.
If you build an automatic turner, use a slow motor that rotates the tray gently. A rapid or jerky movement can damage the embryo. Test the turner for several days before loading eggs to ensure it operates smoothly.
How To Candle Eggs And Check For Development
Candling is the process of shining a bright light through the egg to check development. You can do this with a bright flashlight or a purpose-built candler. Hold the egg against the light in a dark room. You are looking for a dark shadow with visible blood vessels, which indicates a living embryo.
Candle eggs on day 7 and again on day 14. On day 7, a fertile egg shows a spider-like network of blood vessels. An infertile egg appears clear or shows only a faint yolk shadow. On day 14, the embryo is larger, and you may see movement. A dark mass with no visible blood vessels may indicate a dead embryo.
Remove any eggs that are clearly infertile or have died. They can rot and contaminate the incubator. If you are unsure, leave the egg alone and check again in a few days. Do not candle eggs during lockdown, as the light and handling can stress the chick.
What To Do During Lockdown And Hatching
Lockdown begins on day 18 for chicken eggs. This is the final three days before the expected hatch. Stop turning the eggs. Raise humidity to 65-75%. Do not open the incubator.
You will see the chick pip, or break through the shell, with its egg tooth. This is a small, sharp projection on the beak. Pipping can take several hours. After the first pip, the chick rests and absorbs the remaining yolk before continuing to break free. This is exhausting work, and interference can kill the chick.
Do not help a chick hatch. It may seem stuck, but the struggle is necessary for proper development. It strengthens the chick’s lungs and muscles. If you assist too early, you risk tearing blood vessels and causing fatal bleeding. Only intervene if the chick has been externally pipped for over 24 hours with no progress.
Once hatched, leave the chick in the incubator until it is dry and fluffy. This can take up to 24 hours. It does not need food or water immediately, as it absorbs the yolk sac before hatching. Move it to a brooder with a heat lamp once it is fully dry.
Common Problems And How To Fix Them
Most homemade incubator failures come down to temperature instability. If your thermostat is not holding a steady temperature, check the probe placement. It should be at egg level, away from walls and the heat source. Also, check that the fan is running continuously. A fan that cycles on and off creates temperature swings.
High humidity is another frequent issue. If condensation forms on the lid or walls, humidity is too high. Increase ventilation by enlarging the vent holes. Remove some water from the pan. Low humidity is easier to fix by adding a sponge or more water.
If eggs are hatching early, the temperature is likely too high. If they are hatching late, it is too low. Keep a log of daily temperature and humidity readings. This helps you identify trends and correct problems before they affect the current batch.
Power outages are a risk with any incubator. A battery backup or a simple water bottle filled with hot water can help maintain temperature briefly. But do not rely on these for extended outages. Plan ahead based on your local weather and power reliability.
Frequently Asked Questions
Can I use a cardboard box instead of a styrofoam cooler?
Cardboard does not hold heat or humidity well and is a fire hazard near a heat source. Styrofoam or thick plastic is safer and more effective.
How often should I turn eggs in a homemade incubator?
Turn eggs at least three to five times daily during the first 18 days. Consistency matters more than the exact number of turns, so set alarms to keep a regular schedule.
What is the ideal temperature for hatching chicken eggs?
The target temperature is 99.5°F (37.5°C) with an acceptable range of 99-102°F (37.2-38.9°C). Temperatures outside this range for extended periods will reduce hatch rates or kill embryos.
How do I know if my homemade incubator is working before I add eggs?
Run it empty for 24 hours and monitor the temperature with a separate thermometer. If it holds steady at 99.5°F and humidity stays between 40-50%, it is ready for eggs.
