
A small concrete slab is one of the most forgiving projects in home improvement, but only if you get the prep right. The concrete itself is simple: mix it, pour it, level it, and leave it alone. Almost every failure — cracks, uneven surfaces, slabs that sink or crumble — traces back to something that happened before the first shovel of concrete went in. Get the base, the form, and the water ratio right, and a small slab can last decades.
How To Lay A Small Concrete Slab Without Mistakes?
The short answer is that mistakes are prevented in this order: excavate deep enough, compact the subbase, build a level form, mix concrete at the correct water ratio, pour in one continuous pass, screed and float the surface, then cure it slowly for several days.
Each step depends on the one before it. A perfectly mixed batch poured over loose, uncompacted soil will crack. A slab with a flawless finish that dries in direct sun and wind will develop surface cracks no matter how careful the finishing was. The order matters as much as the technique.
For a small slab — think a walkway, a landing pad, a trash can pad, or a shed base — you are typically working with a quarter yard to a full yard of concrete. That is small enough to mix by hand in a wheelbarrow or rent a small mixer, and small enough that one or two people can handle the pour. It is also small enough that a single overlooked step is usually the whole difference between a slab that lasts and one that does not.
How Deep Should You Dig for a Small Slab?
Depth is about frost, drainage, and load, not about making the slab itself thicker. A slab that is four inches thick sitting on soft, wet, or frost-heaving soil will move and crack regardless of its thickness.
For a walkway or a light-use pad in a mild climate, a base of about four inches of compacted gravel under a four-inch slab is common practice. In cold climates where the ground freezes, footings or a deeper base below the local frost line are typically needed, and requirements vary widely by region. Local building departments publish frost depth figures for their area, and those figures are the ones to use.
Excavate deeper than the finished slab thickness by the depth of the base material. So a four-inch slab over four inches of gravel means digging down about eight inches, plus a little extra for settling.
Two things are easy to get wrong here:
- Not compacting the base. Dumping gravel and raking it flat is not compaction. It needs to be tamped in lifts, meaning a few inches at a time, until it stops moving underfoot.
- Digging a bowl instead of a flat-bottomed pit. Low spots in the subgrade collect water and create soft points that the slab will eventually settle into.
Why Does the Form Matter More Than the Concrete?
The form is what makes the slab the shape and thickness you actually want. It holds the concrete while it is wet and sets the top edge that you will screed against.
Use straight, rigid lumber — 2x4s are common for a four-inch slab. Set them so the top edge is at the finished height of the slab. Stake them firmly on the outside every couple of feet so they cannot bow outward under the weight of wet concrete, which is heavier than most people expect.
Check the form for level in both directions. If you want water to run off, slope it slightly away from any structure — a gentle slope is enough and should be consistent, not wavy.
Before pouring, tamp the soil or gravel right up against the inside of the form. Gaps under the form let concrete escape and leave a hollow, weak edge.





What Is the Right Water-to-Concrete Ratio?
Water is the single most common place people go wrong, and it is almost always too much water, not too little. Extra water makes concrete easier to move around, and it also weakens the finished slab and increases shrinkage cracking.
Bagged concrete mixes list a target water amount on the package. That amount is the one to follow, and it is usually less than feels right when you are mixing. Add most of the water first, then the dry mix, then only as much additional water as needed to reach a consistency like thick oatmeal — not soup.
If you are mixing your own from cement, sand, and gravel, the standard reference is a mix by volume with a water-to-cement ratio around 0.5 by weight or less for typical flatwork. Unless you have a specific reason to mix from scratch, bagged concrete removes most of the guesswork.
One thing worth knowing: concrete does not need to be soupy to flow into corners. Working it with a shovel or a screed board gets it where it needs to go without adding water.
How Do You Pour, Screed, and Finish a Small Slab?
Pour the concrete in one continuous operation if you can. Cold joints — where one batch sets before the next is placed — are weak points where cracks often start. For a small slab, that means having all your material on site and mixed before you begin.
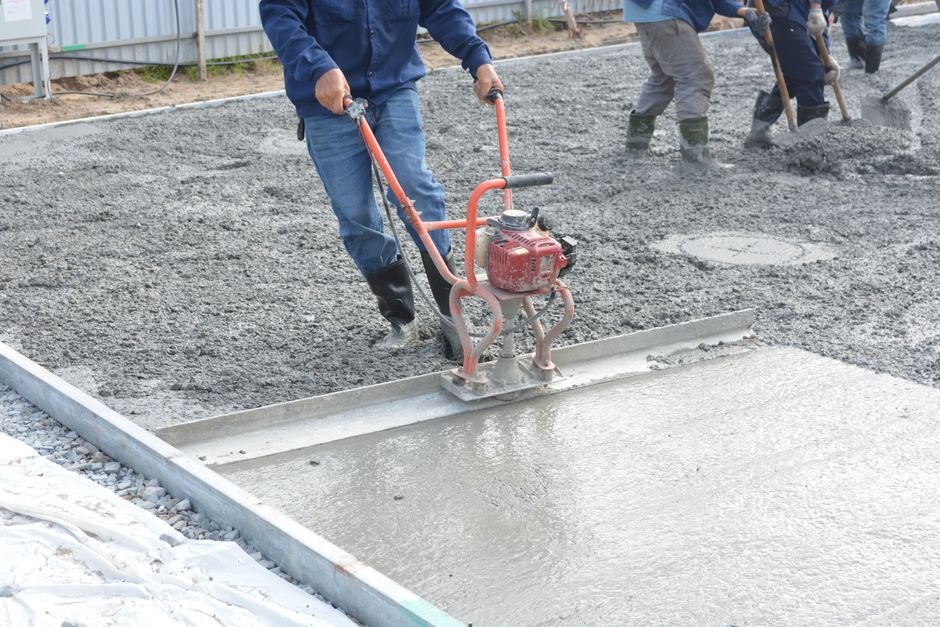
Dump the concrete into the form and roughly spread it with a shovel or hoe. Then screed: drag a straight board across the top of the form in a sawing motion, working from one end to the other. This levels the surface to the form height and pushes excess concrete ahead of the board.
After screeding, let the surface water sheen disappear, then float the surface with a magnesium or wood float. Floating pushes down the aggregate and brings up a smooth layer of paste. Do not overwork the surface — too much troweling brings up too much water and weakens the top layer.
If you want a broom finish for traction, drag a stiff-bristled broom across the surface in one direction once the concrete has firmed enough to hold the grooves. Timing here matters. Too early and the grooves slump closed. Too late and the broom tears the surface.
Why Curing Is the Step Most People Skip
Curing is not drying. It is keeping the concrete moist while the cement continues to react and gain strength. Concrete that dries out too fast never reaches its intended strength, and it cracks more.
Cover the slab with plastic sheeting, or keep it damp with a hose and misting, for several days after the pour. In hot, dry, or windy weather, curing matters more, not less. Direct sun and wind pull moisture out of the surface faster than the concrete can handle.
Do not walk on the slab for at least a day, and keep heavy loads off it for about a week. Full strength development takes considerably longer — concrete continues to gain strength for weeks and months after the pour, though the bulk of it happens in the first several days.
Cut control joints if the slab is more than a few feet in any direction. A control joint is a shallow groove cut into the surface that gives the concrete a planned place to crack instead of a random one. For small slabs, a joint every few feet, or dividing the slab into roughly square sections, is standard practice.
What Causes a Small Slab to Crack?
Most cracks in small slabs come from one of a few causes, and they are all preventable.
- Too much water in the mix. This is the most common cause of shrinkage cracks, which appear as fine lines across the surface.
- A poor or uncompacted base. Soft spots let the slab settle unevenly, and the resulting cracks are usually wider and more structural.
- Missing control joints. Without a planned weak line, the concrete cracks wherever it wants.
- Rapid drying. Pouring in direct sun or wind without curing lets the surface shrink faster than the interior.
- Frost movement. In cold climates, soil that freezes and thaws under the slab pushes it up and down unevenly.
Hairline shrinkage cracks are common and usually cosmetic. Cracks that are wider, that offset vertically, or that appear within days of the pour often point to a base or mix problem. Once a slab has cracked structurally, patching addresses the appearance more than the cause.
When Should You Not DIY a Slab?
Small, flat, lightly loaded slabs are reasonable DIY projects. Others are not.
If the slab will support a structure — a shed with a heavy load, a hot tub, a garage, or anything with a permit requirement — the base preparation, thickness, and reinforcement typically need to meet local code, and inspection may be required. Slabs on slopes, slabs over unstable soil, and slabs in areas with high frost heave are also cases where getting it wrong is expensive to fix.
If you are unsure whether your project needs a permit or engineering, that is a question for your local building department, not a general rule of thumb.
Frequently Asked Questions
How thick should a small concrete slab be?
Four inches is standard for walkways, patios, and light-use pads. Slabs that will carry vehicles or structures usually need to be thicker and may require reinforcement.
How long before you can walk on a new concrete slab?
Light foot traffic is generally fine after about 24 hours. Keep heavy loads off the slab for about a week while it gains strength.
Do you need rebar in a small concrete slab?
Not always. For a small, lightly loaded slab on a well-compacted base, wire mesh or no reinforcement at all is common. Slabs carrying vehicles or structures usually do need reinforcement, and local code often specifies what is required.
Why did my concrete slab crack?
The most common causes are too much water in the mix, an uncompacted base, missing control joints, and letting the slab dry too fast. Hairline cracks are usually cosmetic, while wider or offset cracks often point to a base problem.
