
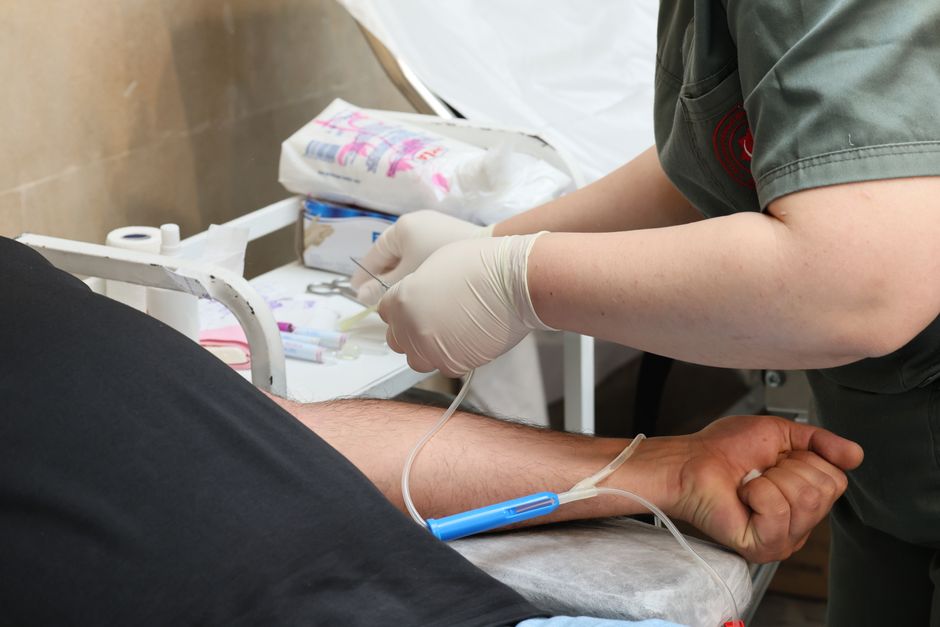
Getting better at IV insertion comes down to three things: choosing the right vein, anchoring it properly, and advancing the catheter only after you see a steady flash of blood. Most failed attempts are not caused by bad luck or small veins. They come from a correctable step — a vein that rolled, an angle that was too steep, or a catheter pushed before the tip was fully inside the vessel. Practicing these steps deliberately, and reviewing what went wrong after each miss, improves success more than simply doing more sticks.
Why Do So Many First IV Attempts Fail?
Most misses happen for predictable reasons. The needle enters the skin but not the vein, the vein moves away from the tip, or the catheter is advanced before it is actually inside the vessel. Each of these has a fix.
Vein depth matters. A vein you can see but cannot feel is often too deep or too fragile to hold a catheter. A vein you can feel as a firm, springy tube under the skin is usually a better target than a visible blue line. This is why experienced clinicians palpate before they look.
Angle is another common problem. A needle that comes in too steep can go straight through the back wall of the vein. A needle that is too shallow may never reach it. The right angle depends on vein depth, but a shallow approach works for most superficial veins on the hand and forearm.
Finally, anchoring. A vein that is not stabilized will roll away from the needle tip. This single step is the most common reason a technically correct stick still misses.
How Do You Choose the Right Vein?
Start with the veins you can feel, not the ones you can see. Palpation tells you more about a vein’s suitability than appearance does.
A good candidate vein feels firm, bouncy, and straight. It refills after you press and release it. It runs in a relatively straight path without branching just under the skin. Veins on the back of the hand and the forearm are common first choices in adults.
Avoid veins that feel hard, cord-like, or that do not refill. These may be scarred from previous sticks or from repeated use. Avoid areas over joints when possible, because the catheter will bend and may stop flowing when the patient moves. Areas with inflammation, bruising, or recent puncture sites are also poor choices.
Some clinical guidance recommends starting distally — lower on the arm or hand — and working proximally if needed. The reasoning is practical: if a lower site fails, you still have clean options above it. If you start high and fail, you have used up your best sites.
One clarification that surprises many people: a tourniquet is not meant to make veins bulge as much as possible. It is meant to slow venous return enough to fill the vein without making it so tense that it becomes harder to puncture. Leaving it on too long can make the vein stiff and more likely to blow. Release it as soon as the catheter is in.
What Techniques Actually Improve First-Stick Success?
Anchoring the vein is the single technique with the clearest practical payoff. Pull the skin taut below the puncture site with your non-dominant hand and hold it there through the entire stick. This stabilizes the vein and keeps it from rolling.
Enter at a shallow angle, bevel up, and watch for the flash. The flash chamber filling with blood tells you the needle tip is inside the vein. At that point, lower the needle almost flat against the skin and advance it a millimeter or two more before you thread the catheter. This extra step ensures the catheter tip, not just the needle tip, is inside the vessel.
Advance the catheter slowly and steadily. If you meet resistance, stop. Resistance usually means the catheter is not fully inside the vein or is pressing against a valve or the vessel wall. Rotating the catheter slightly or withdrawing a touch and re-advancing can help.
Do not probe with the needle once it is under the skin. Redirecting a needle blindly increases the risk of going through the vein wall and causing a hematoma. If you lose the flash, withdraw to just under the skin and reassess before trying again.
- Anchor the skin firmly below the site and do not let go.
- Use a shallow angle and watch for a steady flash.
- Lower the needle nearly flat once you see blood.
- Advance the catheter only after the flash confirms placement.
- Stop and reassess if you meet resistance.
How Do You Handle Difficult Veins?
Difficult veins are common, especially in older adults, people who have had many previous IVs, and patients who are dehydrated. There is no single trick that works for everyone, and the evidence for many popular techniques is limited.
Warmth is one of the better-supported approaches. Applying a warm pack to the area for a few minutes before the attempt can help veins fill. Some clinicians use a hanging arm position or gentle tapping to encourage filling. These are widely used, though the evidence behind each is not strong.
Ultrasound guidance is well established for difficult access. It lets you see vein depth, direction, and whether a vein is suitable before you stick. If you have access to it and your training includes it, it changes the odds considerably. This is a skill that requires specific training, not something to attempt without it.
Be honest about your limits. After a set number of failed attempts, the right move is to ask for help. Repeated sticks damage veins and cause discomfort. Many facilities have a policy on how many attempts one clinician should make before escalating, and following it protects the patient.
What Are the Common Mistakes to Avoid?
The most damaging mistake is advancing the catheter before the needle tip is confirmed inside the vein. This causes the catheter to push against the vessel wall or the skin instead of entering the vessel. It is also the most common cause of a “blown” vein.
Another frequent error is releasing the anchor too early. If you let go of the skin while threading the catheter, the vein can move and the catheter can come out of the vessel.
Using too large a catheter for the vein is a problem too. A catheter that is too big for the vessel can irritate the vein wall and increase the risk of complications. Choose the smallest catheter that meets the clinical need.
Finally, skipping the assessment. Rushing to stick without feeling the vein, checking its path, and planning the angle costs more time than it saves. A few seconds of assessment prevents most failed attempts.
How Do You Build Skill Over Time?
Deliberate practice beats volume alone. After each attempt, note what happened: where the vein was, what angle you used, whether the vein rolled, and where the flash occurred. Over time, these notes build a mental map of what works.
Practice on simulation arms if you have them. They let you work on angle, anchoring, and catheter advancement without the pressure of a real patient. The motor skills transfer, even though real tissue behaves differently.
Watch experienced clinicians and ask them to narrate what they are doing and why. Much of IV insertion skill is judgment — which vein to pick, when to stop, when to call for help — and that judgment is easier to learn when someone explains it out loud.
Get feedback on your technique from someone who can see your hands. Small adjustments to grip, angle, and anchoring are hard to self-correct without an observer.
Frequently Asked Questions
What is the most common reason an IV insertion fails?
The most common cause is failing to anchor the vein, which lets it roll away from the needle. Advancing the catheter before the flash confirms placement is the second most common.
Should you use a tourniquet for every IV attempt?
A tourniquet is standard for most peripheral IV attempts because it helps fill the vein. It should be released as soon as the catheter is in place to avoid prolonged pressure on the vessel.
How many attempts should you make before asking for help?
Many facilities set a limit, often two or three attempts per clinician, before escalating to a colleague. Follow your facility’s policy, and escalate sooner if the veins are clearly difficult.
Does warming the arm help with difficult veins?
Warmth is one of the better-supported methods for helping veins fill before an attempt. Apply a warm pack for a few minutes, but avoid heat on areas with poor sensation or circulation.