
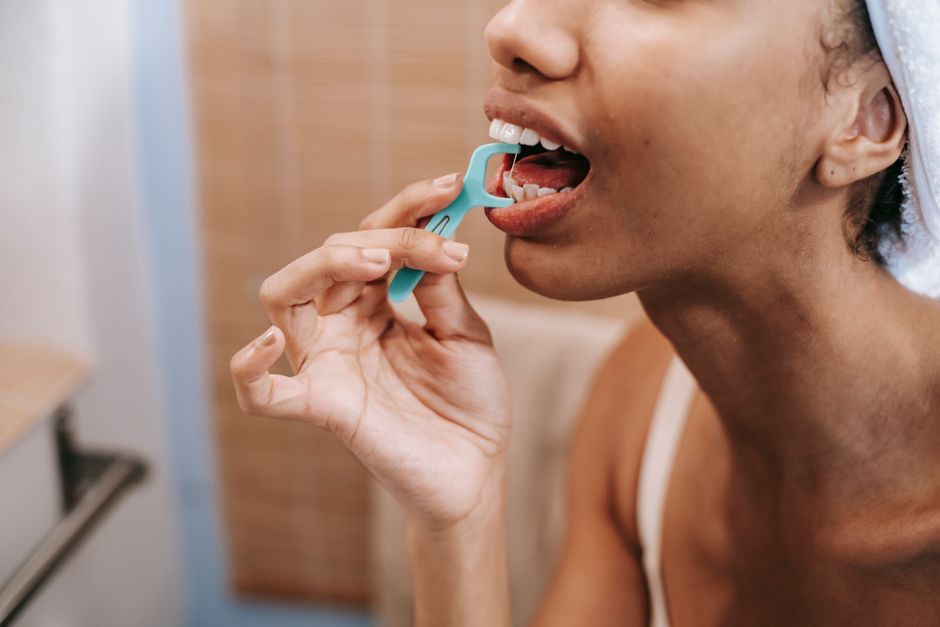
Flossing your back teeth is harder than flossing the front ones, and most people quietly skip them. The molars and premolars at the back of your mouth are where food collects and where cavities and gum disease most often start. The technique that works is to curve the floss into a C-shape around each tooth, slide it just under the gumline, and move it up and down against the side of the tooth. You need about 18 inches of floss, a mirror helps, and if your hands or jaw make it difficult, a floss pick or water flosser can reach the same spots.
Why Are Back Teeth Harder to Floss?
Your back teeth sit at the end of a long, curved row. To reach them, you have to get your fingers past your front teeth and around the corner of your mouth. That is awkward even for people with good hand control.
The bigger problem is what those teeth look like. Molars have deep grooves on their chewing surfaces and tight contact points where they touch the neighboring tooth. Food and plaque collect in both places. The American Dental Association notes that plaque that stays on teeth can harden into tartar, and once that happens, a toothbrush and floss can no longer remove it.
There is also a saliva factor. The parotid glands, which sit near your back upper molars, release saliva through small ducts right next to those teeth. Saliva helps neutralize acid, but it also carries minerals and proteins that contribute to plaque buildup in that area. This is one reason the upper back molars tend to accumulate more deposits than teeth closer to the front.
None of this means back teeth are doomed. It means they need deliberate attention rather than a quick pass.
How To Floss Back Teeth Technique Step by Step
The mechanics of flossing do not change at the back of your mouth. What changes is how you position your hands and how much patience you give each tooth.
- Break off about 18 inches of floss. Wind most of it around your middle fingers, leaving a short working section between them.
- Pinch the floss between your thumbs and index fingers. This gives you control over a section roughly one to two inches long.
- Slide the floss between two teeth using a gentle back-and-forth sawing motion. Do not snap it down onto the gum.
- When the floss reaches the gumline, curve it into a C-shape against one tooth.
- Slide the floss gently into the space between the tooth and the gum, just until you feel slight resistance. Do not force it deeper.
- Hold the C-shape and move the floss up and down against the side of the tooth several times.
- Lift the floss out, then curve it against the other tooth in the same gap and repeat.
- Unwind a fresh section of floss as you move to each new gap so you are not moving plaque from one tooth to another.
For the very back teeth, there is one extra step. You also need to floss the back surface of the last molar — the side facing your throat, where there is no neighboring tooth. Curve the floss around that surface and wipe from gum to crown.
Getting your fingers to the back is the part people struggle with. Many find it easier to start at one end of the mouth and work systematically rather than jumping around. Others find it easier to close their mouth partway so their cheek relaxes and their fingers can reach further back.
What Tools Actually Help You Reach Back Teeth?
String floss works, but it is not the only option. Several tools make the back of the mouth more accessible, and the best one is the one you will actually use consistently.
Floss picks hold a short strand of floss on a plastic handle. They are easier to maneuver to the back teeth because your whole hand stays outside your mouth. A limitation: the same strand is used across multiple teeth, which can move bacteria from one spot to another. Some picks have a small brush or a different floss texture on the other end.
Interdental brushes look like tiny bottle brushes. They clean between teeth and, for people with spaces between their teeth or exposed roots from gum recession, some clinicians consider them more effective than string floss at removing plaque from those gaps. They are not a substitute for flossing tight contact points where a brush cannot fit.
Water flossers shoot a stream of water between teeth and along the gumline. They are helpful for people with braces, bridges, or implants, and for anyone who finds string floss difficult. The evidence on whether they remove plaque as well as string floss is mixed — some studies suggest they reduce gingivitis, but results vary depending on the device and how it is used.
Floss threaders are thin loops that help you pass floss under bridges, braces, and fixed retainers. They are not needed for routine back-tooth flossing.
| Tool | Best for | Main limitation |
|---|---|---|
| String floss | Tight contacts between teeth | Hard to reach back molars |
| Floss picks | Quick access to back teeth | Reuses the same strand across teeth |
| Interdental brushes | Gaps and exposed roots | Will not fit tight contacts |
| Water flosser | Braces, bridges, implants | Mixed evidence on plaque removal vs. floss |





How Often Should You Floss, and Does It Matter If You Skip Back Teeth?
Dentists generally recommend flossing once a day. The order does not matter much — before or after brushing both work, though some evidence suggests flossing first may help fluoride from toothpaste reach between teeth more effectively.
What matters more is consistency and coverage. Flossing the front teeth and skipping the back ones leaves the highest-risk areas untouched. The back molars are where decay often starts because they are the hardest to see and the easiest to neglect.
Gum disease follows the same pattern. Gingivitis — the early, reversible stage — often shows up first around the back teeth, where plaque has sat longest. If it progresses to periodontitis, the damage to the bone and tissue that hold teeth in place is not reversible. This is why the back teeth are worth the extra effort.
If you wear braces, a fixed retainer, or a bridge, your flossing routine needs to include the back teeth every time. These appliances trap food and make plaque harder to remove, so skipping them raises your risk more than it would for someone without them.
What If Flossing Back Teeth Hurts or Bleeds?
Bleeding when you floss is common, especially if you have not been flossing regularly. It usually means the gums are inflamed from plaque that has been sitting there. With daily flossing, bleeding often decreases within a week or two.
That said, bleeding that continues despite consistent flossing, or bleeding that gets worse, is worth mentioning to a dentist. It can be a sign of gum disease that needs professional treatment.
Pain is different from bleeding. If flossing causes sharp pain, you may be pressing too hard, or you may have a cavity, a cracked tooth, or a sensitive area where the gum has receded. Do not floss harder to push through pain. Ease up, and if the pain persists, have it checked.
If your gums feel tender after flossing, try a softer touch. The floss should slide into the gumline, not jam into it. Some soreness in the first week or two of a new flossing habit is normal; ongoing pain is not.
Common Mistakes That Leave Back Teeth Unclean
Most flossing problems come down to a few habits.
- Snapping the floss down onto the gum instead of sliding it gently. This can cut or bruise the gum tissue.
- Using the same section of floss for the whole mouth, which moves bacteria from one tooth to another.
- Stopping at the contact point and never curving the floss against the tooth surface. The floss needs to hug the side of the tooth to remove plaque.
- Skipping the back surface of the last molar because it feels awkward to reach.
- Rushing. Covering all the back teeth properly takes longer than a quick pass, and rushing is how spots get missed.
One thing worth knowing: flossing is not a substitute for brushing, and brushing is not a substitute for flossing. They clean different surfaces. Toothbrush bristles cannot get between teeth, and floss cannot scrub the broad chewing surfaces where most cavities form. You need both.
When Should You Ask a Dentist for Help?
If you have tried different tools and still cannot reach your back teeth, tell your dentist or dental hygienist. They can show you a technique that fits your mouth, and they can check whether the areas you are missing have any early problems.
Professional cleanings remove tartar that has built up in spots you cannot reach. How often you need them depends on your gum health, your risk factors, and what your dentist recommends — there is no single schedule that fits everyone.
If you have not been flossing your back teeth and it has been a while since your last cleaning, that is a reasonable time to book one. Early gum disease and small cavities are far easier to address than advanced ones.
Frequently Asked Questions
How do you floss your back teeth without gagging?
Try closing your mouth partway so your tongue relaxes and your fingers can reach further back, and breathe through your nose. If gagging continues, a floss pick or water flosser keeps your hand out of your mouth entirely.
Is it better to use a floss pick or string floss for back teeth?
Both can clean back teeth effectively if used correctly. Floss picks are easier to reach back molars, but string floss lets you use a fresh section for each tooth, which reduces the chance of spreading bacteria.
Can a water flosser replace string floss for back teeth?
The evidence is mixed. Water flossers can help reduce gingivitis and are useful for braces and implants, but studies have not consistently shown they remove plaque between tight teeth as well as string floss.
Why do my back teeth bleed when I floss?
Bleeding usually means the gums are inflamed from plaque buildup, and it often improves within a week or two of daily flossing. If bleeding continues or worsens despite consistent flossing, see a dentist to rule out gum disease.
