
Making wine at home starts with a simple biological fact: yeast eats sugar and turns it into alcohol and carbon dioxide. Grape juice already contains the sugar and, on the skins of fresh grapes, the yeast. To ferment grape juice into wine, you add yeast to juice in a clean container fitted with an airlock, keep it in a dark spot between roughly 60°F and 75°F, and let it sit for one to two weeks for primary fermentation. After that, you move the wine off the settled yeast and let it clear for a few more weeks.
That is the short version. The longer version involves a handful of decisions that separate wine that tastes clean from wine that tastes like vinegar or nail polish remover. None of them require special talent. They do require patience and basic sanitation.
What Equipment Do You Need to Ferment Grape Juice at Home?
You need a food-grade fermentation vessel, an airlock, a siphon, and a way to sanitize everything that touches the juice. A one-gallon glass jug works well for small batches. Larger batches call for a food-grade plastic bucket or carboy.
The airlock matters more than people think. It lets carbon dioxide escape while keeping oxygen out. Oxygen during fermentation causes oxidation, which flattens flavor and can encourage spoilage organisms. A rubber stopper with a drilled hole holds the airlock in the jug.
Sanitation is the single most important habit. Wild microbes and bacteria are everywhere, and a dirty vessel gives them a head start. Use a dedicated no-rinse sanitizer made for brewing, or a diluted sulfite solution. Dish soap alone is not enough, and residue from it can harm yeast.
- A one-gallon glass jug or food-grade bucket with a lid
- An airlock and drilled rubber stopper
- A siphon or racking cane with tubing
- A hydrometer to measure sugar content (optional but useful)
- Sanitizer, a long spoon, and clean bottles with corks or caps
A hydrometer is worth mentioning. It measures the density of the juice, which tells you how much sugar is present. By comparing the reading before and after fermentation, you can estimate alcohol content. It is not required, but it removes guesswork.
Should You Use Fresh Grapes, Concentrate, or Store-Bought Juice?
All three can work, but they behave differently. Fresh grapes give you the most complexity because the skins carry color, tannin, and wild yeast. Juice concentrate is the most predictable and the easiest for beginners. Store-bought juice is convenient but has a catch.
Most commercial grape juice is pasteurized and preserved with additives. Some contain potassium sorbate or sodium benzoate, which are preservatives designed to stop yeast from growing. If your juice contains either, fermentation may stall or never start. Check the label and choose 100% juice with no preservatives. Ascorbic acid is fine. Sorbate and benzoate are not.
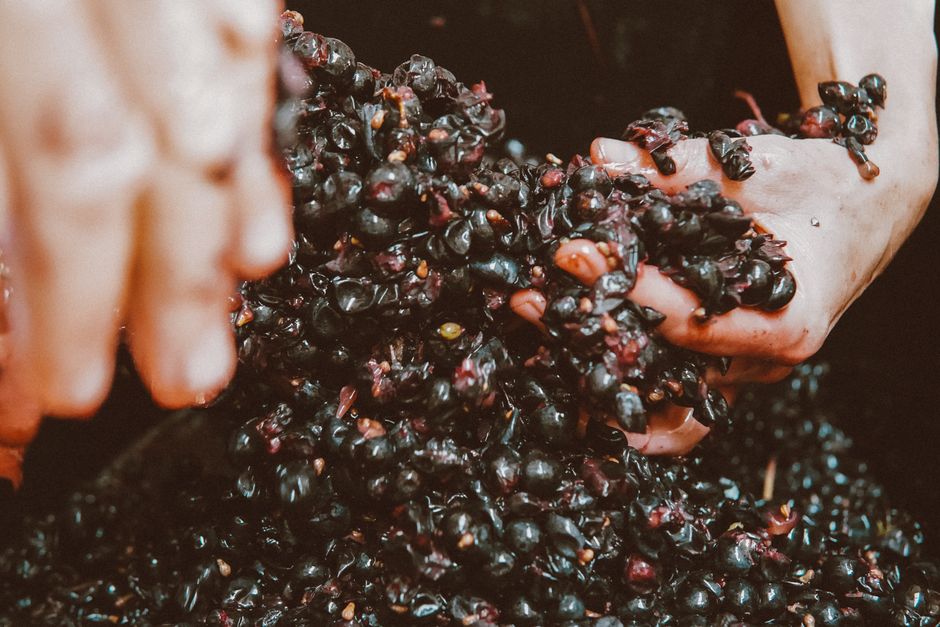
If you use fresh grapes, you are technically making wine from fruit rather than juice. You crush the grapes, keep the skins in contact with the juice during early fermentation to extract color and tannin, then press and continue. White wine is made by separating juice from skins right away. Red wine keeps them together longer.
One clarification that surprises many home winemakers: the white powdery coating on grape skins is natural wild yeast, and it can ferment juice on its own. That process is called spontaneous fermentation. It is how wine was made for thousands of years. The tradeoff is unpredictability. Wild yeast may produce pleasant flavors or off-flavors, and it ferments more slowly. For a first batch, adding a commercial wine yeast gives you far more control.
How Do You Actually Start the Fermentation?
Start by sanitizing everything, then prepare the juice and pitch the yeast. Pour your juice into the sanitized vessel, leaving some headspace. Yeast produces foam during active fermentation, and a full jug will overflow.
If you are using a commercial wine yeast, follow the packet instructions. Yeast needs to rehydrate properly to work well. Some winemakers sprinkle dry yeast directly on the juice; others rehydrate it in warm water first. Both approaches are used in practice, and rehydration generally gives a healthier start.
Temperature is where beginners often go wrong. Most wine yeasts work best in a range that roughly spans the mid-60s to mid-70s Fahrenheit. Too cool and fermentation slows or stalls. Too warm and the yeast produces more of the compounds behind harsh, solvent-like flavors. Keep the vessel away from direct sun and drafts.
Fit the airlock and fill it with sanitizer or clean water. Within a day or two you should see bubbles moving through the airlock and foam on the surface. That is carbon dioxide leaving. If nothing happens after three days, something is wrong: the yeast may be dead, the juice may contain preservatives, or the temperature may be too cold.
How Long Does Fermentation Take and When Is It Done?
Primary fermentation usually takes one to two weeks, but the exact time depends on temperature, yeast, and sugar level. The reliable signal is not the calendar. It is the bubbling.
When the airlock slows to a bubble every minute or two, primary fermentation is close to finished. At that point, most of the sugar has been converted. A hydrometer reading confirms it: when the density stops dropping over a couple of days, fermentation is complete.
Then comes racking. Racking means siphoning the wine off the layer of dead yeast and sediment at the bottom, called the lees, into a clean sanitized vessel. Leaving wine on the lees too long can produce off-flavors, though short contact is generally fine. After racking, the wine goes through a quieter secondary phase where it clears and flavors settle. This typically takes a few weeks to a couple of months.
You may rack again if more sediment forms. Patience here pays off. Wine that is rushed into bottles stays cloudy and can throw sediment later.
What Can Go Wrong During Home Winemaking?
Most problems trace back to three causes: contamination, oxygen exposure, and temperature. Recognizing them early saves a batch.
Vinegar smell usually means acetobacter, a bacteria that converts alcohol into acetic acid when oxygen is present. It thrives when the airlock runs dry or the vessel is left open. A small whiff early on may fade; a strong vinegar character generally does not.
Smells like nail polish remover or solvent point to excess ethyl acetate or higher alcohols, often linked to warm fermentation temperatures or stressed yeast. Sulfur or rotten-egg smells can come from yeast stress or insufficient nutrients. These are harder to fix after the fact.
Cloudiness that never clears can come from pectin, starch, or yeast that will not settle. Time and cool temperatures help. Some winemakers use clarifying agents, though these are not always necessary.
A stuck fermentation, where bubbling stops before the sugar is gone, is usually caused by temperature swings, nutrient shortages, or preservatives in the juice. It can sometimes be restarted by warming the wine and adding fresh yeast, but success is not guaranteed.
Is Home Winemaking Safe and Legal?
Home fermentation is generally safe when basic sanitation is followed, but it is not risk-free. The main safety concern with any home-fermented beverage is methanol. It is worth being precise here, because misinformation is common.
Methanol is a natural byproduct of fermentation, but in grape wine it forms only in very small amounts. Serious methanol poisoning is associated with distilled spirits made improperly, not with fermented grape juice. The greater practical risks in home winemaking are spoilage organisms and, for anyone drinking the result, the alcohol itself.
Legality varies by country and, in the US, by state. Federal rules allow limited home production of wine for personal use without a license, but state laws differ, and some states restrict quantity or require registration. Check your local rules before you start.
If you are pregnant, breastfeeding, or taking medications that interact with alcohol, the established guidance is to avoid alcohol entirely. Home-fermented wine is still alcohol and carries the same considerations.
How Should You Bottle and Store Homemade Wine?
Bottle only when the wine is clear and fermentation has fully stopped. Bottling too early traps residual sugar and active yeast, which can restart fermentation in the bottle and cause bottles to burst or corks to pop.
Sanitize bottles and siphon the wine carefully, leaving sediment behind. Fill bottles nearly to the top to limit oxygen, then seal with corks or caps. Store them upright for a few days, then lay corked bottles on their sides if you are aging them.
Cool, dark, stable temperatures are best. Most simple home wines are ready to drink within a few months, and some improve with a little aging. Homemade wine without added sulfites tends to have a shorter shelf life than commercial wine, so plan to drink it within a reasonable window rather than cellaring it for years.
Frequently Asked Questions
Can you ferment grape juice into wine without adding yeast?
Yes, if the juice comes from fresh grapes with their natural wild yeast intact, spontaneous fermentation can occur. Results are less predictable than with commercial wine yeast, so many beginners add yeast for control.
How long does it take to make wine from grape juice?
Primary fermentation typically takes one to two weeks, and clearing takes a few weeks to a couple of months. Most simple home wines are ready to bottle within roughly one to three months.
Why is my grape juice not fermenting?
The most common causes are preservatives like potassium sorbate or sodium benzoate in the juice, yeast that was not viable, or temperatures that are too cold. Check the label and confirm the temperature is in the yeast’s working range.
Do you need special equipment to make wine at home?
You need a food-grade vessel, an airlock, a siphon, and sanitizer at minimum. A hydrometer is optional but helps you track sugar and estimate alcohol content.