
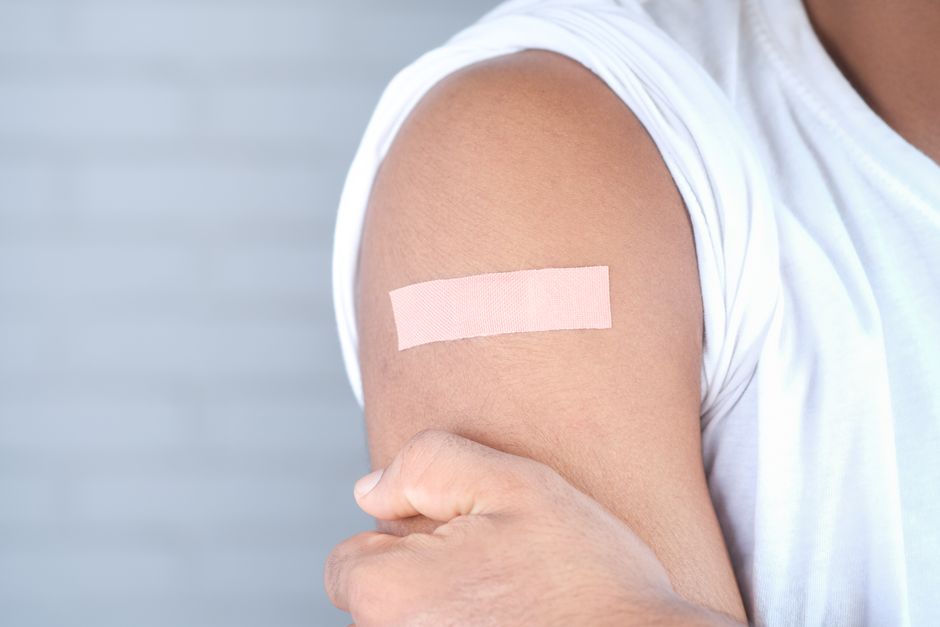
Steri-Strips are thin adhesive strips used to hold the edges of a small, shallow wound together while it heals. To apply them, clean and dry the wound and surrounding skin, bring the wound edges together, lay the strips across the cut with a small gap between each one, and leave them in place until they loosen on their own. They work best on straight, low-tension cuts that are not bleeding heavily and do not need stitches. Used correctly, they can support healing and reduce scarring; used on the wrong wound, they can trap bacteria or hide an injury that needs medical care.
What Are Steri-Strips and How Do They Work?
Steri-Strips are narrow strips of adhesive tape, usually made of a porous, non-woven material, reinforced with thin fibers running along the length of the strip. That reinforcement is why they resist stretching when you pull them tight. The adhesive is designed to hold to dry skin for several days.
Their job is mechanical, not chemical. By pulling the two sides of a wound together and holding them there, they reduce the gap the body has to fill in with new tissue. Less gap generally means less scar tissue. They do not disinfect, they do not stop bleeding inside the wound, and they do not kill bacteria. They are a closure device, nothing more.
This matters for expectations. A Steri-Strip does not heal a wound. It creates the conditions for your body to heal it. If the wound is contaminated, too deep, or under tension, the strip cannot fix those problems.
When Should You Use Steri-Strips Instead of Stitches?
Steri-Strips are appropriate for small wounds that are clean, shallow, and under little tension. The classic example is a straight kitchen-knife cut on a finger or a minor laceration on the forearm.
Stitches or medical glue are generally better when:
- The wound is deep enough that you can see fat, muscle, or bone.
- The edges do not come together easily on their own.
- The cut is longer than about half an inch to an inch, or gapes open.
- It is on a joint, the face, the hands, or over a bony area where the skin is pulled tight.
- It is bleeding steadily and does not stop with a few minutes of firm pressure.
- It is a puncture wound, a bite, or anything dirty or contaminated.
- The wound is more than a few hours old.
On the face, even small cuts can leave visible scars, and a clinician may prefer fine sutures for a better cosmetic result. On the hands, constant movement works against the strips. When in doubt, get it looked at. A doctor can close a wound properly and check for nerve or tendon damage that you cannot see from the outside.
One point people often miss: Steri-Strips are not a substitute for wound cleaning. A wound that needs cleaning needs cleaning first, whether or not strips go on afterward.
How To Apply Steri Strips And Care For Them Step by Step
If the wound qualifies, here is the process.
1. Stop the bleeding. Press firmly on the wound with a clean cloth or gauze for several minutes without lifting to peek. If bleeding does not stop after about ten minutes of steady pressure, seek medical care.
2. Wash your hands. Clean hands reduce the chance of introducing bacteria.
3. Clean the wound. Rinse it under clean running water. Gently wash the skin around it with mild soap. Avoid getting soap deep inside the wound. Do not use hydrogen peroxide or alcohol on the wound itself — both can damage healthy tissue and slow healing.
4. Dry the skin thoroughly. Steri-Strips do not stick to wet skin. Pat the area dry, then let it air dry for a moment. Dry skin is the single biggest factor in whether the strips stay on.
5. Bring the wound edges together. Use your fingers or clean tweezers to line up the two sides of the cut so the skin sits flat.
6. Apply the strips. Place the first strip across the middle of the wound, perpendicular to the cut. Press down firmly on both sides. Then add strips on either side, leaving a small gap — roughly the width of a strip — between each one. That gap lets fluid escape and air reach the wound. Do not apply them in a solid row.
7. Check the fit. The edges should meet neatly with no overlap of skin. If the skin puckers or rolls under, remove the strip and try again.
8. Cover if needed. A light bandage over the top can protect the strips from dirt and friction, but it is not always necessary.
Caring for the strips afterward
Keep the area as dry as you reasonably can. Brief contact with water is usually fine, but prolonged soaking softens the adhesive and the strips lift off. If you need to shower, a waterproof cover can help.
Leave the strips in place until they start to peel up on their own. That is usually several days. Do not rip them off while they are still firmly attached — you can reopen the wound. When they loosen, peel them off gently, ideally after a shower when the adhesive has softened. If you want to remove them sooner, rubbing a little petroleum jelly along the edges can help them release.
Watch for signs of infection: increasing redness, warmth, swelling, pus, or a wound that starts hurting more rather than less. Fever or red streaks spreading from the wound are reasons to seek care promptly. If the wound reopens after the strips come off, or if the edges were never well aligned, see a clinician.




What Can Go Wrong With Steri-Strips?
Most problems come from using them on the wrong wound or applying them incorrectly.
Sealing bacteria inside is the main risk. If a wound is contaminated and you close it tight, you can trap organisms that would otherwise drain out. That is why animal bites, puncture wounds, and wounds exposed to dirt or saliva generally should not be closed with strips at home.
Poor adhesion is common. Ointments, moisture, hair, and skin oils all interfere with the adhesive. If the strips keep falling off, the wound may need a different closure method.
Skin irritation from the adhesive is possible, particularly in people with sensitive skin. It usually shows up as redness or itching at the strip edges and typically clears after removal.
Wound dehiscence — the wound splitting back open — can happen if the strips are removed too early or if the wound is under tension. This is more likely on joints and areas of high movement.
Do Steri-Strips Reduce Scarring?
Keeping wound edges closely aligned during healing is associated with less noticeable scarring. This is a general principle in wound care, not something unique to Steri-Strips. Any method that holds the edges together neatly — sutures, glue, or strips — supports the same goal.
Whether Steri-Strips outperform other closure methods for scarring specifically is not clearly established. The evidence here is limited. What matters most is how well the edges are aligned and whether the wound heals without infection. Once a scar forms, scar creams and silicone sheets are the more common tools, though results vary from person to person.
Sun exposure during the first months of healing can darken a scar. Protecting the area from direct sun is a reasonable step.
Frequently Asked Questions
How long should Steri-Strips stay on?
Leave them on until they loosen and peel up on their own, which is usually several days. Removing them early can cause the wound to reopen.
Can I shower with Steri-Strips on?
Brief contact with water is generally fine, but avoid soaking the area because moisture weakens the adhesive. A waterproof cover can help during longer showers.
Can I put Steri-Strips on a cut that is still bleeding?
No — stop the bleeding with firm pressure first. If bleeding does not stop after about ten minutes of steady pressure, seek medical care.
What happens if I leave Steri-Strips on too long?
They usually fall off on their own before that becomes an issue, but leaving them on longer than needed can irritate the skin. Once the wound is closed and the strips are loose, remove them gently.
